DIY Gold Leaf & Colorful Staircase Makeover
Comin at ya with a seriously extra DIY. This staircase makeover sucked up my life for 5 straight days but it was SO worth it in the end. (Even if I cussed at the stairs and myself for coming up with such a hair brained idea about a zillion times while working on this)
Gold Leaf Staircase Makeover
Who has basic carpet grade stairs?! 🙋♀️ The carpet that was here was old and dirty and just plain ugly. But I waited years to rip it up since the upstairs floor is the same stuff. In order to upgrade it to a hardwood we would need to replace most of the staircase, plus address the upstairs flooring. That is a big project we just aren’t ready to undertake yet.
You can see the stairs below in the background, with that awful carpet before I ripped it out.
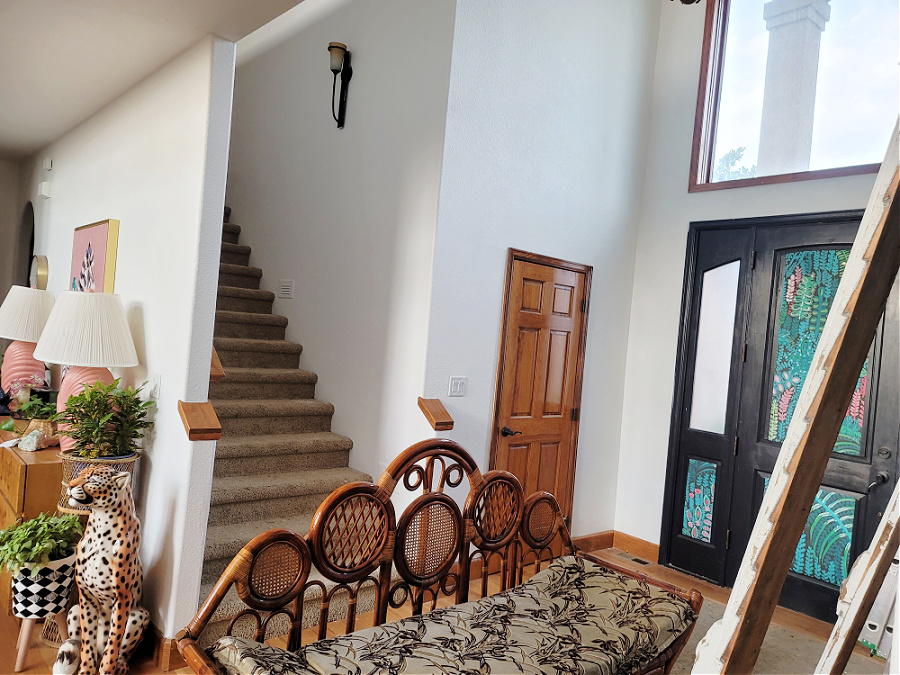
We have been working on painting things white to freshen everything up and I got so sick of the carpet I just decided on a whim to rip it out. Thus I came up with a crazy idea to do a painted solution that would make them beautiful to look at in the interim, which is actually indefinite.
Here’s what I used to do this project:
Wood filler or spackle and spackle knife
Pencil
Measuring tape
Large T square
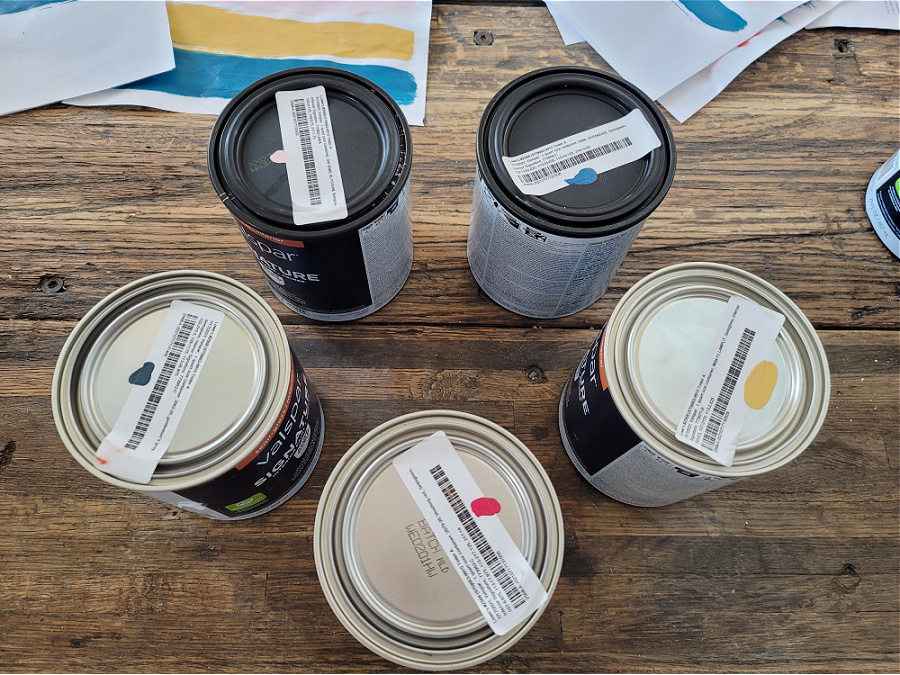
1 quart: semi gloss (or porch/patio paint!) in Gentleman’s Gray by Benjamin Moore
1 quart: semi gloss (or porch/patio) in Oceanside by Sherwin Williams
1 quart: semi gloss (or porch/patio) in Blushing Red by BM
1 quart: semi gloss (or porch/patio) in Alyssum by SW
1 quart: semi gloss (porch/patio) in an Orange or Coral (mine is custom mixed, see more below)
4 orders of 100 sheet gold leaf
Speedball Mona Lisa Gold leaf adhesive 32 oz
Small paint tray and small roller
5 -10 Cans of Rustoleum Crystal Clear Enamel Spray
Step 1:
Clean your stairs thoroughly by making sure all staples, nails, etc has been removed. Several of the nails had taken out chunks from the treads and risers when we removed them. I didn’t want to have a bunch of holes showing through my finish so I took some spackle (I had a big bucket on hand but you can use wood filler too!) and filled those.
If you don’t have the holes issue when you remove the tacks and nails you can skip this step.

This didn’t take long and I wasn’t too worried about it being perfectly smooth since the stairs have texture on them anyway.
Step 2:
Decide how many stripes you want and the width of each. Our stairs are extra wide at 48 1/2″ wide. I opted to stick with a standard runner size at 30″ total width for the 5 stripes. I started with a wider stripe on the left, 2 small stripes, then a wider stripe and 1 medium on the end.
After marking the stripes out on the bottom step using a tape measure we took a large T square and lined it up with each mark to make a line on the step above. Repeat marking with a pencil all the way up. We did this with every stripe.
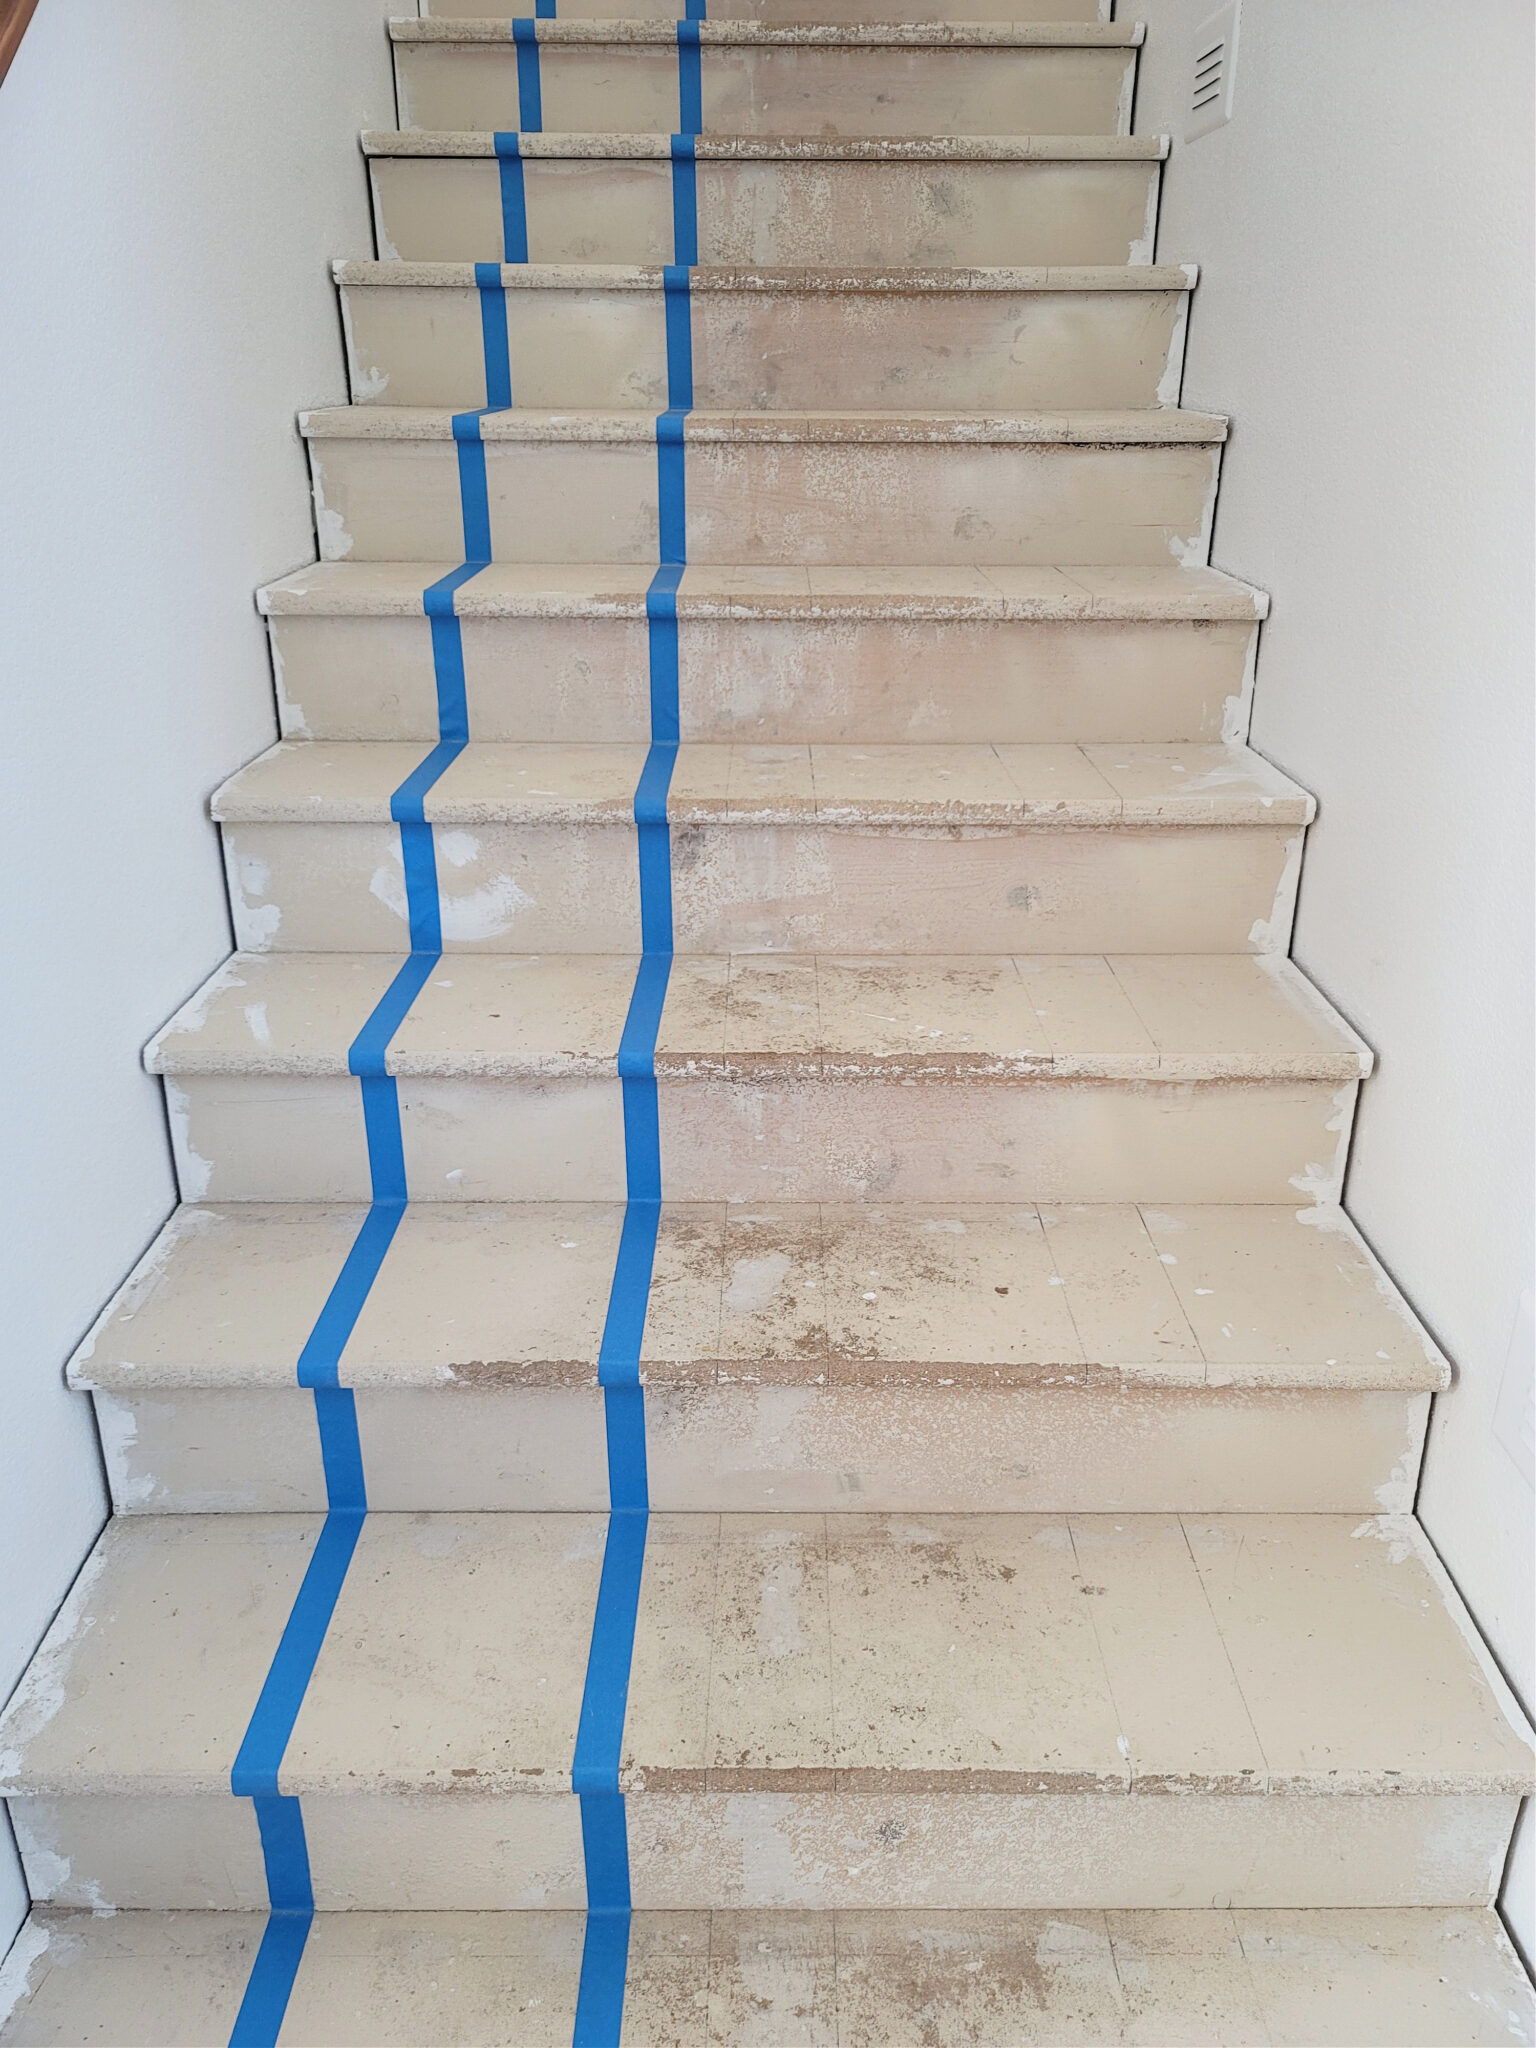
You can just see the pencil lines marking the stripe outlines.
Step 3:
Run your painters tape on the outside edge of every other stripe. I used the tape linked above but I did have some bleed through. This is due to the existing texture on the stairs but if you have a tape you prefer from another brand feel free to use that.

I’ve got my far left stripe painted and ready to do the next 2.
Step 4:
Bust out your paints and start painting stripes!
My husband picked up semi gloss paint which was ok for me as I was planning on sealing it anyway. If you don’t want to seal the painted treads use a porch and patio paint. I used porch/patio paint on our rainbow stairs and a year later it’s holding up fabulously.
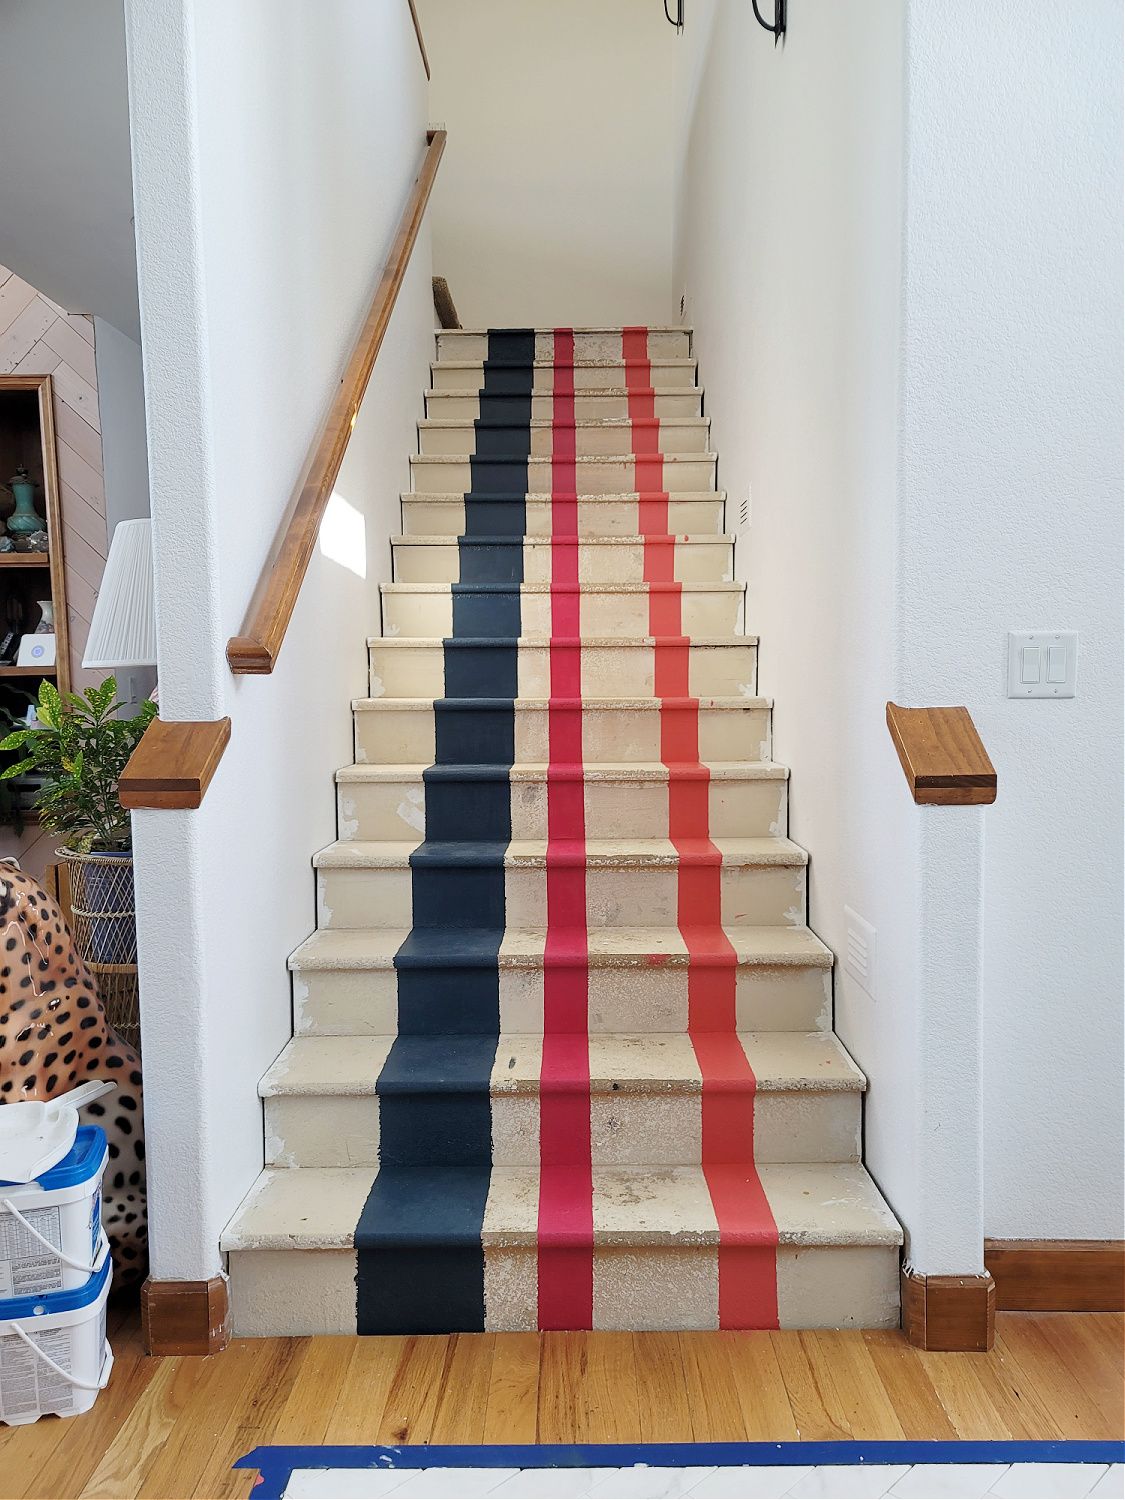
Here we are after I finished those other 2 stripes. You can see the bleed through on the edges.
Repeat Step 4:
Do the same thing for the rest of your stripes.
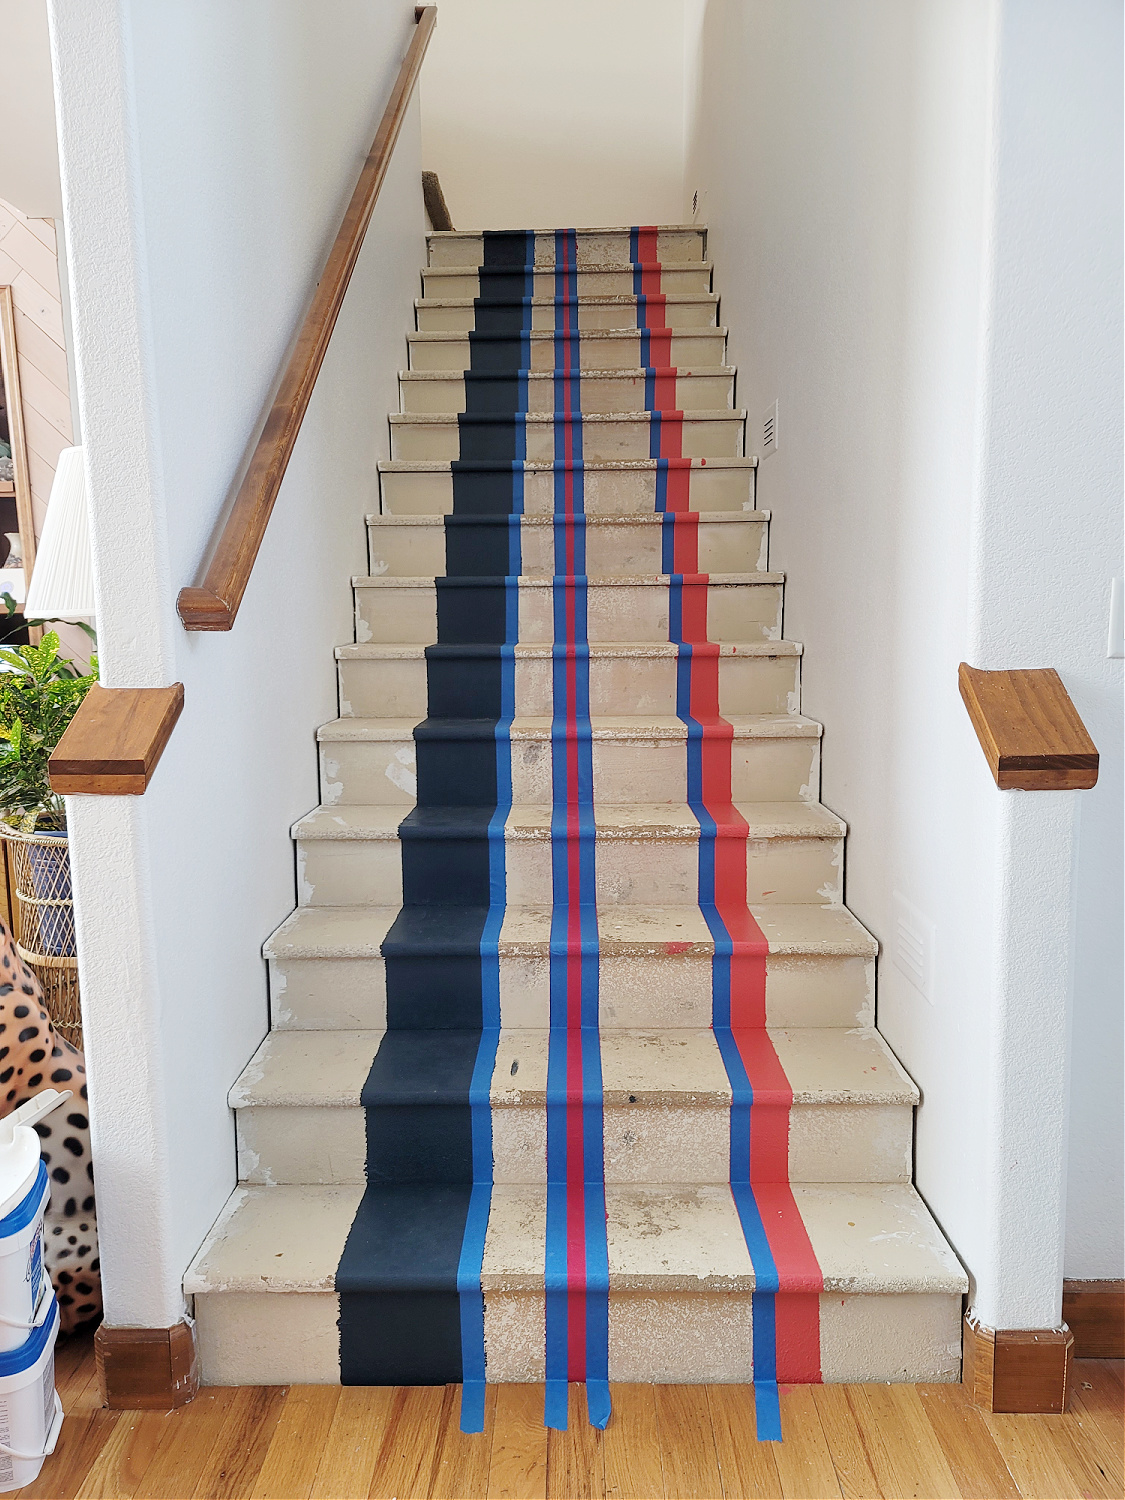 I let the paint dry overnight and came back the next morning to do the last 2.
After I finished the last stripes, I went back with a brush. I hand painted each edge of the inner stripes, so as to clean up the bleed through as much as possible. Then let dry so I could safely walk on it.
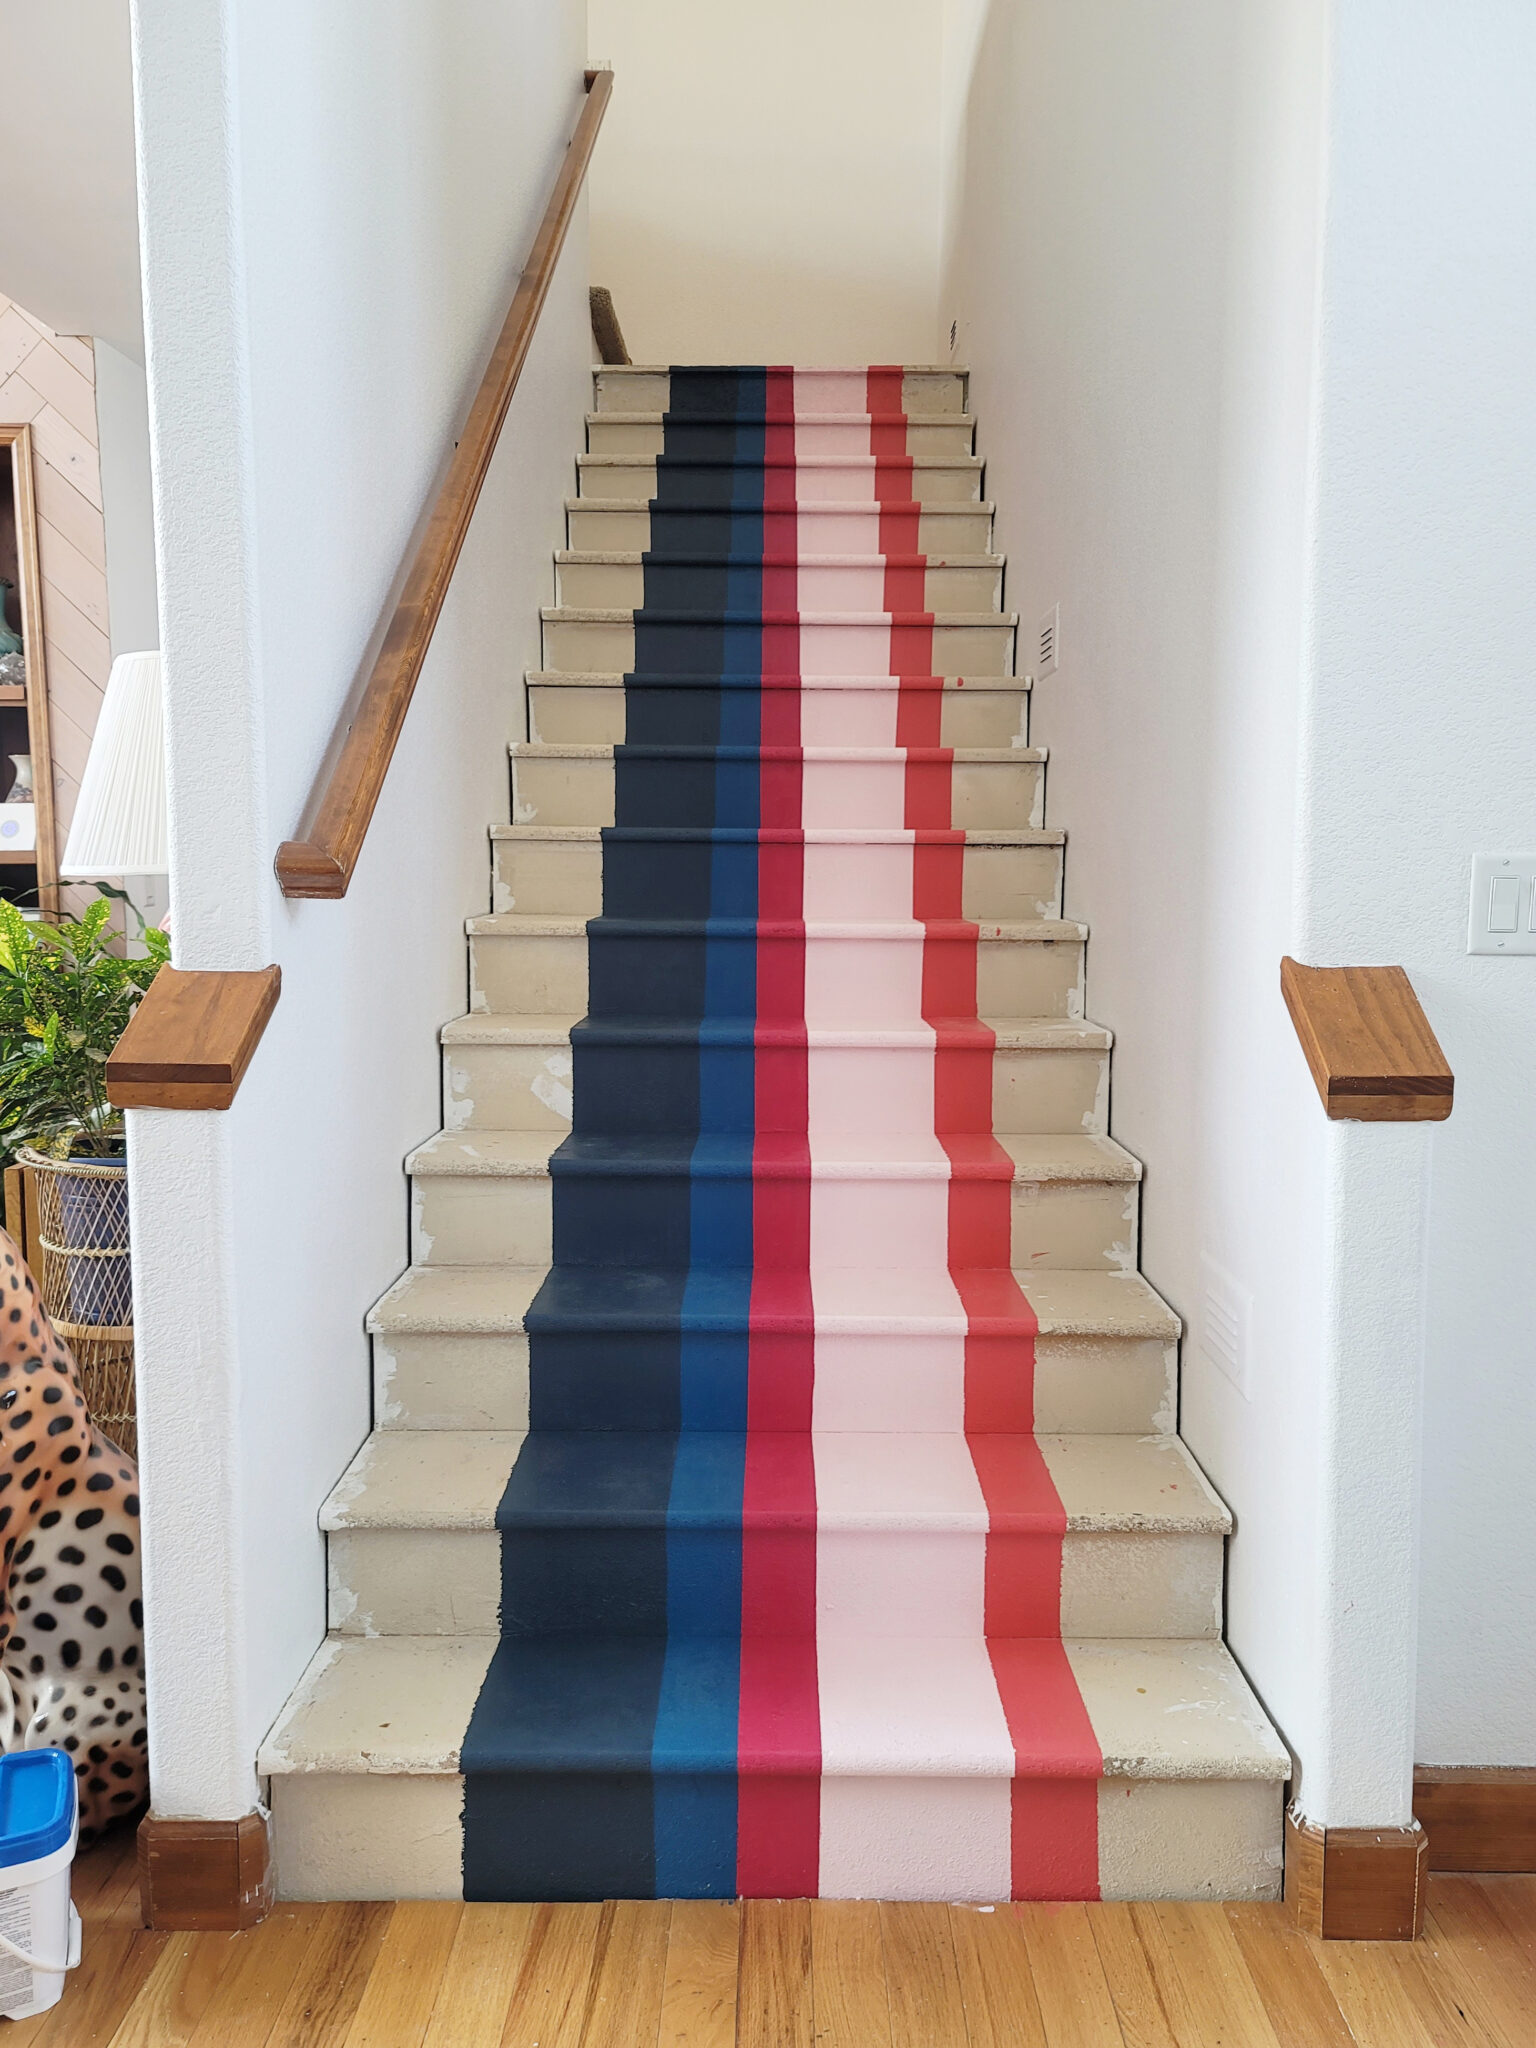
Colors from left to right: Gentleman’s Gray, Oceanside, Blushing Red, Alyssum and Orange/Coral (same color I used in the laundry room)
I didn’t worry about the outer edge as I was going to cover it anyway.
Step 5:
Time to gold leaf. Shake or mix adhesive and pour into small paint tray. Using a small roller (and small brush from the set) begin rolling on the adhesive from the stripe to the wall. Taking care to use the small brush to apply adhesive to the edges and nooks and crannies.
This adhesive needs to sit for a bit before it’s tacky enough to apply the gold leaf. If you apply it too soon before the glue is sticky the gold leaf will just smear around and tear. I decided to start applying the adhesive to several steps at once so that by the time I had moved my way to the next one it would be ready for the gold leaf sheets.
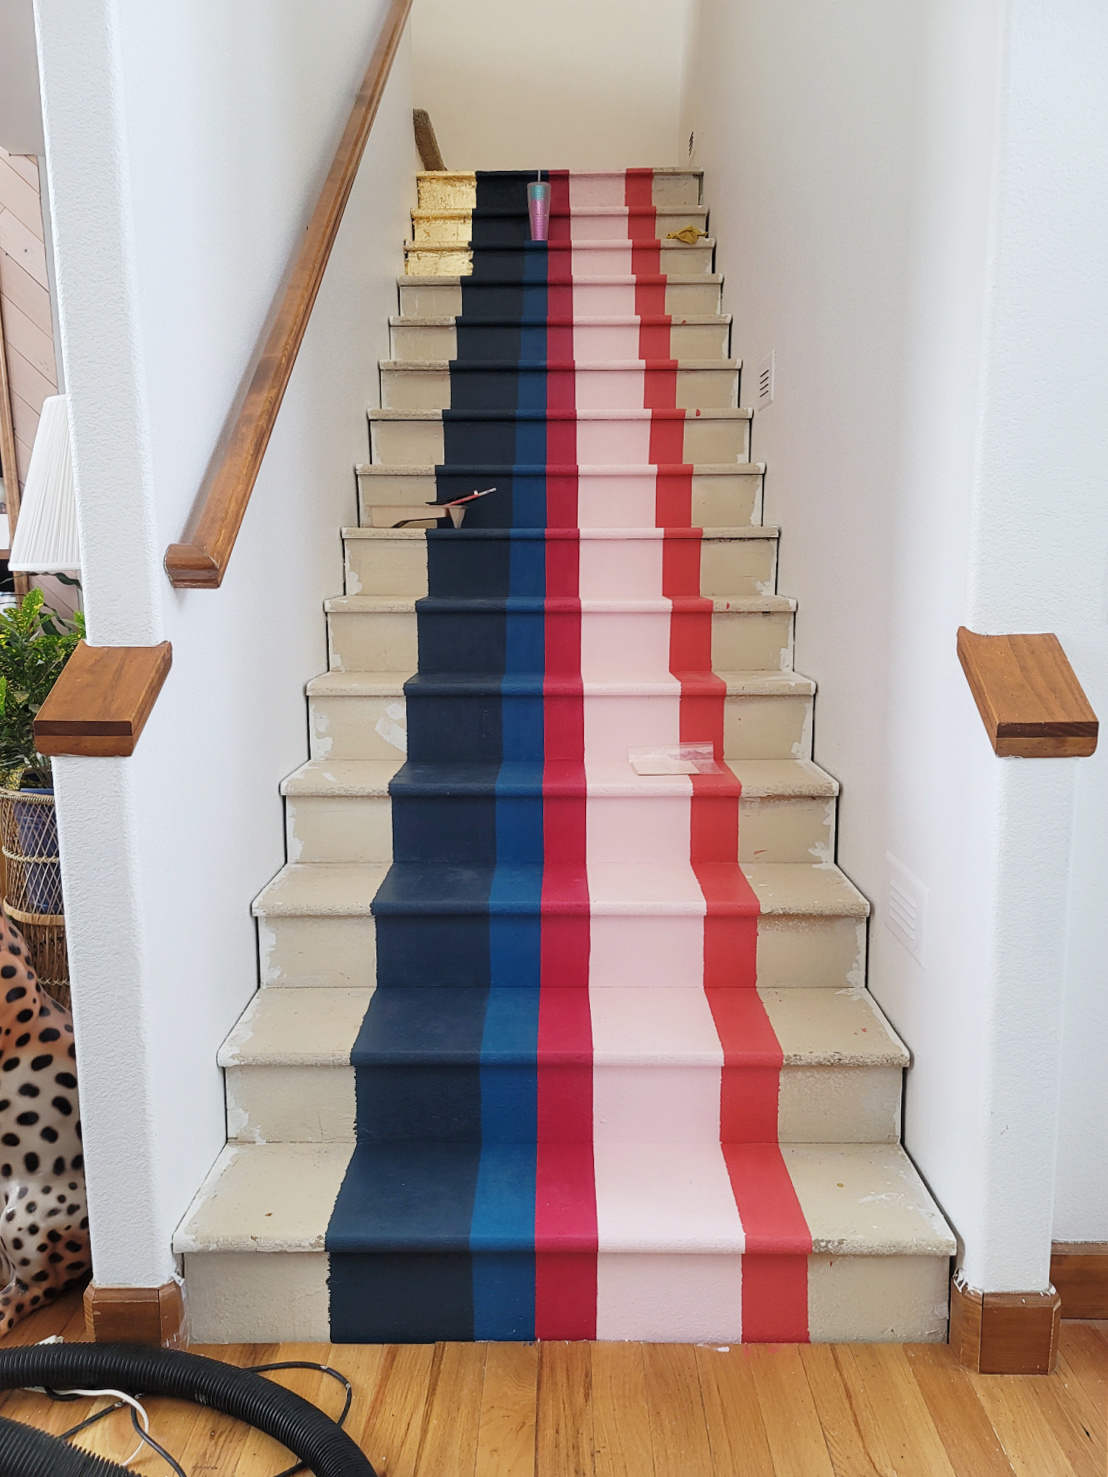
Remember anywhere you get adhesive the gold leaf will stick too. You want to be careful with not getting it on the walls or on your painted stripes.
*Important* Don’t forget where you applied the adhesive. I stepped on one of the lower treads while applying gold leaf to an upper step and accidentally glued my flip flop to the floor. I had to pry it up which also removed the top 2 layers of the tread. Don’t be like me haha.

Continue the process all the way to the bottom. Again keep in mind, the adhesive sticks to everything so if it gets on your hands or fingers you will have a hot mess (of course I got it on mine) and it will be harder to cleanly apply the gold leaf since it will stick and tear.

Here’s how she looked with the leaf applied on one full side.
Repeating the same process on the other side..
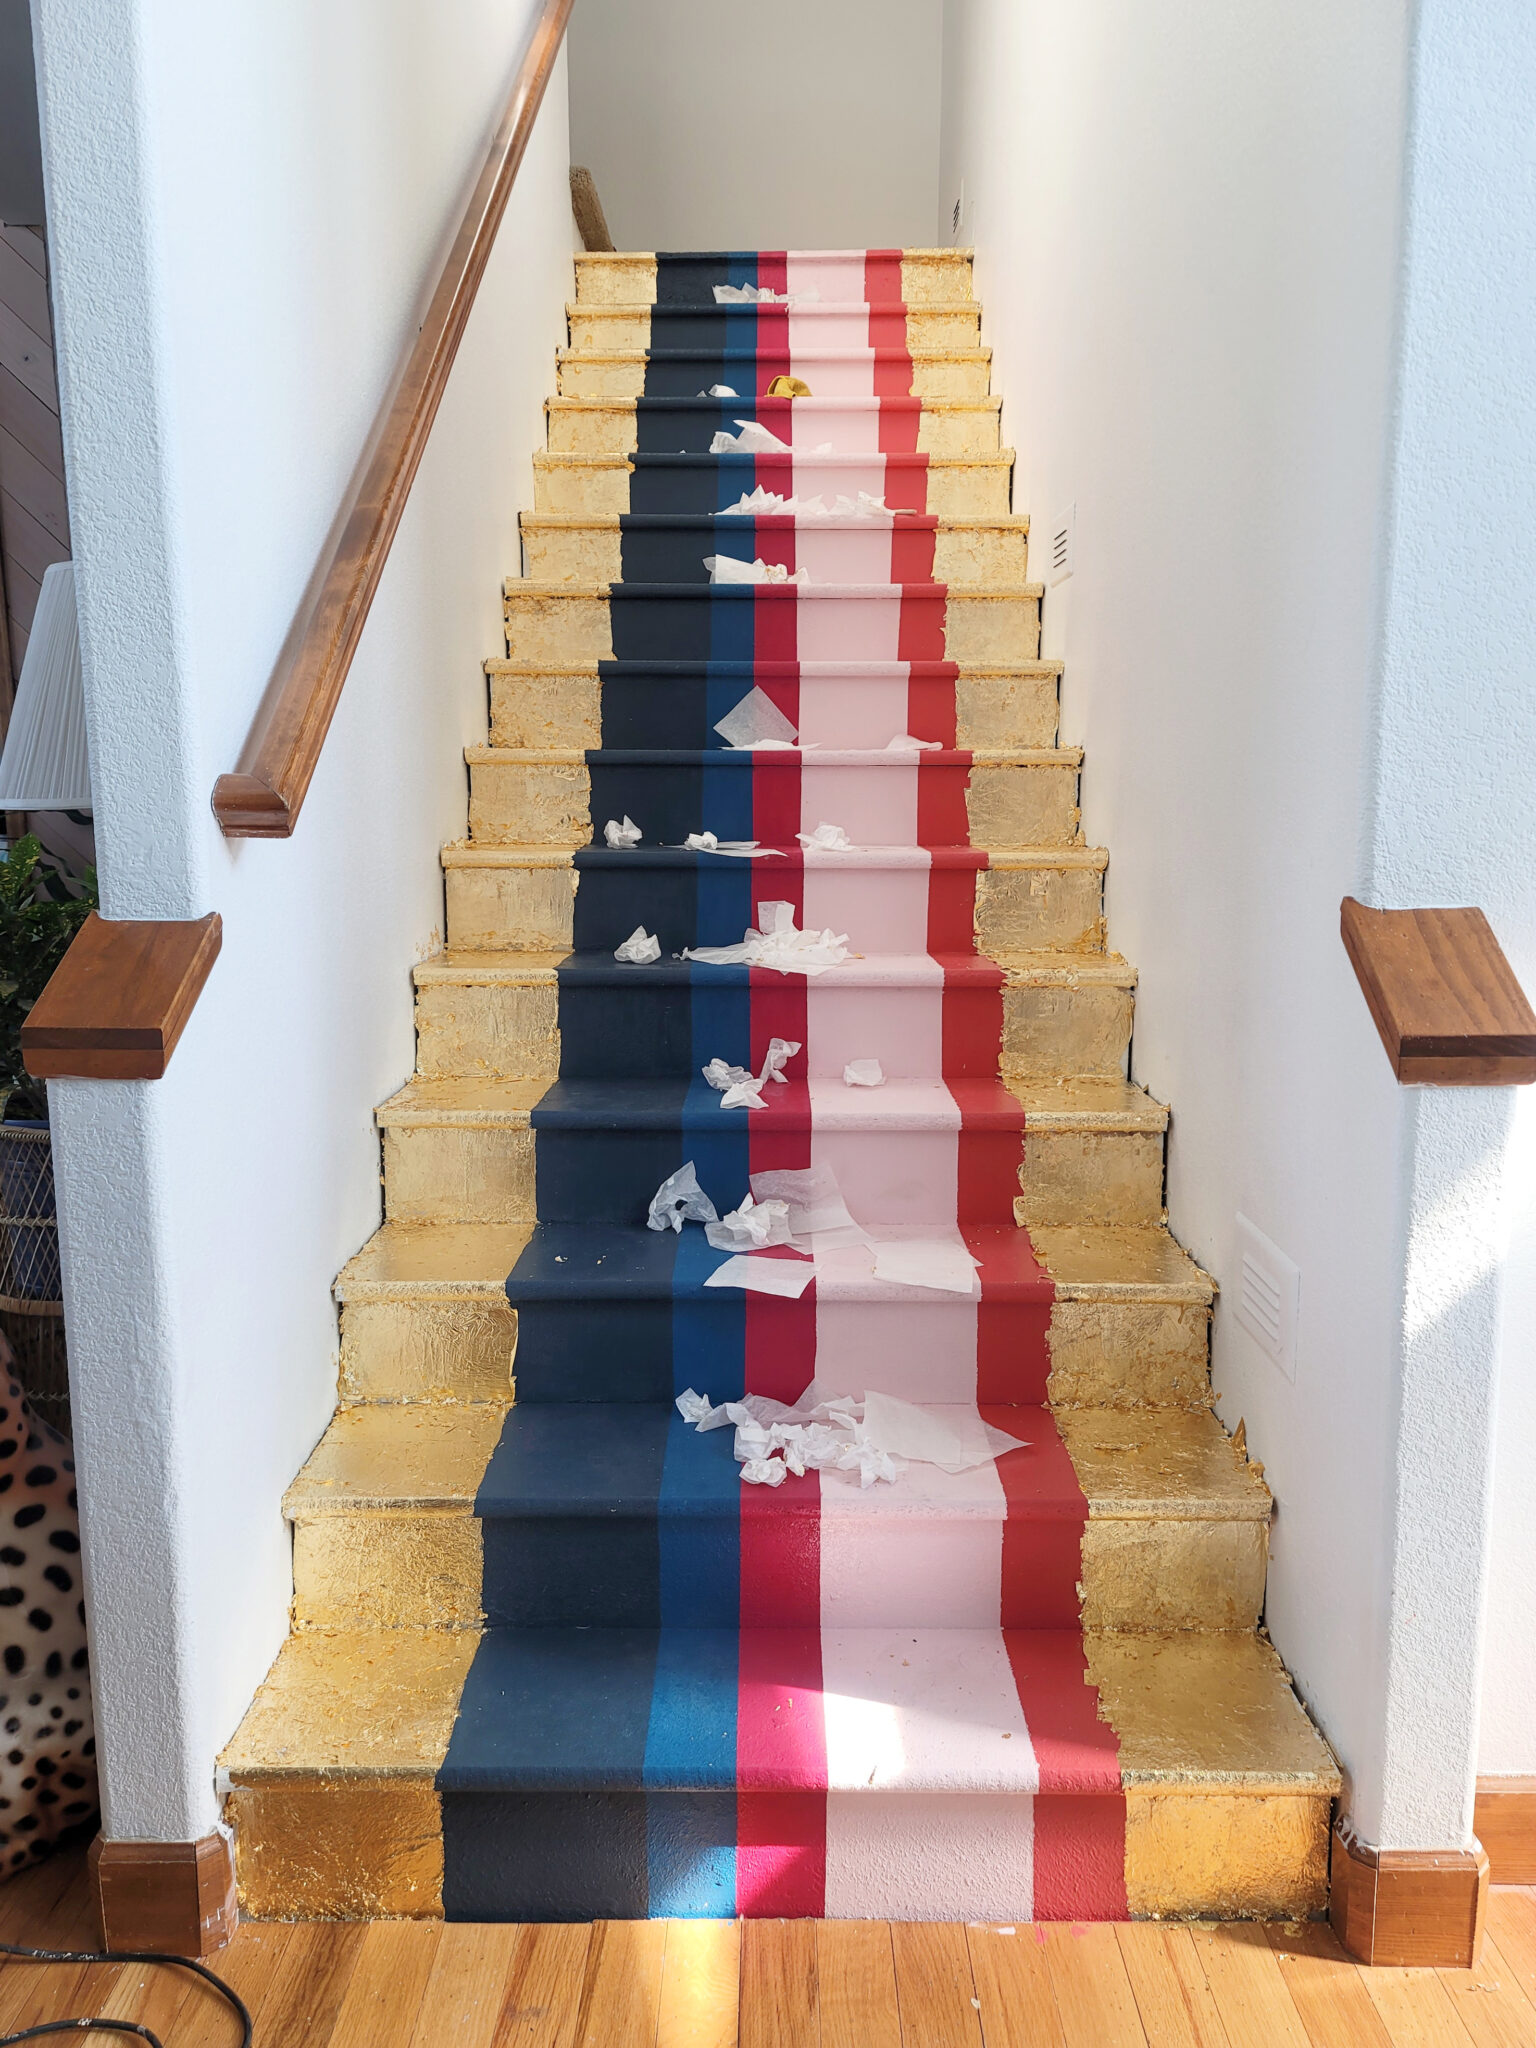
I decided to wait until it was fully applied and dry before going back to brush off the excess leaf.
Step 6:
Using one of the larger brushes in the set we purchased, I started at the top and brushed the gold leaf to remove all of the excess. *Another hot tip! Cover your painted stripes with paper, plastic or a tarp either before you apply the gold leaf or before you brush the excess. It gets EVERYWHERE and if there is any adhesive, even a tiny bit, it will stick to your stripes. I had flecks showing up all over the place, pain in the butt-ski.
 Here she is post excess brush off!
Step 7:
Touch up. As careful as I was applying the adhesive of course I didn’t get a perfectly straight line. Since I’m weirdly obsessive about this I devised a way to go back and clean it up.
Cut a piece of cardboard and put a piece of painters tape along the bottom. Line it up on your edge. Pressing firmly down on the cardboard piece, take a little bit of paint and swipe it along the edge. This process did a good job and it went much more quickly than trying to do it by hand.

Be careful not to overload your brush. If there’s too much paint it will still bleed under the cardboard. Repeat on the other side if necessary.
Step 8:
Time to seal it! You absolutely must seal gold leaf (unless you use real gold leaf which is major bucks more) as it will tarnish into an ugly black color. When I did our gold leaf countertop I used a waterbased sealer. But I didn’t feel it gave that really sealed in coating I needed on the stairs. These are highly trafficked steps so I wanted a solid finish.
I had a can of Rustoleum crystal clear enamel spray, I went and tested it out on the gold leaf to see if there was a reaction. When looking for sealers for gold leaf you have to be careful since many can actually darken/tarnish it. My goal was to keep the bright gold color, prevent tarnish and not have any yellowing on the painted stripes.
That’s a tall order. Fortunately the enamel spray worked perfectly on the gold leaf and did nothing to the color.
After researching I felt confident it would give a nice clear finish. I really didn’t want to use a spray (hello chemical smells) in the house but I also knew any sealer I used would have a strong smell.
I opened all of the windows and doors, (including the front door) and brought out 3 large fans to create as much ventilation as possible. Then cut out 2 rectangle pieces of cardboard to wedge into the sides of the stairs to catch overspray which I moved along with me as I went.
Pop on a good mask and spray away. I went through 4 1/2 cans of enamel spray for one coat. I left if for a few days to see how the sealer held up and decided it could use another coat. Another 5 cans later it has a finish similar to what sealed hardwood feels like.

There’s a residual dust that comes from the spray, I used a wet rag and wiped up the floor when I finished.
And tada! The finished stairs. I have an idea for a fun DIY sconce project and am planning on either replacing the railing or painting it, but these stairs! Such a huge difference and for the cost of $175.47 + tax, a whole lotta sweat and cussing, not to mention back pain for life…….worth it.
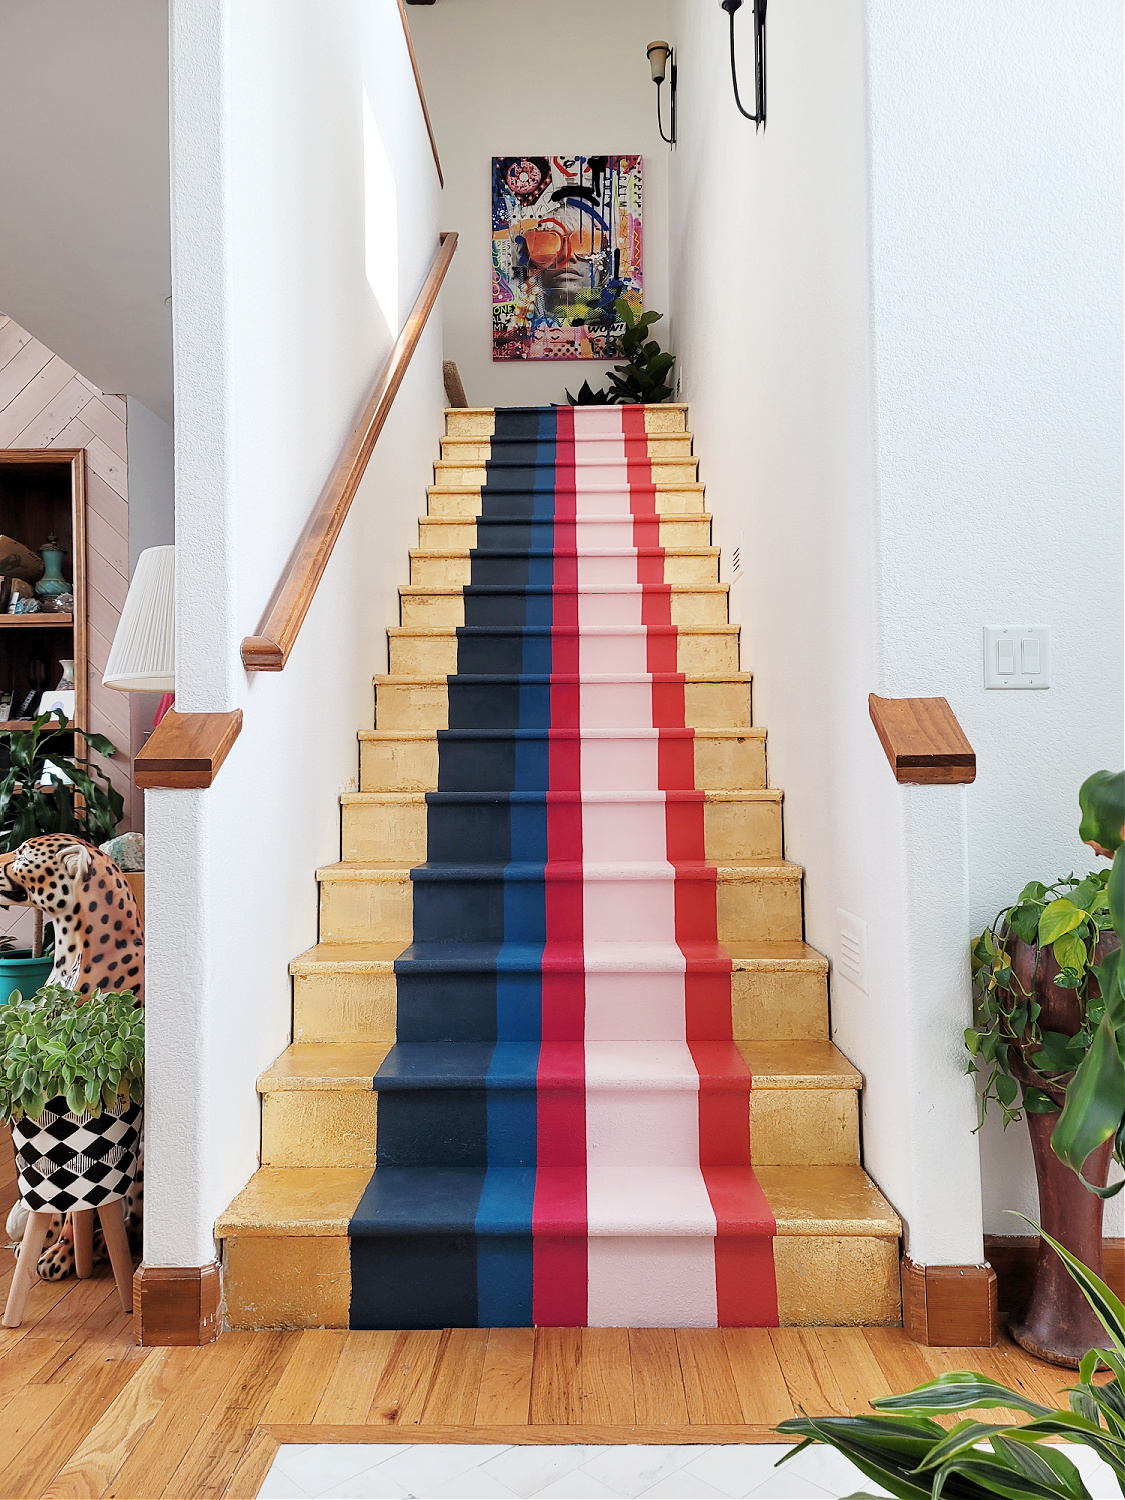
This is the first thing I see every morning and it sure is a much happier sight.
All the texture is still there but it adds character now instead of being an eyesore. Who needs to spend hundreds to thousands when all they want is non-nasty stairs?!
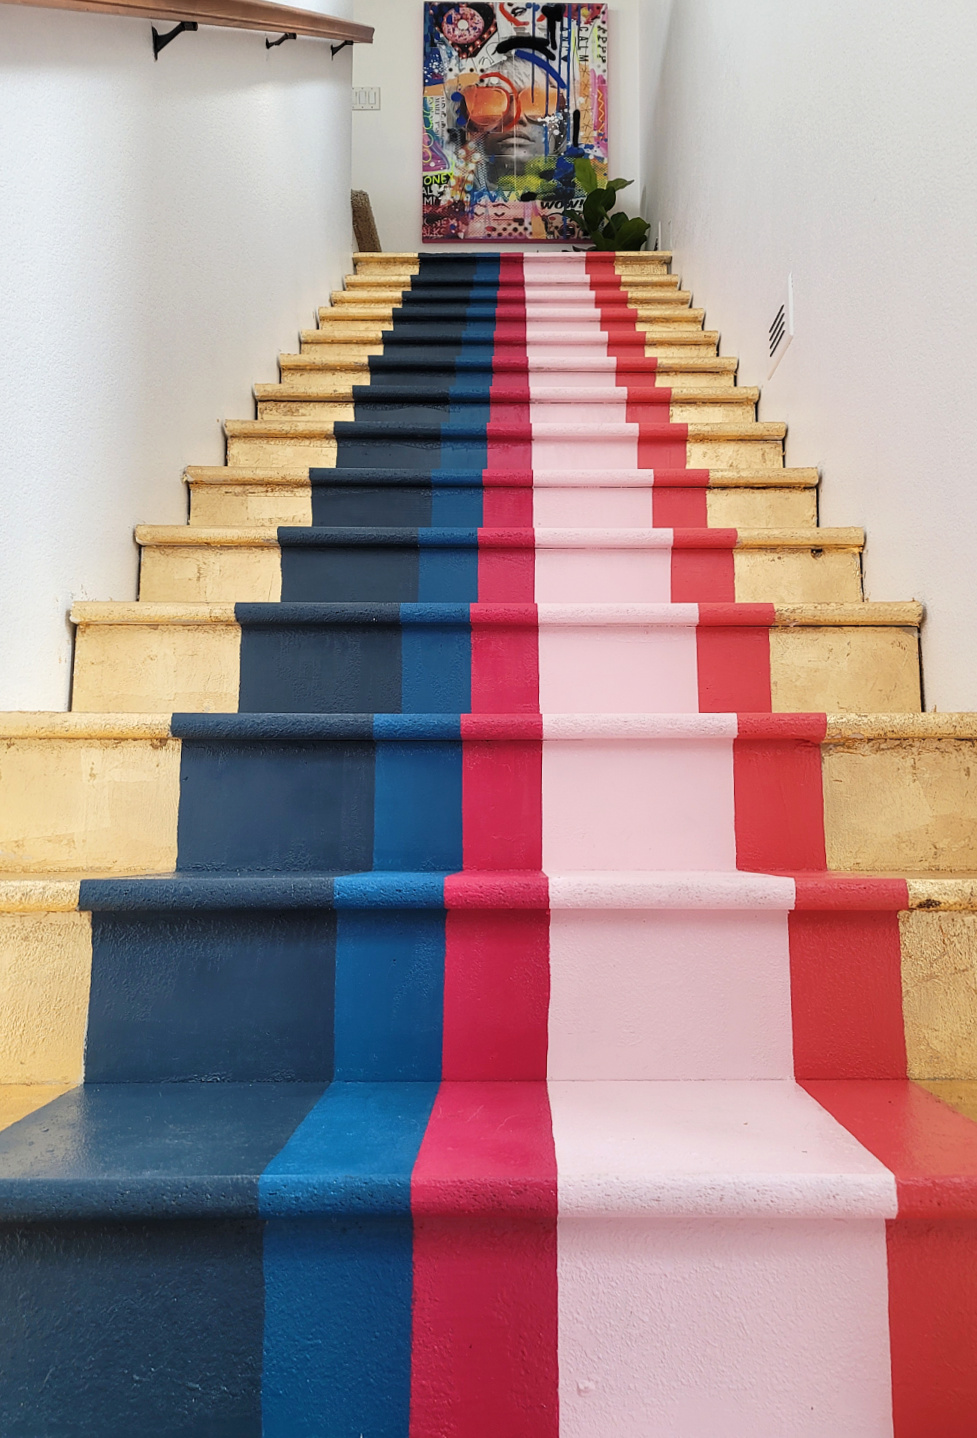
I did go back after snapping this pic and touch up the white along the stairs. Also let’s ignore the slightly wobbly line there mmkay. (while I go fix it argh)
There you have it! If you want to take this project on be prepared for some serious work. And you won’t really have any help since it’s such a small space, really only one can work at a time.
This whole thing took me 5 days start to finish. If you choose a less complicated design, for example 2 or 3 stripes of even size or even just one down the center, it will be much quicker.
What do you think?! Would you do gold stairs in your house? How about combined with a bold “runner”?!
I always love to hear from ya so hit me up in the comments below!
And be sure to pop in your email to the subscribe box! I’ve got some fun projects in the pipeline you won’t want to miss.
XOXOXO
Have you done your own staircase makeover yet? Let me know in a comment below!





Pat Rutledge
August 2, 2021Tina, your creativity continues to amaze me! You have a ton more energy & patience than I do. 😂 I think the stripes & gold leaf would look beautiful on a small wall area or a piece of furniture…that I might be able to handle!
Absolutely gorgeous!
Tina Bousu
August 17, 2021Thank you so much Pat! And yes you could definitely start with a small piece of furniture and work up from there!