Shower Waterproofing and How to Install Zellige Tile
The master bathroom renovation continues and today we’re going over shower waterproofing! Scroll down to read more!
A quick recap, the master bath and bedroom are getting makeovers as part of my One Room Challenge project. From a full gut to the finished product and I’m sharing it all. Oh and we’re DIY’ing the entire thing, eeps!
(See previous posts regarding demo and the plan, my DIY cabinet makeover and DIY copper pulls, the flooring installation and tile, the Norwegian rose marble and lighting, and the copper shower pan deets and install!)
Here is what we were dealing with during demo…

All of the walls were rotten and there was significant mold behind this wall and underneath the floor.
Our shower was built using drywall underneath the tile and no proper shower waterproofing except this plastic on the exterior wall.
*Please never use drywall in a wet space like a shower. It will absorb moisture and cause all kinds of nasty problems.
Shower Waterproofing 101:
The first thing we did was clean out all of the old rotted material as fast as possible. Then I took a bleach solution and sprayed everything in the shower area from the studs that had mold to the mold covered plastic sheet and cleaned it.
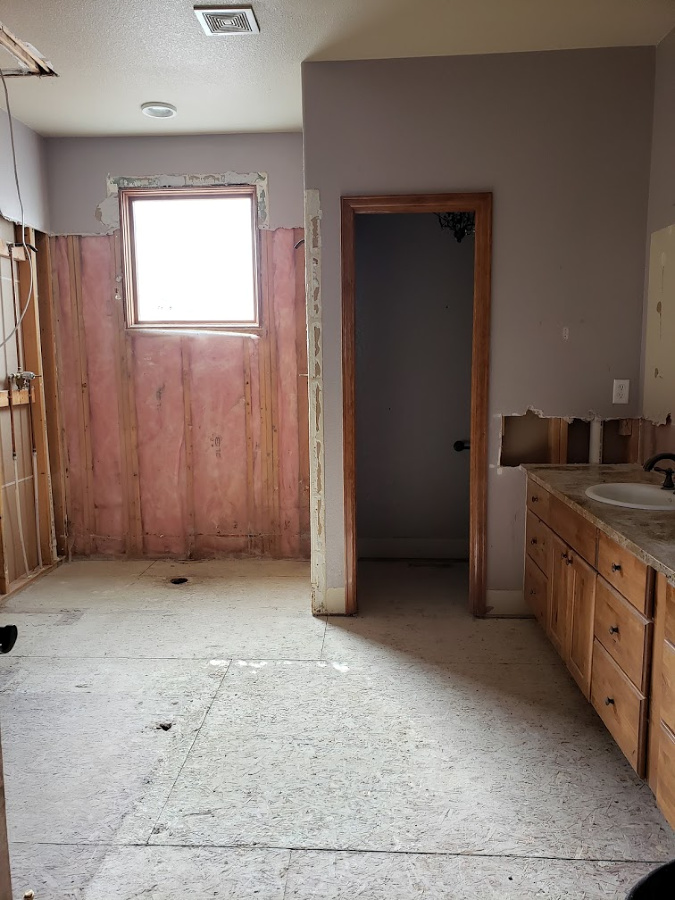
So much better
I know that the issues we had were due to improper waterproofing and I wanted to make sure it was done correctly this time.
First step is fitting cement board on all 3 walls. We used Hardibacker but there are several other brands too. Be careful when cutting this as the dust is toxic, be sure to use a mask when cutting. We also found that a jigsaw with a fresh blade put out less dust.

Protected the copper shower pan with the felt pad and the thick plastic sheet that it came with.
Next step is seaming each joint with cement board tape (mesh tape just like drywall tape but made specifically for use with cement board), mortar and let set. This essentially creates one solid concrete surface.

Try to keep the mortar on the joints as smooth as possible as you will be tiling over this later and you don’t want bumps impacting the level of your tile.
Once the mortar had set we taped off all of the plastic along the edges of the pan and cracked open our liquid rubber sealer. We used Mapei’s Aquadefense Liquid Membrane. It was easily accessible at our local Lowes, had great reviews across multiple sites and was from the same line as the mortar and grout we were using. Basically I did a whole bunch of boring reading and we thought this would be a great product.
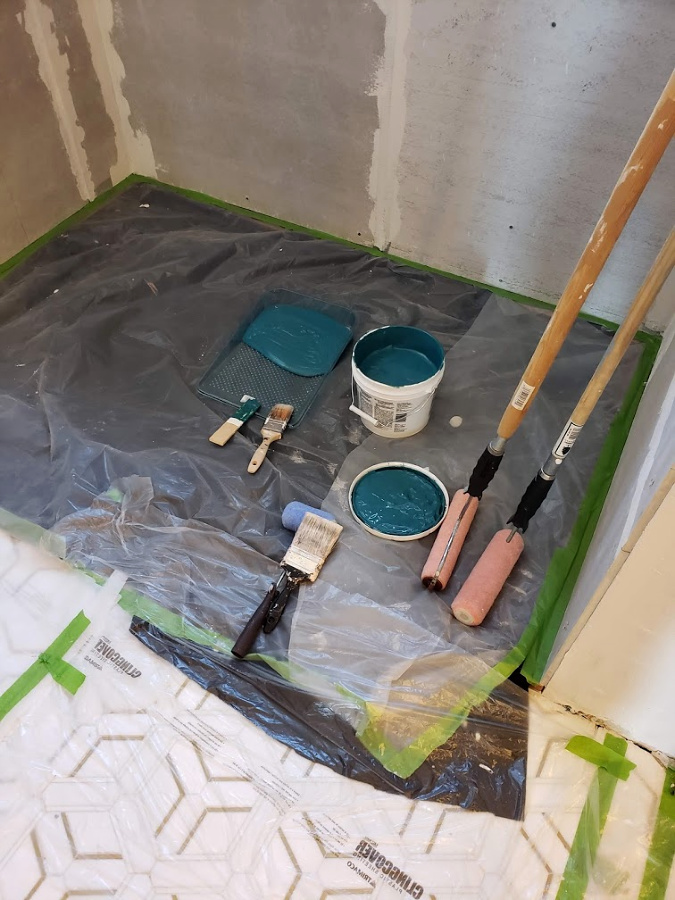
We just used rollers to apply and brushes for the corners.
It’s a super dark color when it dries but we applied 2 coats and opted to go all the way to the ceiling. This wasn’t necessary as water won’t be spraying up there but you can’t do too much waterproofing right?

Why are there 2 gaps in the walls?
It’s all to do with the shower fixtures. I ordered them in the beginning of March as they are from England (read long production time). Annnddd the coronavirus happened. They have been under lockdown for the past 2 months only recently opening at a reduced workforce. We weren’t sure if they were going to be able to complete the fixtures in time for the reveal and if that happened, the plumbing wouldn’t fit anything I could find in the US if I had to order something else.
So the hubs and I decided to do something very unconventional. We left open 2 spots where the shower fixtures will be until we knew for sure the fixtures were going to make it. I don’t recommend this as it’s risky. But we needed to keep going with tile installation so I could get the glass ordered for the shower (which is another 4+ week lead time).
It’s a bit scary and very irregular but do what you gotta do amiright?
The existing window is a wood window. That aside it was in surprisingly great shape with just a little bit of water damage to the finish on the bottom. I sanded it down all the way around and picked up an exterior paint in the same black as the vanity.
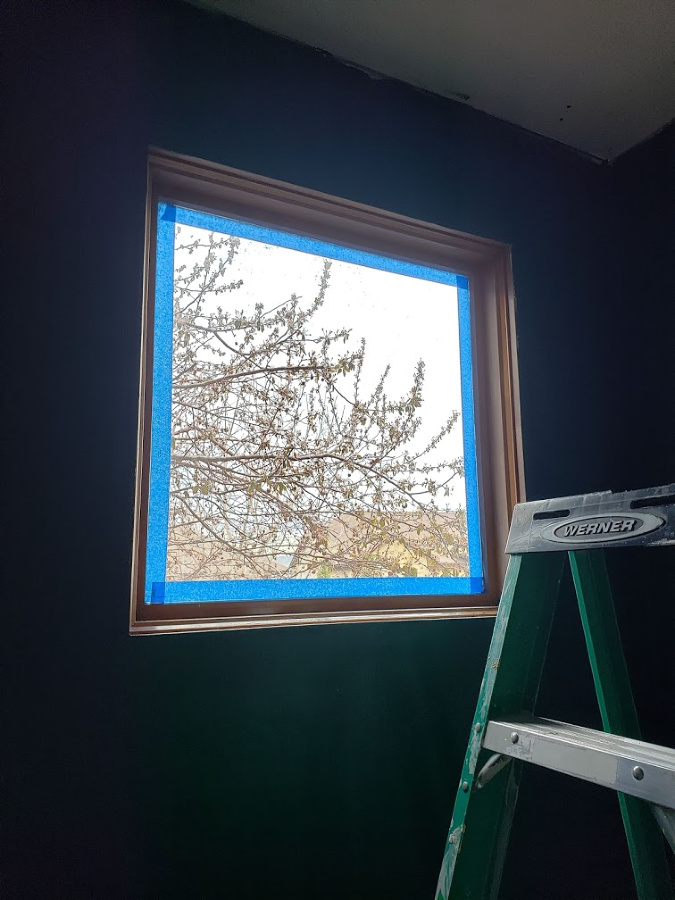
Taping off the glass for easy painting and cleanup.
I hopped up and painted the window at this point to prevent any spilling of paint on my new tile. I gave it a good coat all the way around and left to dry.

The color is Caviar by SW.
Here we started tiling using the same staggered brick pattern as the fireplace. We measured and calculated the number of rows that we needed on both sides to insure we had an even amount around the gaps.

After day 1 of tiling.
Applying the Zellige tile: soak in a bucket of water for a minute, back butter thoroughly and stick. Be sure to give it a good press onto the wall. Be sure to grab from a few different boxes at a time.
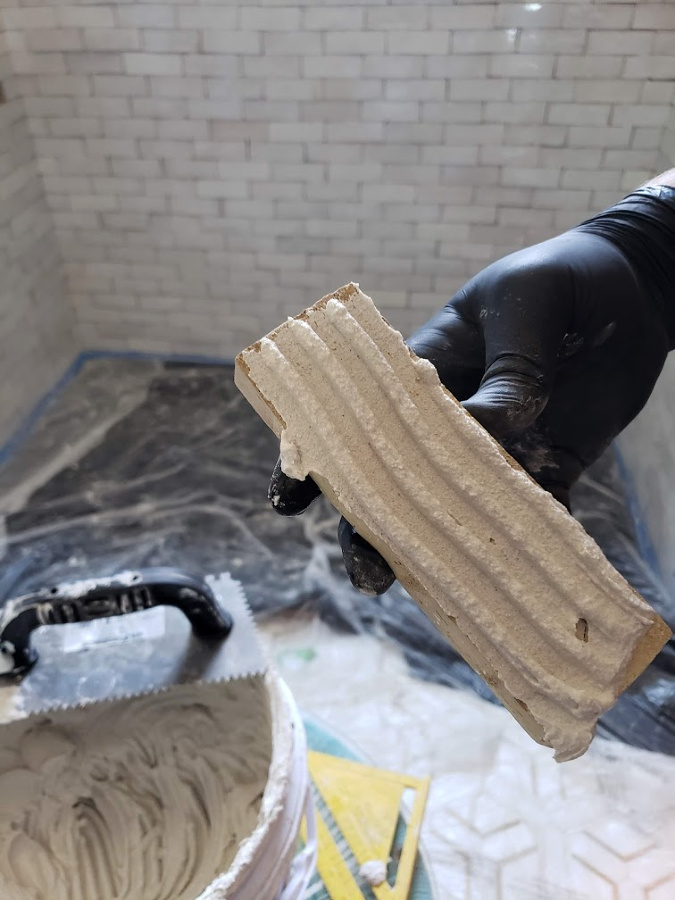
When tiling with zellige you have to be aware that there are inconsistencies in every tile, so you will end up with some uneven areas. By dry fitting tiles as you go you can straighten it out in subsequent rows. Kind of like putting a puzzle together.
Here was after day 2. We used a level to check every now and then to be sure our rows were staying relatively straight.

Here is after completing all the way around and a day of grouting. The almost-finished-we’re-96%-of-the-way-there shower.
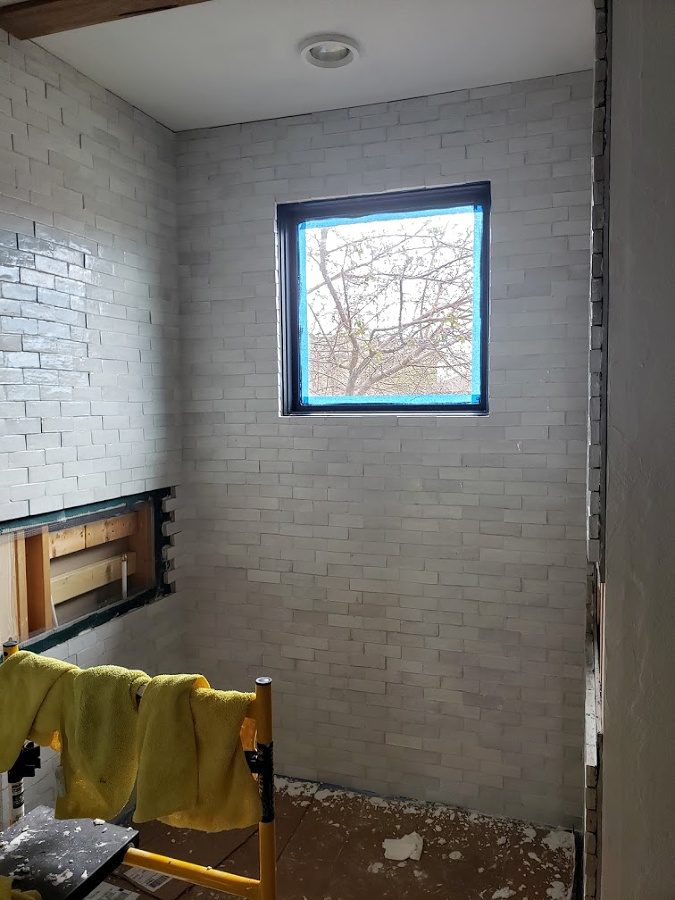
We put down cardboard on top of the plastic covering for the shower pan as grouting gets messy.
Here’s a straight shot looking into the shower. This is post cleanup and second touch up coating of black paint in the window.

Almost there!
We have to come back and pop in the 2 pieces of cement board, mortar the seams (note we left an overlap on the top and bottom of each gap), slap on some waterproofer and complete the tile. We also need to wrap the tile around the corner edge once the gaps are filled.
I was able to have the glass guy out to get the custom pieces ordered so I can finally see the finish line.
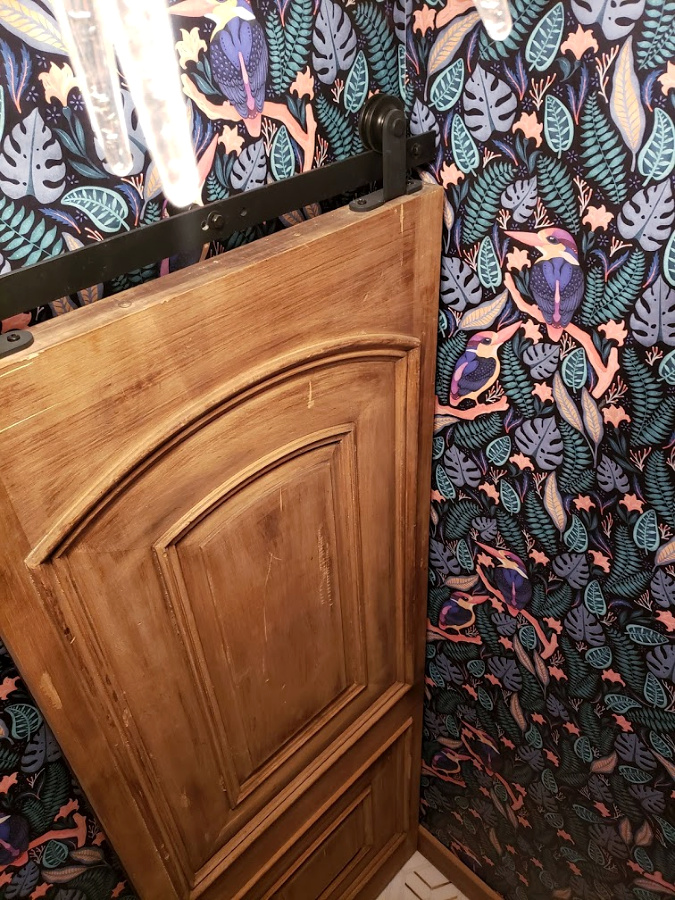
Coming up I’ve got the water closet (aka toilet area) makeover from wallpaper to lighting to the sliding door!
Questions about setting/laying handmade zellige tile or shower waterproofing? Hit me up in the comments, I always love to hear from ya!
And don’t forget to pop your email in the subscribe box to be the first to know when a new post goes live!





Jessica
November 16, 2020Hi there! Beautiful bathroom!! Did you miter the corners around the windows? And the edges of the shower?
Tina Bousu
November 17, 2020Hi Jessica! We didn’t miter around the window. We just followed the shape exactly and given the height of the window and the rainfall shower head (water flowing straight down instead of at an angle) we aren’t concerned about any kind of substantial water hitting up there. I did however seal everything with not just grout but also a silicone just in case! The left straight edge I just lined it up as I set it, no mitering. While on the right it is mitered to create the corner where I carried it over in a brick pattern. We also mitered around the corner of the fireplace.
Leticia Paniagua
December 2, 2020Nice job 👏 👌
Tina Bousu
December 8, 2020Hi there! Thank you so very much!
Lisa
February 27, 2021Did the tile have raw edges or were they finished? The zellige I wanted installed has mitered edges with terracotta color showing on the edges. Just wondering if you had to dress those edges up somehow.
Tina Bousu
March 2, 2021Hi Lisa! Yep the zellige we used was literally shaped like a brick with the terracotta colored clay exposed on all sides but the glazed front. For the shower side trim going up the wall I devised a plan to cut the tiles in half lengthwise (so instead of being an inch thick they were only 1/2 inch thick) and then stacked those overlapping the exposed edge from the shower. If I had figured out doing the stacked edge earlier I probably would have done a mitered corner. But since we had installed the shower all the way around beforehand I had to come up with a way to make it look mitered without being mitered if that makes sense. The other bonus is that the 1/2 thickness going up the wall is more of a decorative accent since it isn’t so bulky. It worked great!
vincent g
April 26, 2021Did you put a vapour barrier behind the cement board ?
Tina Bousu
April 29, 2021Hi! On the exterior walls yes!
Celina Gregory
October 4, 2021Hi there! We just finished putting zellige in our shower and I’m wondering about putting on a sealer (Cle tile now recommends sealing even glazed zellige when used in a shower). Did you apply any grout/tile sealer when finished? How has the tile held up so far for you? Thanks in advance!
Tina Bousu
October 5, 2021Hi Celina! I did not apply any additional sealer to our zellige tile or grout. The grout we used has a sealer in it and the zellige being glazed was not recommended when I purchased it. A year and a half later and everything is holding up amazingly well. No issues cleaning the zellige and the grout has done very well too. I would do it the same if I had to do it over again as I have had a great experience so far. I hope this helps and good luck with your project!
Julie
May 8, 2021Hi there! So happy I found your site. How did you space between each tile? And if you didn’t use spacers, was grouting an issue?
Tina Bousu
May 13, 2021Hi Julie! I didn’t use spacers I just butt jointed them. That’s a fancy way of saying I put them right next to each other and keeping the lines relatively straight. Since the tiles are all handmade and therefore not all exactly the same you will have some unevenness in your rows and on the surface of your tiled wall. So when it came to grouting we used a regular grout float to initially apply doing a couple of extra sweeps over the tile and pressing, then I would come through and use my fingers to get it into the tiny spaces that might have been missed or not completely filled with grout. Some extra swipes with the sponges were necessary to clean all of the tiles off too. A bit extra work but totally worth it!
Suzanne Perron
March 22, 2022We are doing zellige in our kitchen. How did you finish the edges? Miter cuts? Thanks for your response!!!!
Tina Bousu
April 8, 2022Hi Suzanne! Yes we just did miter cuts with the zellige to create the corners. I left the edges of the shower where it’s flat just naturally straight with the raw edge for added texture. Have fun with your kitchen project!
Stewart
July 10, 2025Hello! A little late to the party but…. we just had zellige tile put on shower/bath walls in our guest room. They look great but when a guest stayed, they noticed back plate of the shower fixture wasn’t sealed to the tile. At all. I was able to pull it away from the wall to see the a 4″x4″ opening where the pipes come through. Water can easily trickle down and into the wall. The tile around the top of the back plate is flush enough to seal but not around the bottom (it’s easily a 1/8″-3/16″ gap). Did the tile installers totally goof this/plumbers kept their mouths shut/GC hoped we wouldn’t notice?
How did you handle the fixtures in your shower? Thanks!
Tina Bousu
July 17, 2025Hi! Hmm it sounds like they didn’t get the tile flush at the base of your fixture plate. Ours is relatively flush, there are some very small gaps in a few areas just due to tile thickness differences but its pretty miniscule. They are also fully sealed with clear silicone all the way around to ensure they are waterproofed. See if you can seal it up with silicone, otherwise the only other option is to tear out and redo that area which would be no fun.
Stewart
July 17, 2025Ugh, that’s what I was afraid of but thank you so much for your response! I *think* we have a few more pieces of the tile, just in case. I think gap is a little bit too much for silicone to handle.
Thanks again!