DIY French Bistro Shelving 2.0
Not long ago I did a little suspended french bistro shelving project . I have this weird small wall with nothing on it that’s part of the kitchen but isn’t part of the kitchen. I know, makes no sense right?
Here’s a photo of the french bistro shelving 1.0 and that weird little wall. I’ve been trying to figure out a functional way to use that space without feeling like it’s taking over.
 You can peep how I made that shelving here!
I collect vintage colorful glassware and am working on amassing a full rainbow. I wanted somewhere I can display it that would do it justice. After living with the suspended shelving for awhile I liked the concept but it wasn’t nearly enough and I didn’t like how it so abruptly stopped.
Then I decided to change the ceiling, because of course I did 😂. So I knew I would be taking the suspended shelving down for the new mural to be installed and it was the perfect opportunity to build a full floor to ceiling shelving unit.
I sketched up an idea and between the hubs and myself we devised a way to make it happen for less than $220!
Supplies List:
12: 1/2″ T copper pieces
16: 1/2″ copper caps
4: 1/2″ 10 ft copper pipes
Just for Copper Glue (if you want to use it)
Screws to secure shelving to wall
6 glass shelves
Here’s how we did it…
Step 1:
Develop your spacing and overall shelving unit. This is our initial sketch. You can see I decided on 6 shelves evenly spaced at 16 inches apart with the top and bottom at 14 inches. This will vary a bit depending on your ceiling height.
You can just adjust the spacing based on your space and needs.
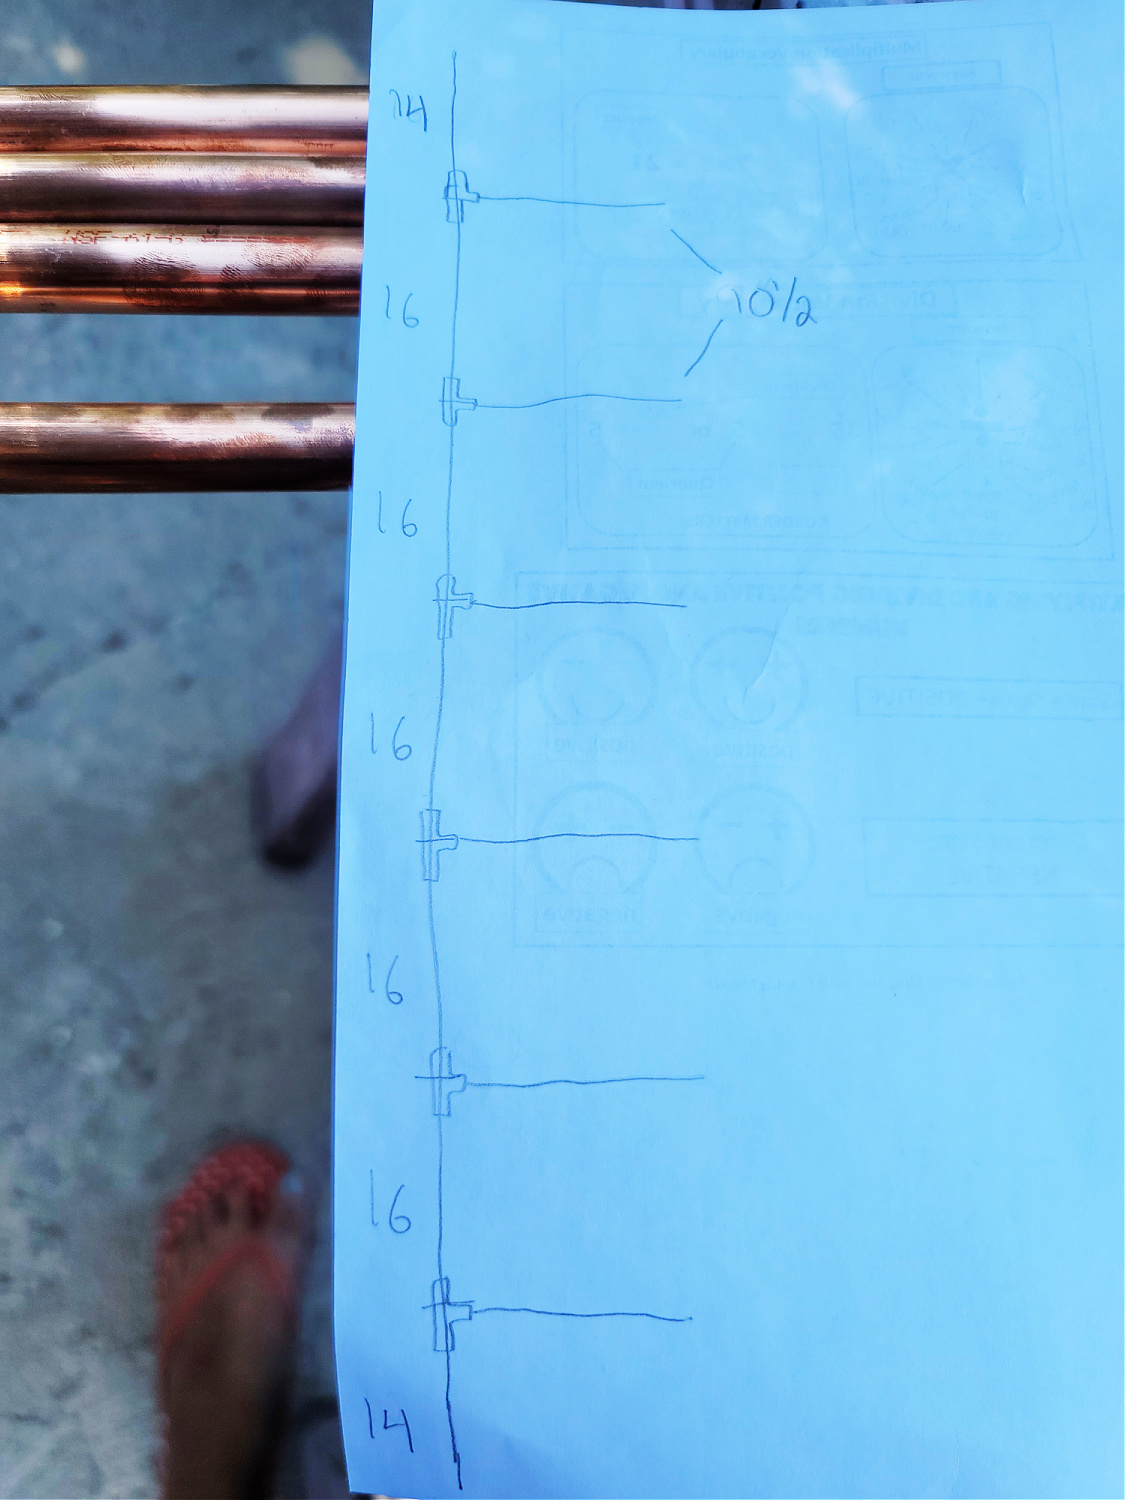 So fancy right? I’m so old school with my paper sketches.
Step 2:
Cut 10 ft pipes down into your pieces for the shelving. We went through and marked our measurements with a sharpie, this made it easy to just go along the 10 ft and cut each piece as we went.
The breakdown went like this:
12 pieces at 10 1/2″
10 pieces at 16″
4 pieces at 14″
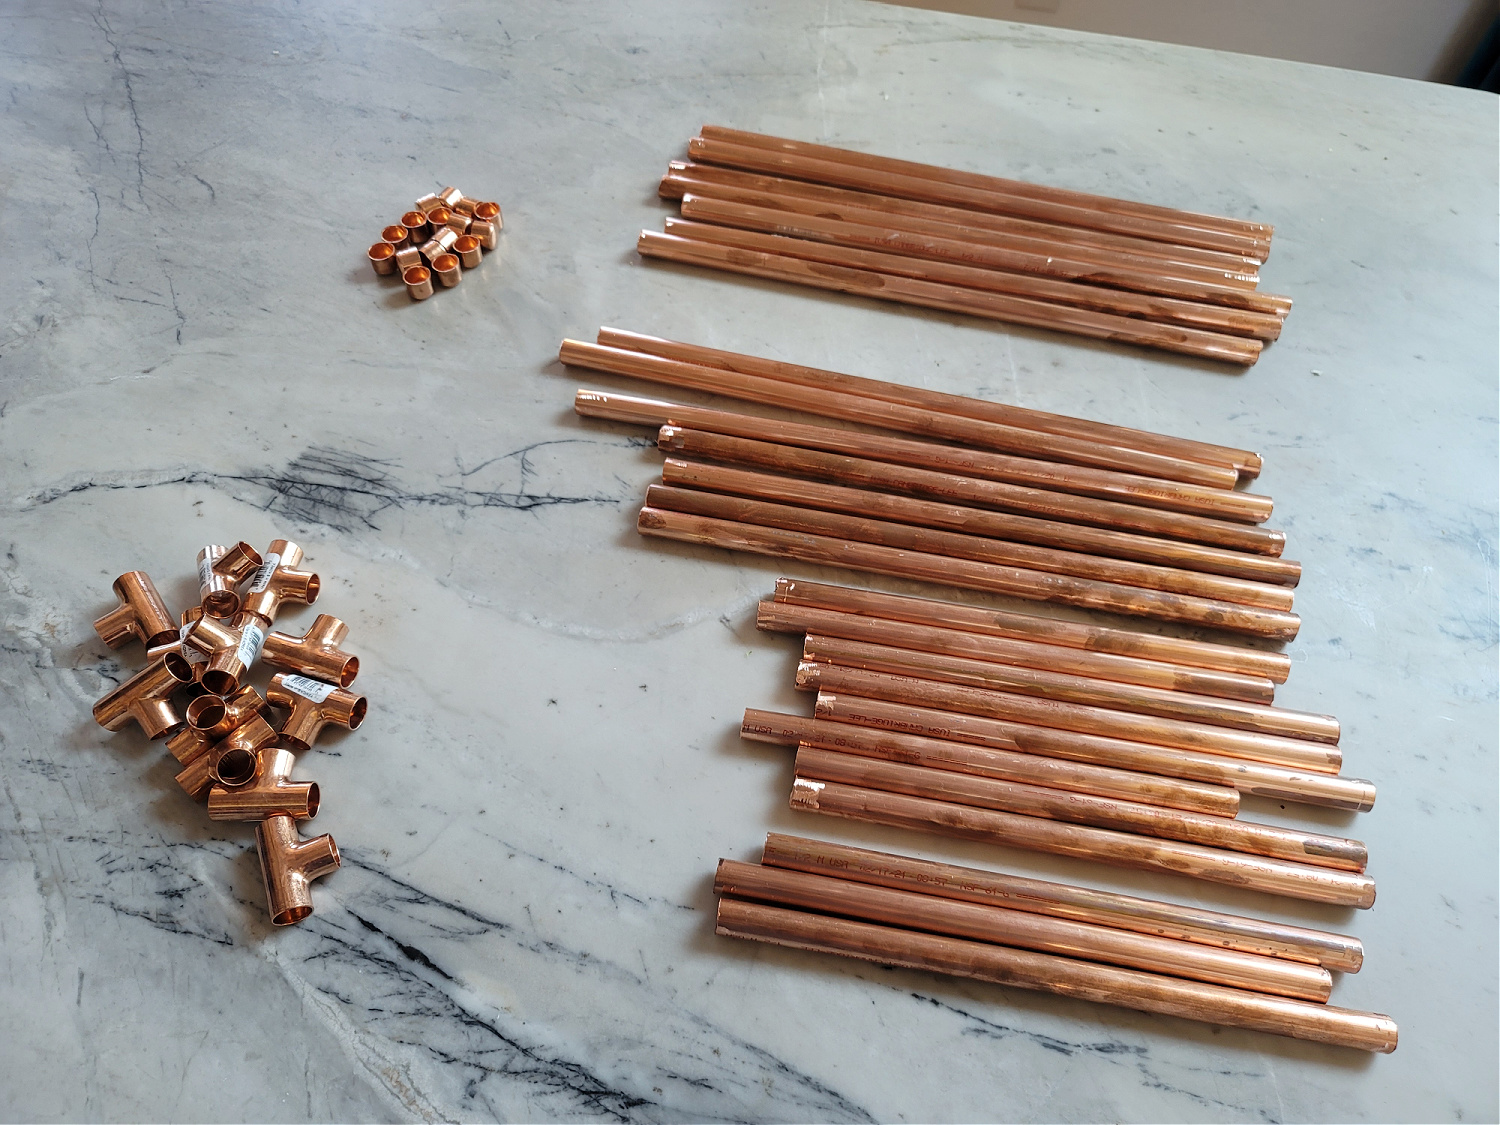 This is my pile of pieces to assemble the shelving. The pipe cut to size, the T’s and the caps
Step 3:
Assemble and retro fit to be sure you are happy with spacing and shelf size along with placement.
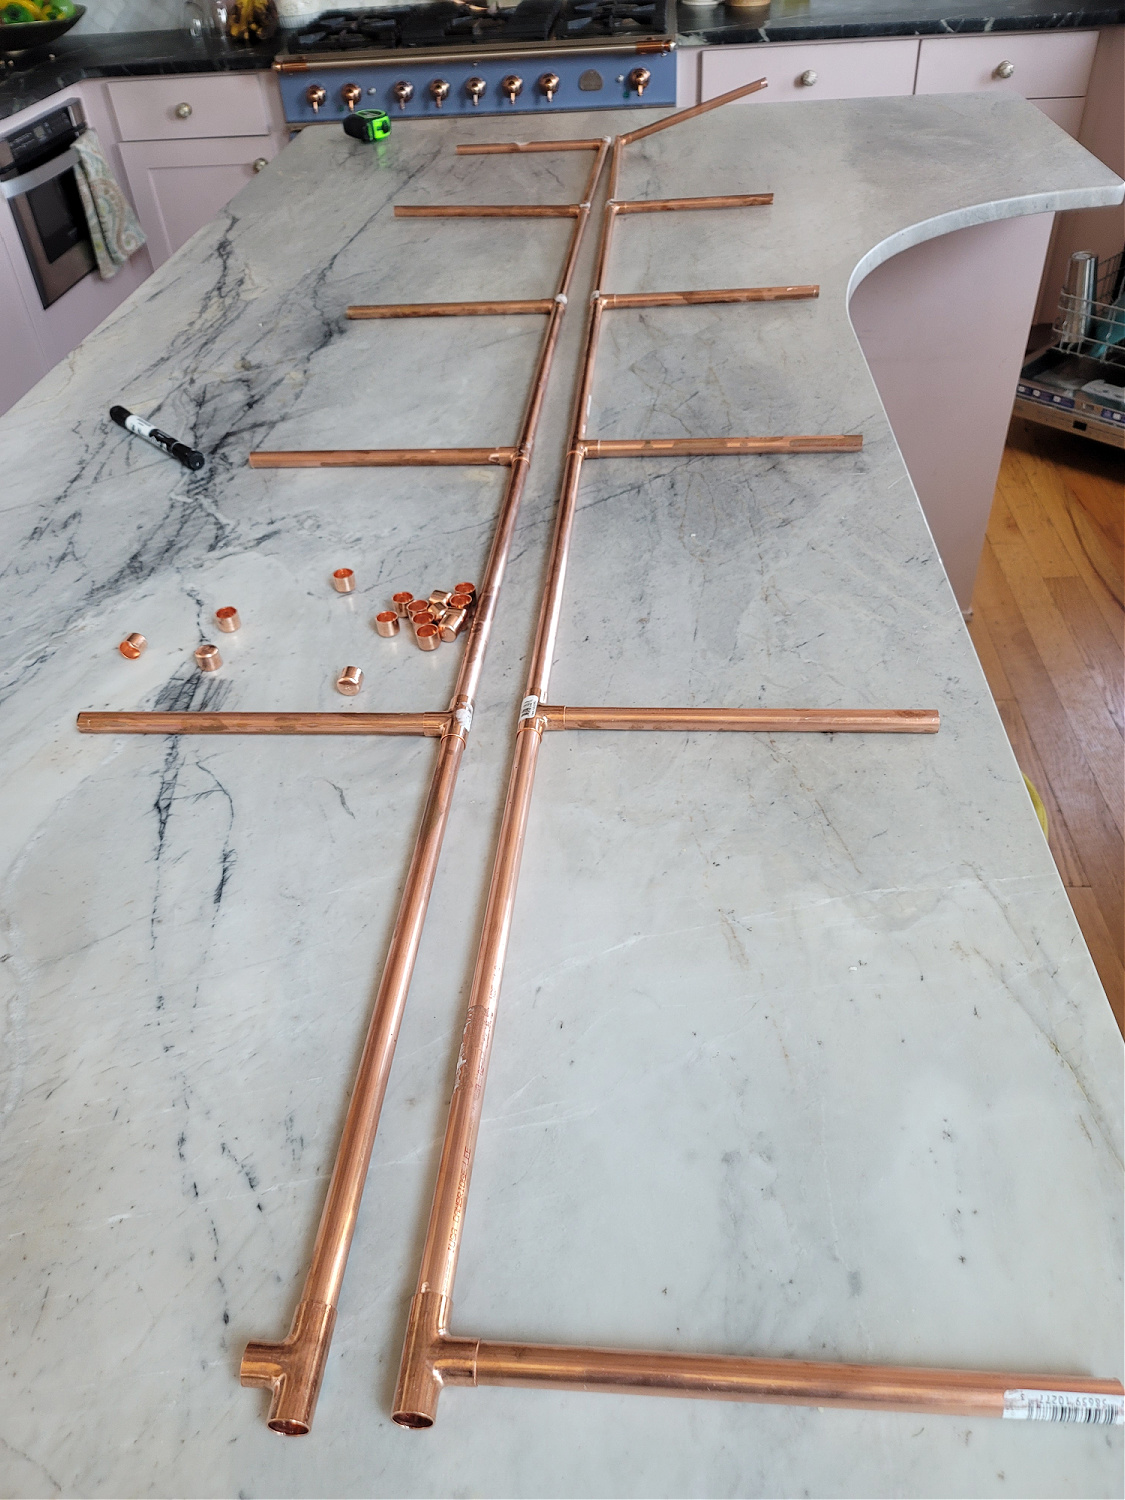 Assemble according to your sketch. Mine is 14″ spacing on top and bottom with 16″ spacing between the rest of the shelves.
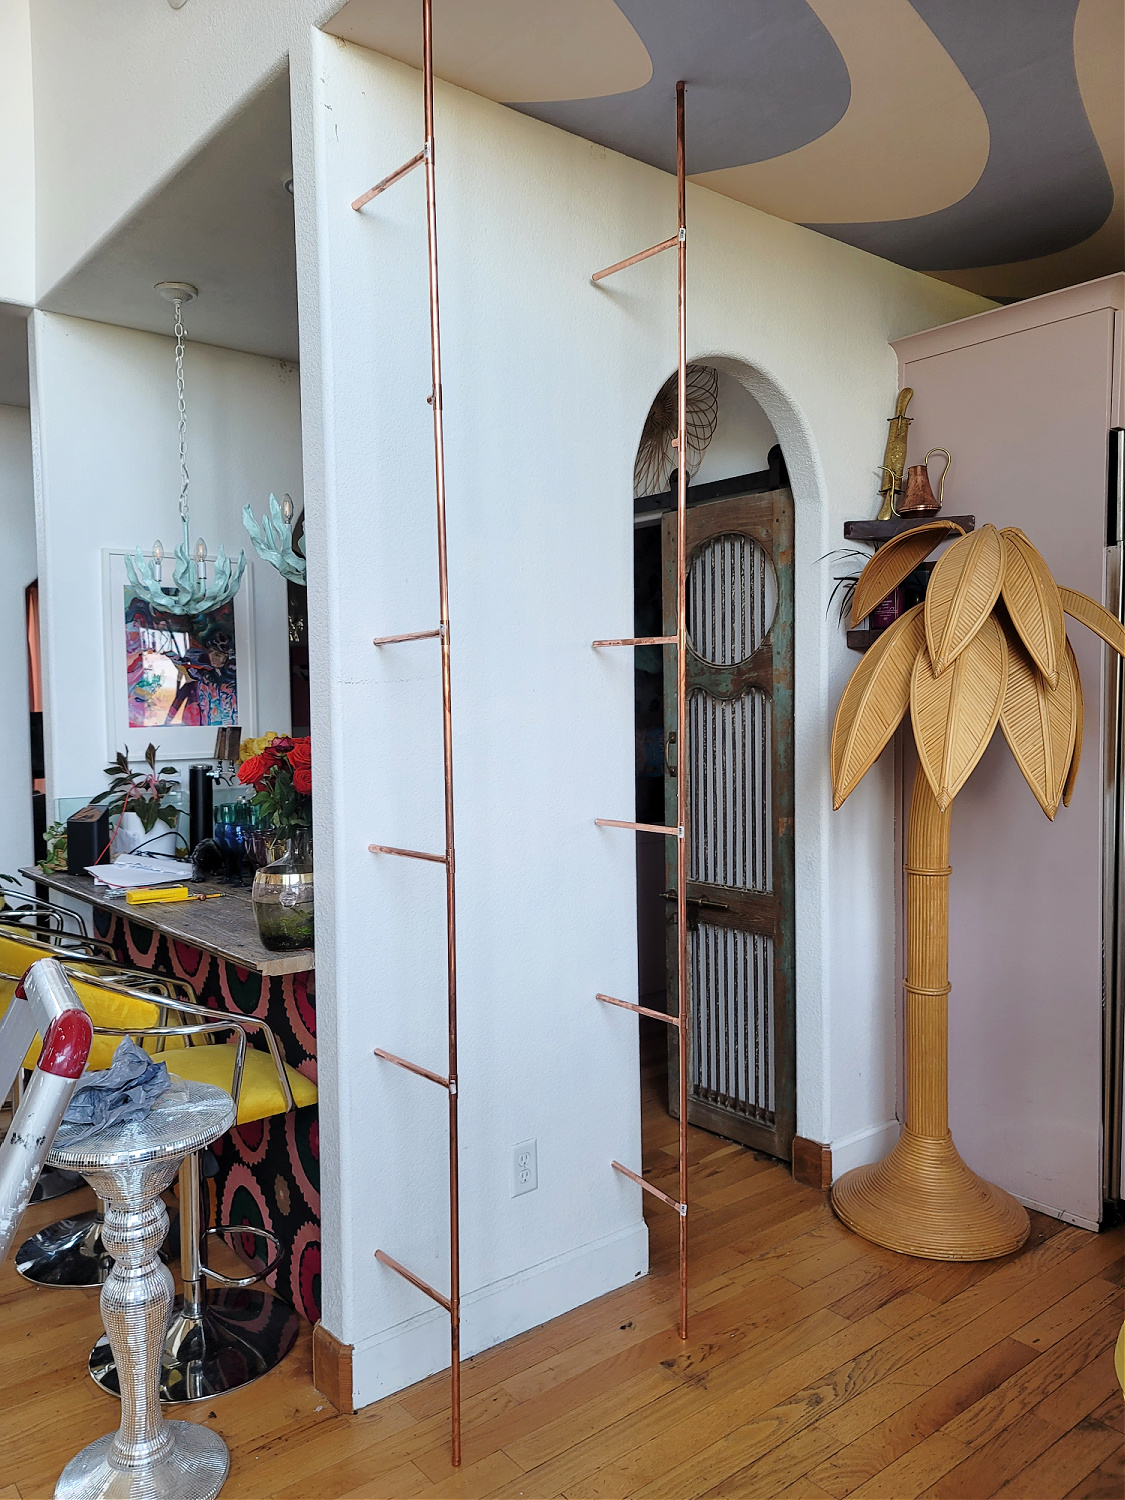
Here we rested it in place to see how it looked. I am so glad we did this because I decided I wanted it shallower. The 10 1/2″ depth stuck out a bit too far. To make the adjustment we just popped off the shelf pieces and cut them down to 9″.
Step 4:
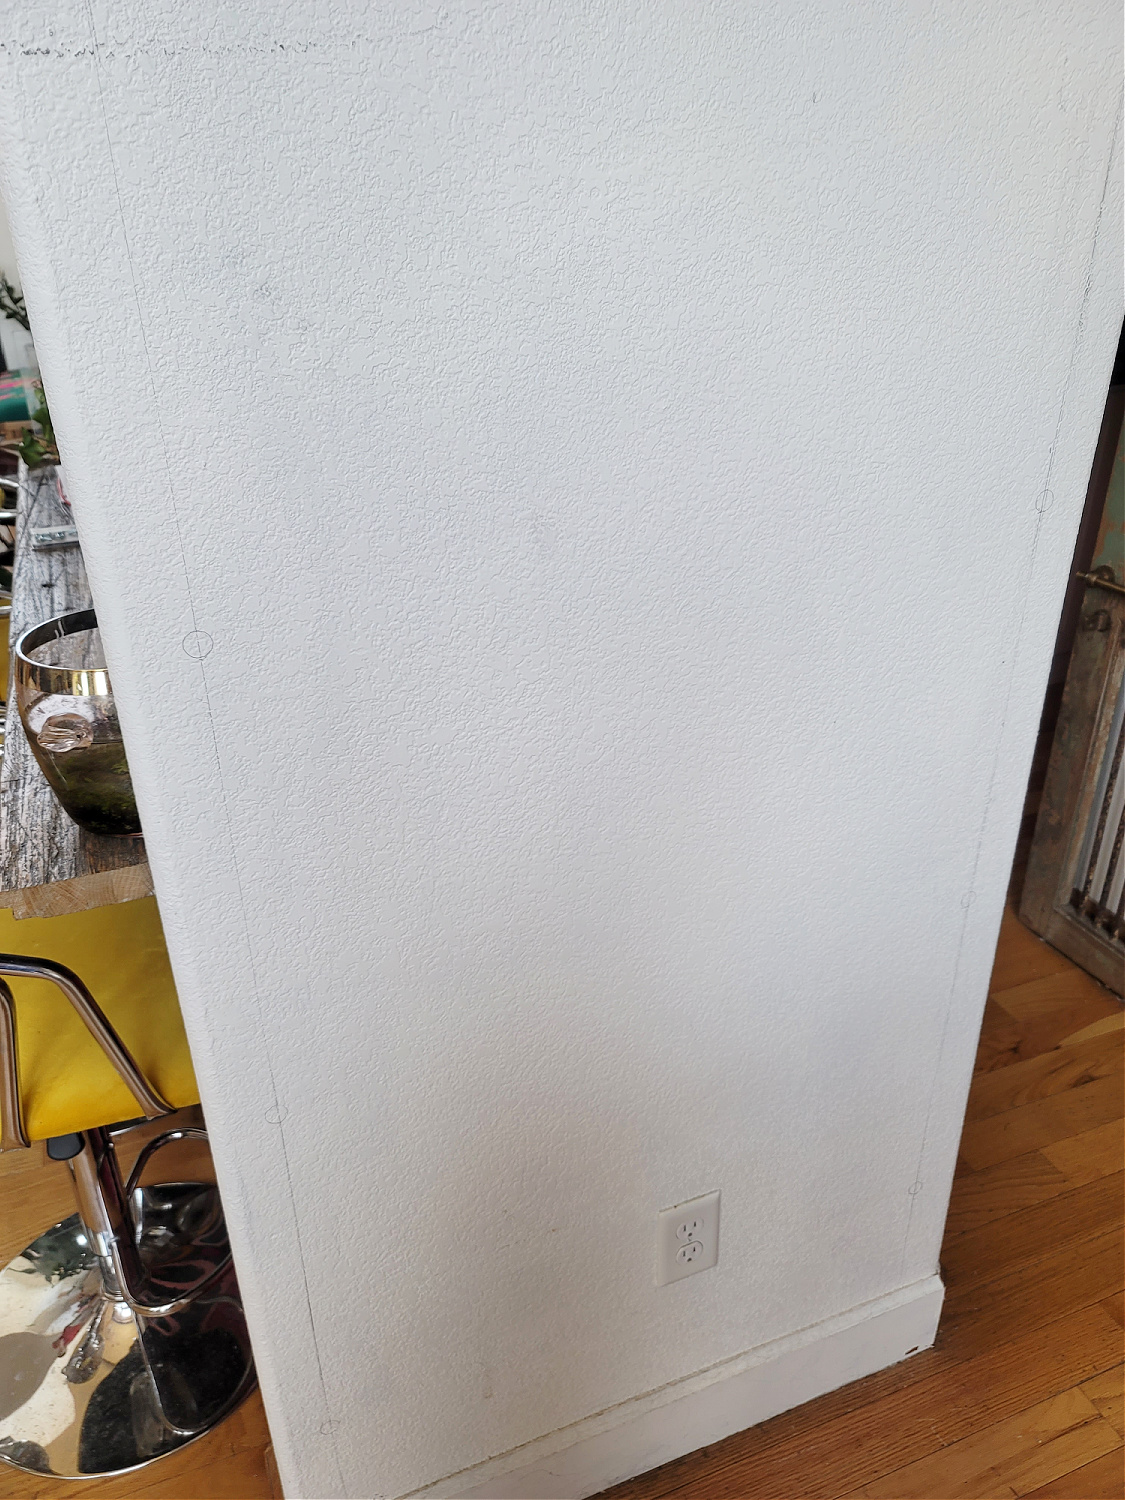
Once you have your shelving dimensions as you want them, its time to mark where your caps are going to be anchored to the wall. We used a stud finder to locate them and then a T square to mark a line on both sides.
We then used the incredibly technical technique of just holding up the shelving brackets to the wall and drawing circles around the ends being careful it lined up right over the stud line. Do this for both sides!
Step 5:
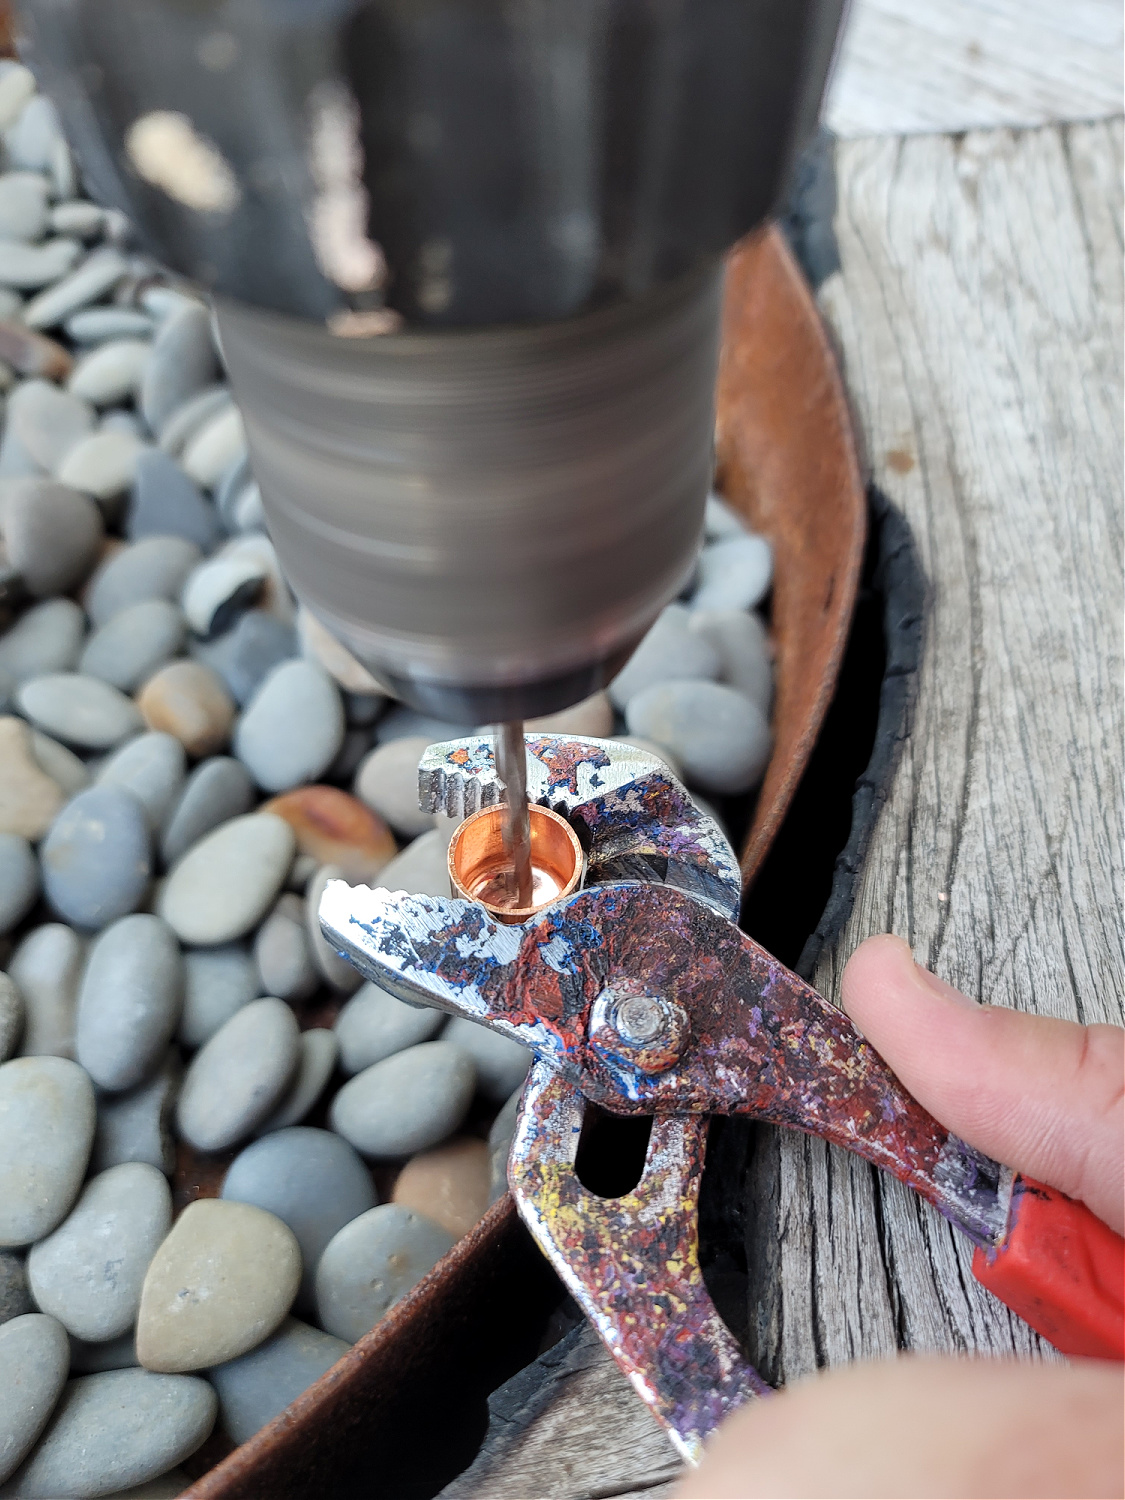
Drill holes into your caps to make way for the screws you will be using to anchor them to the wall.
Step 6:
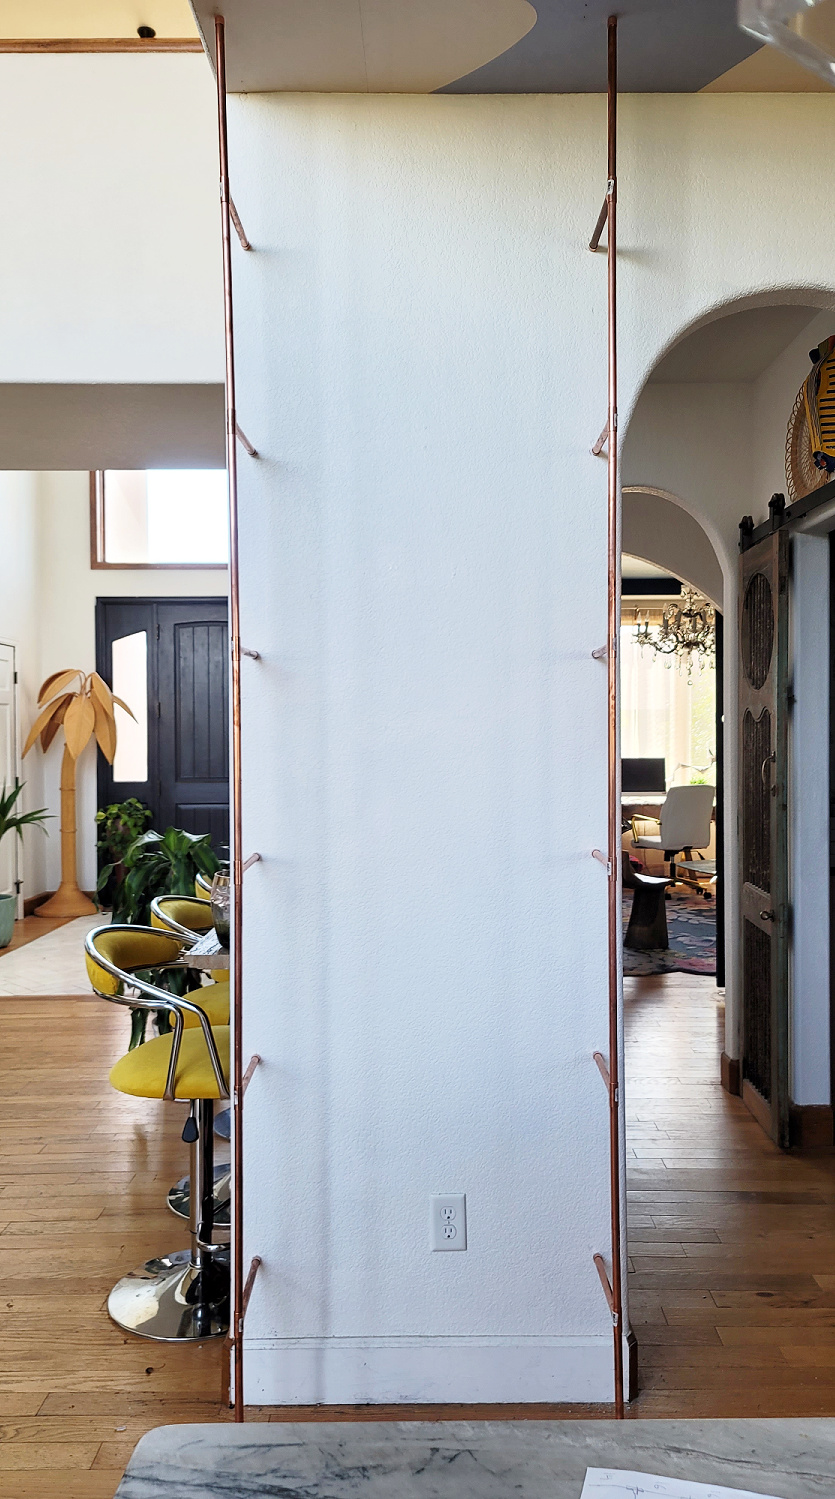
Screw caps to the wall where you marked the circles for your shelf locations and on the ceiling. You can also get additional stability by screwing caps into the floor for the bottom of the shelving unit to anchor the base. I didn’t do this but it is an option if you feel more comfortable.
After we had anchored all of the caps into the studs on the wall and ceiling we popped the pieces into them and tested the stability. It was surprisingly sturdy on it’s own with just the anchored caps. If this worries you though, simply use the Just for Copper glue kit and glue it all together (minus the end caps) before installing!
Step 7:
Clean up the copper and remove the stickers easily using nail polish remover on a paper towel. I had these 2 glass shelves from the previous shelving unit so I set them in here until the other 4 were ready.
*Call a local glass shop to get the glass shelving. They can cut to any size! These were $24 per shelf.

Step 8:
Set in your last shelves and have fun styling it up!

I checked the stability of it as I put things on the shelves and it feels solid. The weight actually makes it more sturdy.
But get a lookie loo at how pretty my glassware looks! It really pops against the white wall and the simplicity of the shelving really lets it be the focal point.
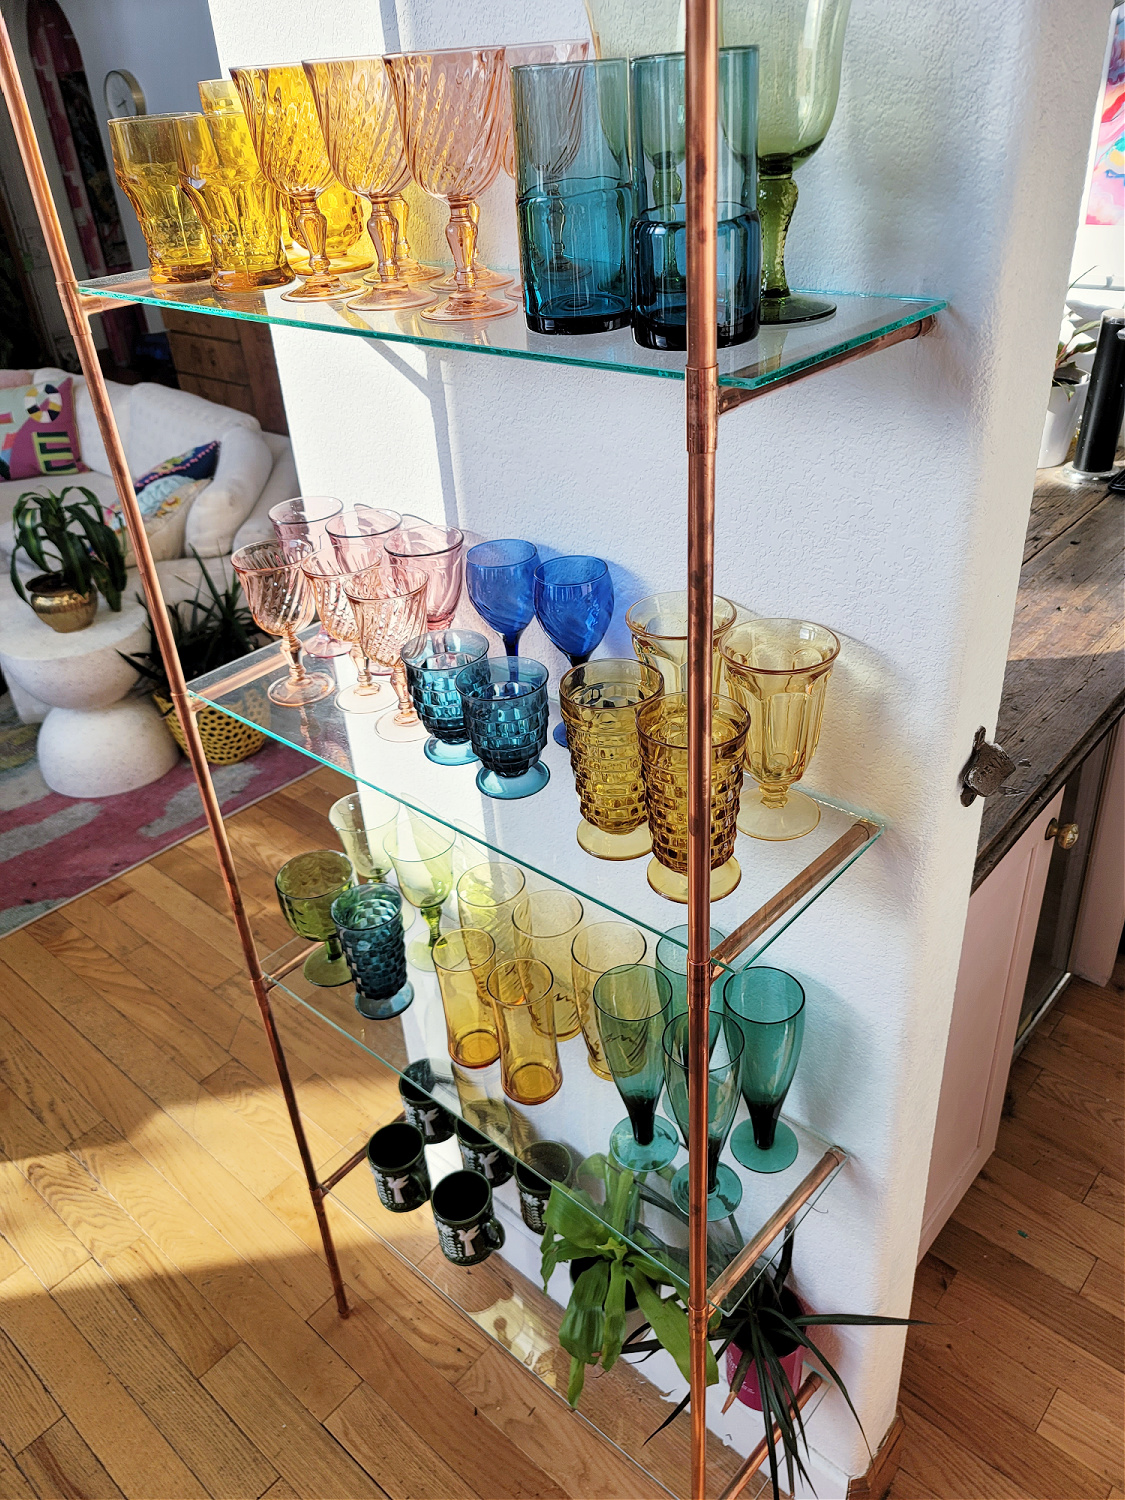
All of my glassware is thrifted.
Here is a view looking up. The caps in the ceiling are also anchored so it holds the entire front in place.
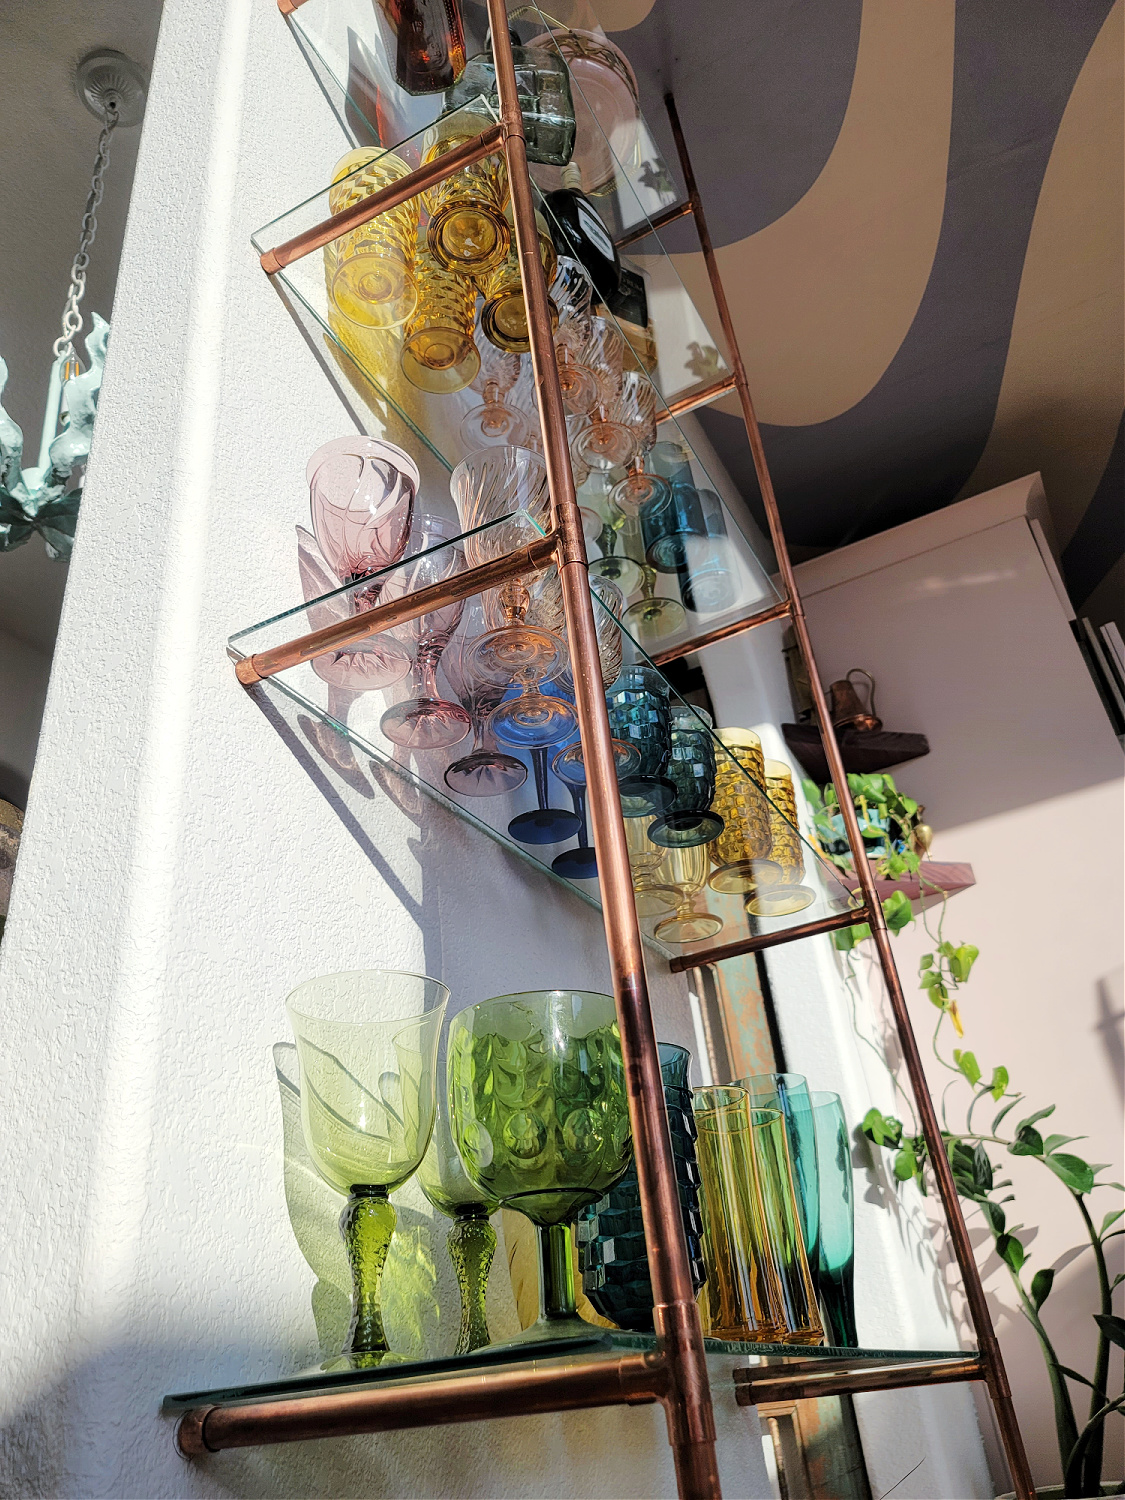
Peep the anchored caps in the wall. Those buggers are never going anywhere.
I absolutely LOVE this! After all these years of feeling like this weird wall was just all wrong, now it’s not only functional but SO pretty.

The floor to ceiling installation also visually makes the space seem larger than it is.
I plan to continue adding to my glassware collection and eventually fill the entire French bistro shelving with a rainbow of colors.
What do you think? Would you take this project on?
I always love to hear from ya so hit me up in the comments!
And don’t forget to hit up the subscribe box to the ole blog….I have an exciting announcement coming up very soon and it involves some serious DIY project action. 😉
XOXOXO





Anna
March 26, 2022Love it ALL!!!
Tina Bousu
April 8, 2022Hi Anna thank you so much!
Becky
July 8, 2022Hi! Your home is so cheerful and fun! Would you mind sharing where you sourced the rattan tree from? I NEED one!
Thanks,
Becky
Tina Bousu
July 26, 2022Hi Becky, thank you so much! Absolutely, the rattan tree is a vintage facebook marketplace find. : )
Karen Smith
July 21, 2022Where did you source your materials?
Do you know of a source that offers more decorative finials for a project such as this?
Tina Bousu
July 26, 2022Hi Karen, I just picked things up at a local big box hardware store. You might be able to find more decorate pieces online!
Talia
October 18, 2022In love! We are doing similar shelving in our basement bar… wondering if the glass is just rested on top? Or is it secured somehow? Do you feel like it’ll move at all? Thanks for sharing!
Tina Bousu
October 29, 2022Hi Talia! It is just resting on the copper structure. If you wanted a bit more security you could pick up some of those little rubber circular stoppers to rest underneath the glass. The only time I have to worry about my shelves moving is when the big pups butts bump them haha. Otherwise it’s not an issue for us. Best of luck with your basement project!
Tierra
November 3, 2022Great job! I love the modern look shelf with vintage wares. Beautiful !
Tina Bousu
November 6, 2022Hi Tierra! Thank you so much
Brittany
November 3, 2022Absolutely love! Such a great idea, especially after seeing the price for custom made bistro shelving. Question, how much overhang does the glass shelve have or should have, over the piping?
Tina Bousu
November 6, 2022Hi Brittany! Yes this is SO much cheaper than custom or pre-made in this style. I decided to have a couple inches on each side of overhang for stability and balance but you could do a bit more or go down to an inch depending on your comfort level for your shelving.
Randi Dieckman
November 28, 2022Hello! Obsessed with this! You did an amazing job. I am doing something similar but from the counter to ceiling. How do you recommend securing on the counter? I don’t want to ruin the marble countertops. Also, are the glass shelves just sitting on the brackets or is there a way to secure the glass shelves? Thanks so much!!
Tina Bousu
January 4, 2023Hi Randi! You can try using a clear silicone and set the base pieces into that. It would be easy to clean up any excess and given its clear it shouldn’t be visible leaving a crisp look.
Katie
July 4, 2023Love this. I saw that you secured the end caps to the studs on the wall and ceiling, but then how did you get the rest of the framing to fit in the end caps? Because I can see how the framing would slide into the wall end caps, but not the ceiling at the same time. Or is there enough “play” in the wall supports that you can set the entire frame into the ceiling caps, then Set the wall supports?
Tina Bousu
July 6, 2023Hi Katie, thank you so much! We secured all of the caps first and then I took the framing (which I made beforehand) and popped each piece into the caps. I didn’t have any problems with the wall caps and the ceiling caps, I had done alot of prep work and pre-measuring so everything would line up perfectly. The wall pieces have a little bit of wiggle until they are secured into the caps but there is a little bit of wrestling with the top caps to the bottom. I decided not to screw into the floor but use clear silicone adhesive for those bottom caps. No issues whatsoever! I hope that helps
D. Fuller
August 1, 2023Beautiful but not for beginners.
I needed more pictures of each step
Thank you
Tina Bousu
August 24, 2023Hi, what step did you have trouble with? Then I know what to take more pictures of next time! Thanks
Erica
August 16, 2023I noticed no one else asked this so I’m guessing it’s a dumb question…what tool did you use to cut the copper pipes?
Tina Bousu
August 24, 2023Hi Erica! Thank you for asking this I must have forgotten to address it. You can use a chop saw with a metal cutting blade or an angle grinder.