This Thrifted Bench Got a Gilded Makeover!
Who is totally vibing DIY makeovers on thrifted pieces? 🙋♀️ I’ve got another “blah to ta da” project today, a thrifted bench!
I spotted this beauty on facebook marketplace. The pictures were dark but I was pretty sure I could spot some carved detailing on the frame. Combine that carving with the fabulous ornate shape and my mind immediately went to gold.

You can see the wood grain isn’t very pretty so the stain isn’t doing it any favors and the detailing is barely visible.
Here’s a shot so you can really see the depth of the carving details and the rounded edges.
 It’s a really great shape and the open sides add extra interest.
Of course my plan was to gold leaf it, the shape and carving just screamed for something bright and over the top. So I began by removing the top which just screwed to the base so this was easy to do.

I found this stamp on the top rail after removing the cushion which was a pleasant surprise!

Here she is ready to go. I opted to set it up on my kitchen island for the easiest gilding application. There’s an old felt blanket underneath because gold leafing gets messy.

Here are the things that I used. Mona Lisa gold leaf adhesive and 2 packages of gold leaf sheets (both from Amazon) with any brushes you have around.

Ideally you want one brush for adhesive application and one really soft but full bristle brush for removing the excess leaf.
I have gold leafed before (peep my scalloped mirror and stairs projects!) so I was confident in how I wanted to do this. As usual I dramatically underestimated the amount of time it takes when you have a bunch of nooks and crannies to fill in. If you decide to gild anything with grooves be prepared for at least a few hours (or more) depending on the size of the piece.
Starting on one end here’s an in process shot. The brighter color immediately made that carving detail stand out.

Steps of the gold leaf process:
- apply thin layer of adhesive to a section. Let it set until adhesive goes from milky to clear.
- apply gold leaf very gently using the tissue piece on each gold leaf sheet and gently flatten with hand or clean brush.
- continue process until clear adhesive section is covered in leaf.
- you can now use a clean brush to gently brush off the excess gold leaf on the section that’s been covered or wait to do this until the end.
- repeat in sections until entire piece is covered

I like to brush off excess as I go so I can see if I need to go back and fill in anywhere/missed any spots before continuing on.
Here she is almost covered. You can see I have the top side on the back and some areas on the end to go over and clean up. But really close!

This also shows you how messy it gets. I actually vacuumed the floor every half hour/hour because flakes were flying everywhere.
Once you finish your gold leafing you have to seal it. Since the gold leaf sheets aren’t real gold they will tarnish and turn an ugly dark color over time and exposure to touch/etc. So sealing it is super important to maintain that gorgeous gold color and all of your hard work.
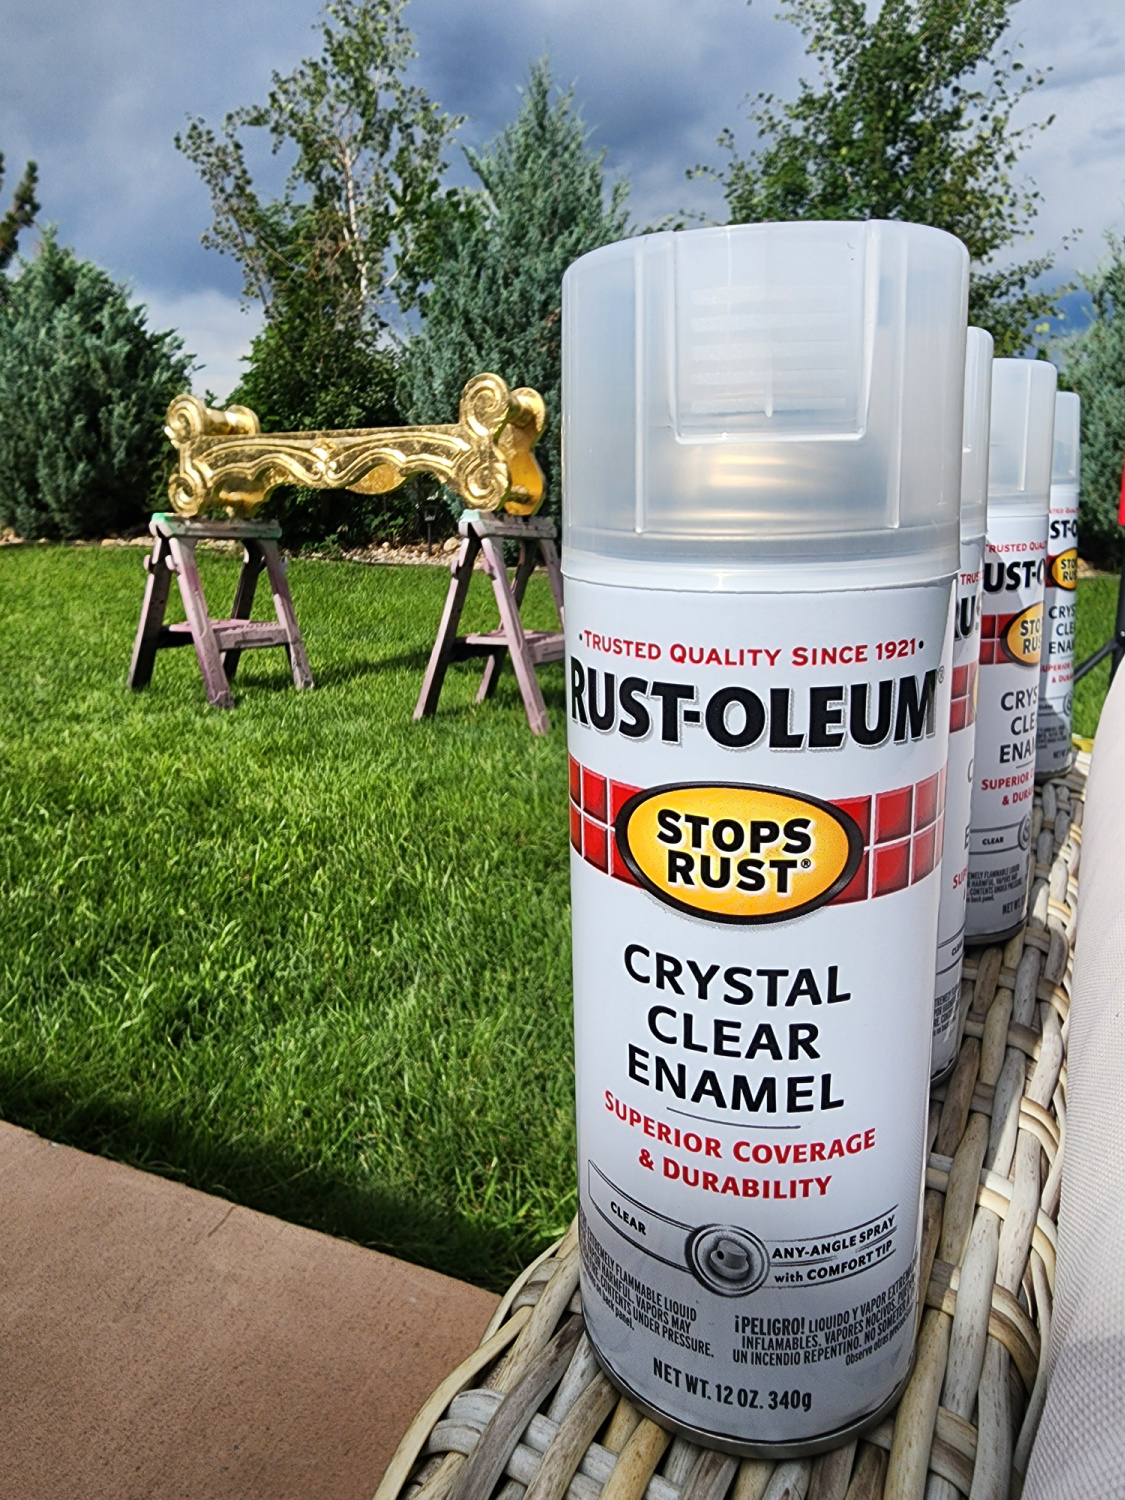
I’ve used a couple of different sealers and this one is my favorite for 2 reasons. 1. its’ really easy to use and very fast to apply. 2. you get a good sealed coating on top of your gold leaf. It’s also really reasonably priced and easily accessible. (I picked this up at Lowes)
Here’s a little shot of how it looked freshly sprayed with sealer and drying. I propped it up on saw horses so that I could easily get every angle inside and out, worked like a charm.

After reattaching the seat (I kept the fabric because it was in great shape and a beautiful color) I placed it in the bedroom!
The foot of the bed seemed like the perfect spot and it picks up on the gold in the rug as well as the gold leaf arm swan chairs in the corners.

The sealer slightly darkens the gold leaf into a richer tone. You can see I did leave just a hint of dark showing through in most of the carving areas. This was to create a bit of a shadow effect with the carving to highlight the dimension.

Here it is up close. I didn’t want it to feel like a new piece but rather something very old and I think it worked out pretty well.

The chairs in the corner are vintage finds from a local antique mall. Can you ever have too much gold in a space?! Nah!

Here’s that side profile of the rounded edges. I covered the interior as well as the exterior.

I’m really happy with how it turned out! A little imagination and time combined with just a few inexpensive materials left me with a one of a kind piece on a budget.

One might ask why not Rub’n’Buff it instead? I wanted a really luxe look and even though rub’n’buff can absolutely give you that I don’t think it has quite the same dimension as gold leaf. So for me it was worth the extra time and effort. But I can absolutely see how rub’n’buff would be a fantastic alternative.
What do you think? Have you ever gold leafed anything before? I’d love to hear how it went in the comments.
And don’t forget to pop your email in the subscribe box for all the latest when it goes live!





Jamala
September 11, 2023Looks absolutely stunning in your beautiful room..
Tina Bousu
December 19, 2023Jamala! Thank you so much lovely!