How I DIY’d My Own Counter Stools
I have been on the hunt for some really amazing kitchen counter stools. (see my top faves and my requirements list here) I’ve been unable to commit to anything when I had the idea of making my own, ok partially making my own DIY counter stools.
DIY Counter Stools
We recently had an At Home store open in our area and I went for the first time last week. I shared the entire visit on IG stories including these super cute bar/counter stools.

Sadly the round seat is way too small, when I tested it my rear end was spilling out on all sides. Either I have a giganto rear or these seats aren’t realistically sized.
Later I came across these lovelies. They were the exact shape I had been looking for online. A curved back, cushy looking seat, and a pretty light blue color.
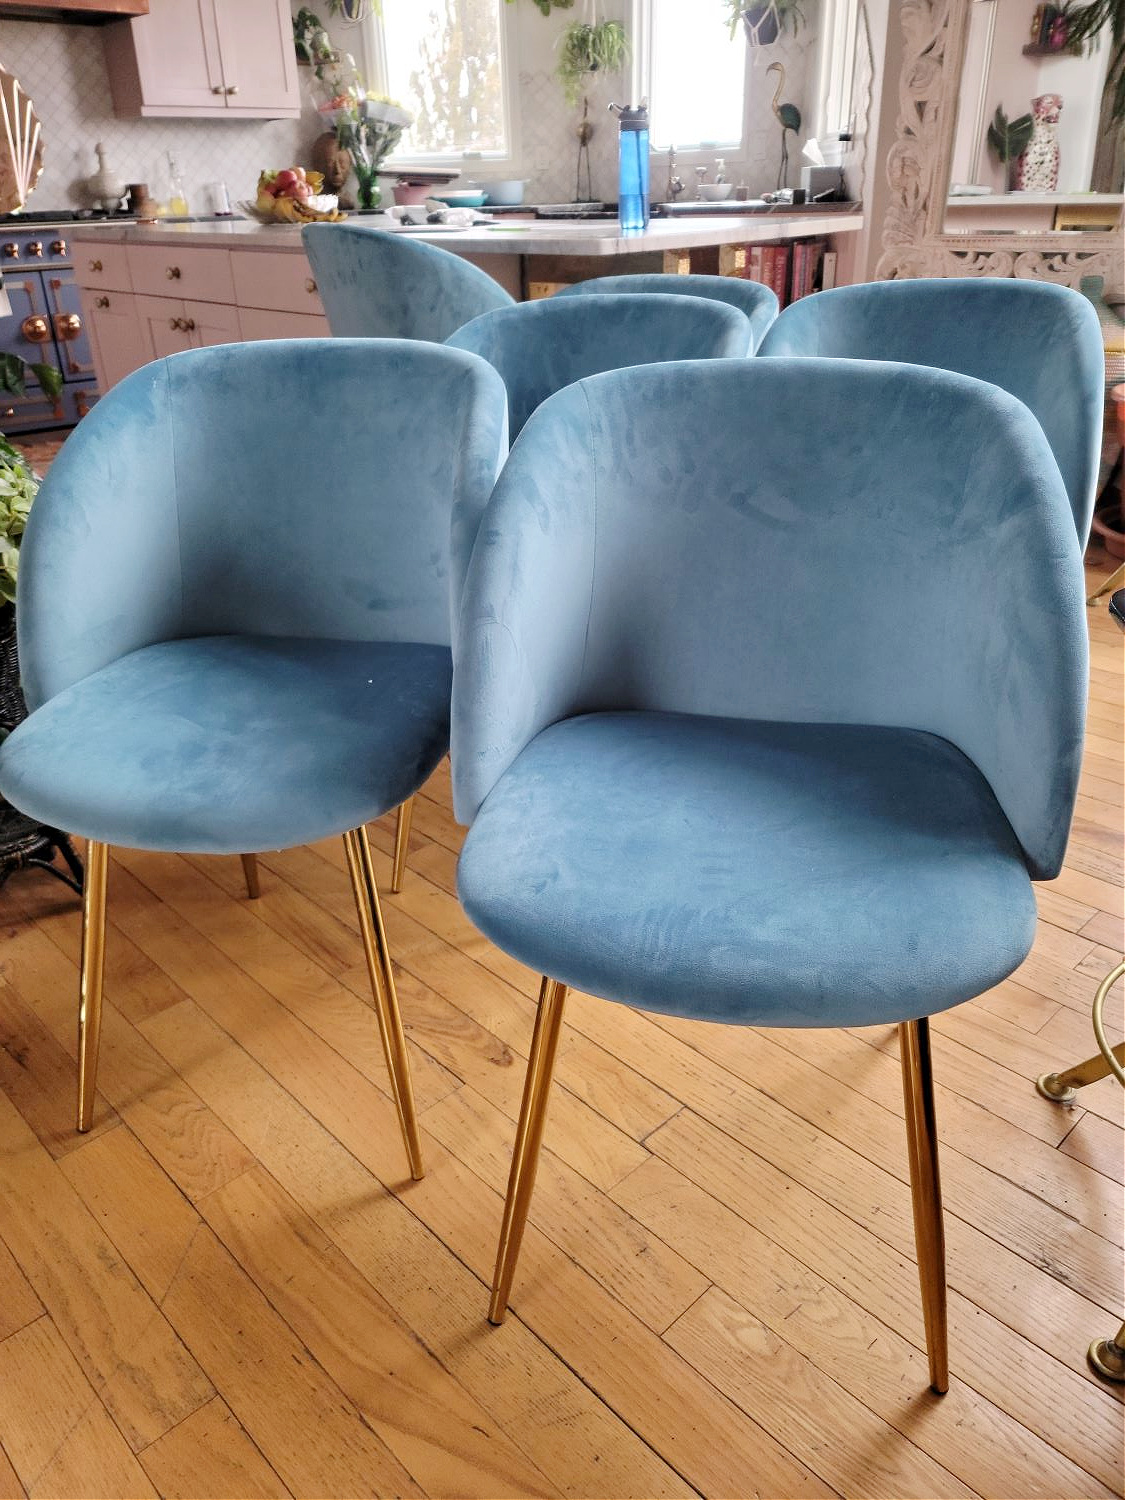
When I shared these in IG stories, I lamented that I wished they had come in stool height. A few folks suggested getting different legs which I had considered, but I figured the cost would end up being so high it wouldn’t be worth it.
I did some research when I got home and still couldn’t find this shape in the right counter height online. That’s when I remembered the way-too-small-for-a-real-person’s-arse counter stools (above). I did the math and total it would cost $210 per stool. ($60/bar stool and $150/chair)
Luckily, I had signed up for their free perks program which comes with a 10% welcome coupon. The coupon brought the total cost down to $189 per stool. That was low enough that it was worth trying!
I took the hubs back with me to check them out. We both sat in the chairs and inspected the bases to see if this would be do-able. Turns out the chairs are crazy comfy and we felt a solid 70-80% sure we could make this work, so we crammed 6 bar stools and 6 dining chairs in the car and off we went.
First up was disassembling both sets.

I removed all the screws on the bar stool bases.
Here they are disassembled and ready to go.

Don’t the seat cushions look like stacked candy?! Anyone remember Sprees?
Next up I repeated this on the chairs, it was super straightforward and easy.

I saved the screws and washers to re-use.
It took me maybe 10 minutes to do the stools and all of the chairs, which I organized into piles. You can see in the background on the right, that’s the tester stool. We had carefully ripped the bottom fabric off to see how it was constructed and then popped the base on. I went back and stapled it back into place later.

Ready to re-assemble
At this point I turned around from taking apart the last chair and saw that my husband had gotten himself stuck in a barstool base. Apparently he wanted to see if he could fit. I laugh/cried for a good 5-10 minutes before assisting him in achieving freedom.
Imagine him kneeling on the floor my foot on his shoulder and a good heave ho. I was ready to bust out the WD40 if necessary.

Fortunately it didn’t come to that.
Now that he was no longer caged inside a barstool base….
We began reassembly. I held the base in place while he re-screwed it on using the existing washers that came with the stools. Because we knew the base was a solid piece of quality plywood (tester stool inspection previous to assembly) the screws gripped in tightly.
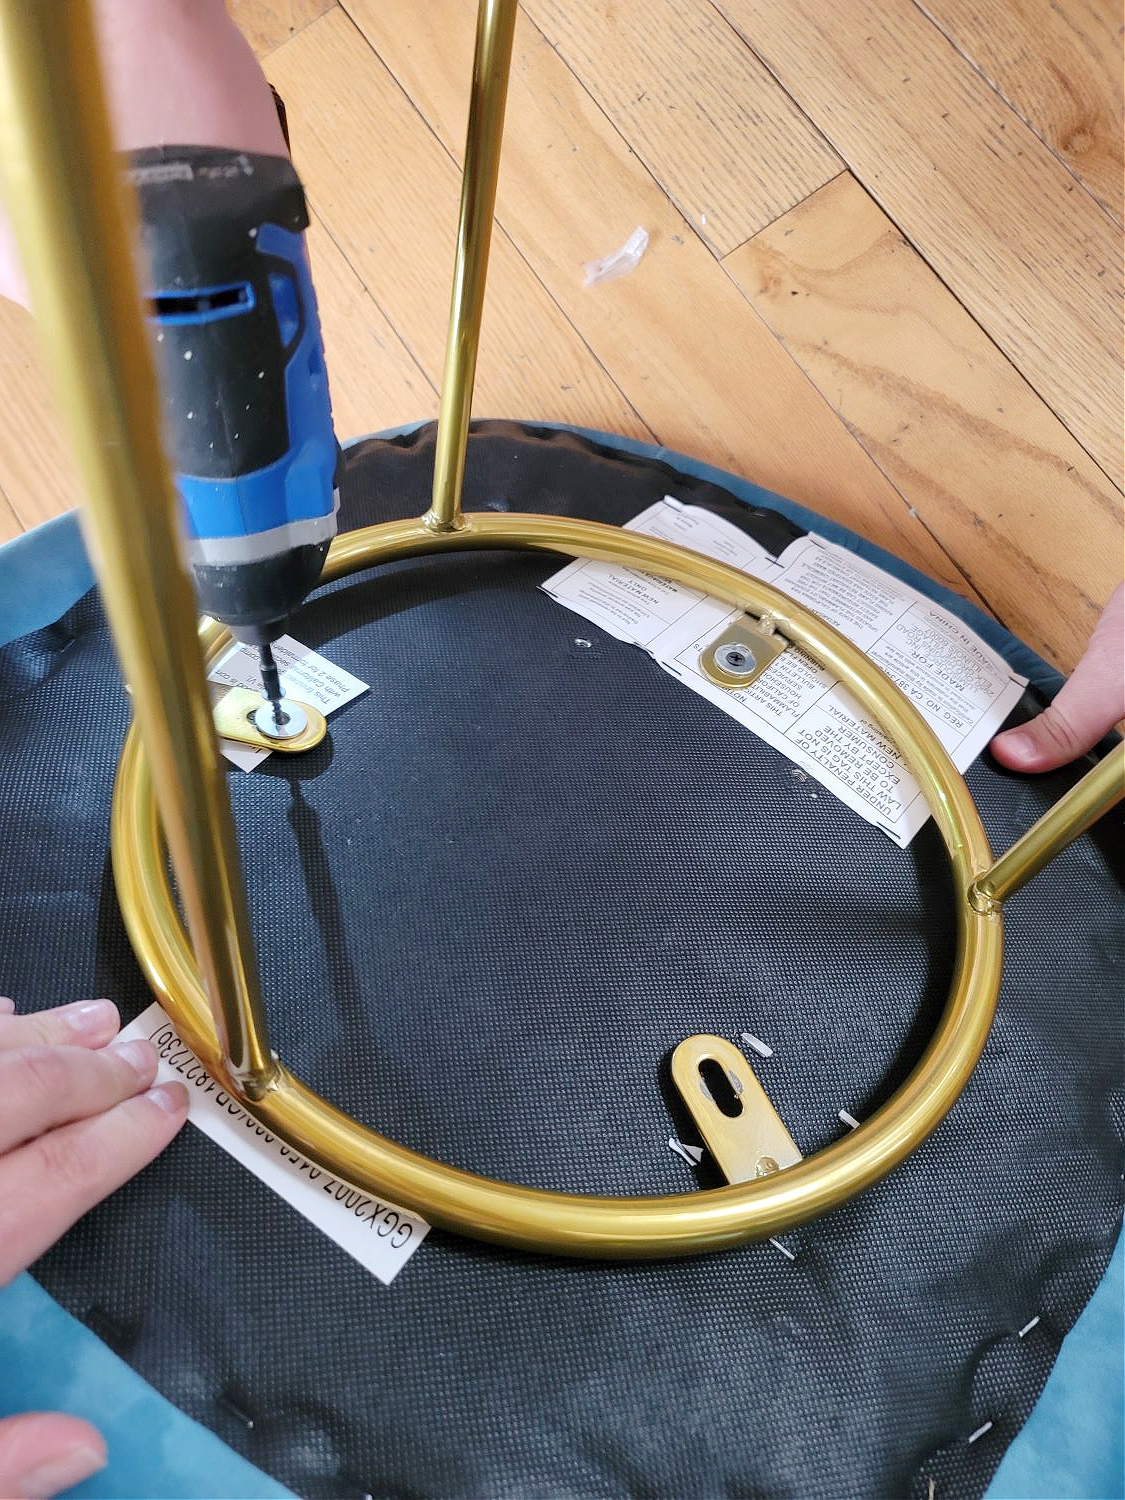
We probably should have measured to insure even positioning of the base on each stool but alas, we eyeballed it.
And the finished product! One of the things I love about these vs all the stools I saw online is the base. The vast majority had legs vs a pedestal/column style base. Our old stools had legs and they were always getting caught on each other.

Curved back and simple column style base with footrest. It’s what I had been looking for.
We tested out the first stool we made (before I disassembled in case it was an epic fail). I sat in it and jiggled around, my hubs did and then the biggest test. Our 17 year old 6’4 240 pound lineman son. He is not gentle and tends to plop. I stood by a bit of nervous while he sat in it. It didn’t move, tip or fall apart. Whew!

It looks like it would tip easily but we haven’t had one stool tip over and we’ve been using them for almost a week.
Now I’m trying to decide if I need to add some fringe to jazz these babies up a bit more!

That soft blue and gold combo.
The seat base was comfy yet solid, they’ve got a stable back form with no jiggling or weakness. The bases support our giant of a son so that’s automatically a win.

They are a bit wider than I wanted but that’s minor.
They are crazy comfortable, we’ve already had dinner here while continuing to talk for over an hour with zero butt or back discomfort. Overall, they are SO much better than our previous stools.

I wasn’t sure we would be able to fit 6 but by golly we did!
Will I keep them forever? I’m not sure, but they sure do a fantastic job if/until the perfect stools come along. But at least it’s one thing I can stop obsessing over, I’m that happy with them. Now I just need to decide whether to fringe or not to fringe.

What do you think? Fringe? No Fringe?
Alas, after several months of searching and coming up disappointed, I’m really happy I DIY’d my own style and did it for under $190 a stool. Sometimes when you just can’t find what you are looking for, it totally pays to think outside the box.
Oh and I intend to find a use for the chair bases and round seat cushions. I was envisioning attaching the seat cushions on the wall for an art installation look. As for the chair bases I was thinking of trying to create some sort of hanging sculptural thing but that’s overly ambitious. When I figure it out what to do with them I will definitely share here!
Have you ever thought of making your own piece by taking apart other pieces?! I always love to hear from you so hit me up in the comments!
And don’t forget the subscribe box to keep up to date on all the latest!
XOXOXO
Have you done DIY counter stools before? Let me know in a comment below!




Linda Hirschfeld
March 9, 2021They’re gorgeous!
Tina Bousu
March 11, 2021Linda! Thank you so very much! xoxo
diane
March 10, 2021NO fringe. in my mind’s eye, I see a ‘center piece’ on the back. something that represents the family. adhered in such a way it its removable and changed out for the seasons or holidays. if you feel set on fringe, I would definitely try out a fringe pinned in place first, or a shawl with fringe thrown over the back. with all 6 stools parked at the counter, it looks a little crowded. pull 2 away, if you have a space to put two into, when not sitting down to eat. but its your house, your home, you decide what works for the family! and I love your home and your use color! its definitely a happy house!!! I always enjoy visiting!
Tina Bousu
March 11, 2021Hi Diane! Definitely planning on testing out fringe options before I do anything permanent. I actually just ordered 4 different colors! Unfortunately I have to have 6, it’s our only space to eat as a family and with 6 butts, they are in and out of them all day. My 2 youngest also like to do school here, that was another reason comfort was a super important aspect. Even though they are a bit wider than I would have liked, they fit the bill in all other ways so you win some you lose some right?! I so appreciate the support and love hearing from you Diane! xoxoxo
Priscilla Hedlin
March 12, 2021Absolutely gorgeous. I love them as is. I think fringe would take away from the beautiful design of the base. Where did you get your island lighting? I love it so much.
Tina Bousu
March 16, 2021Hi Priscilla! Thank you so much! I’m still waiting on the fringe to arrive so we’ll see what a mock up looks like before I make any decisions. The island pendants are from Hudson Valley Lighting! xoxo
Brenda Alston
December 31, 2022Love this! Thank you for posting this great detailed info for the rest of us. That was super generous of you! I love the light blue chairs, I hope I can find them someplace.
Tina Bousu
January 4, 2023Hi Brenda! My pleasure, I love to share them so others might benefit and learn how to do some of these projects too!
Heidi Hoogwerf
December 8, 2024no fringe!!!