DIY Pink Kitchen Cabinets: How to Get a Factory Finish Using Chalk Paint!
Whew! It’s been a CRAZY week and I am feeling really really old. lol We are officially at week 4 of the One Room Challenge and this was my biggest challenge for this project. (see weeks 1, 2, 3) Painting all of my kitchen cabinets Antoinette (pink) using Annie Sloan’s Chalk paint!
A quick recap, the One Room Challenge is a twice yearly online design event that shares how participants completely transform a space in 6 weeks. A huge shoutout to Linda and the team for hosting this event!
DIY Pink Kitchen Cabinets
Ok so first up we cleaned off quite a bit of patina from the copper hood. This makes a bit of a mess so I wanted to do it before we began on the cabinets.
It’s a super simple process of mixing flour, vinegar and salt. Apply paste to tarnished copper, let sit and wash off. You can decide how much patina to remove by the length of time it sits and how many times you apply the paste.
Here’s before:

Just brush paste on….let sit….wash off!
And after! It really shines it up while not completely stripping everything away. See the green? That’s the patina that the paste lifted off.

Check this post for more detailed info on how to do this!
Now the Mac Daddy, the Beef Patty of your Burger and the PB of your PB and J. How I went about painting our entire kitchen using Annie Sloan’s Chalk Paint and Clear Gloss Laquer using a SPRAYER! (and some rollers but we’ll get to that) **A HUGE thank you to Annie Sloan Paint Co. for sending me the paint and laquer for this project!**
Step 1: Clean your cabinet doors and boxes thoroughly. We used this stuff. Make sure to mix with water as per instructions and wear gloves! (we bought cheap plastic ones at Lowes)
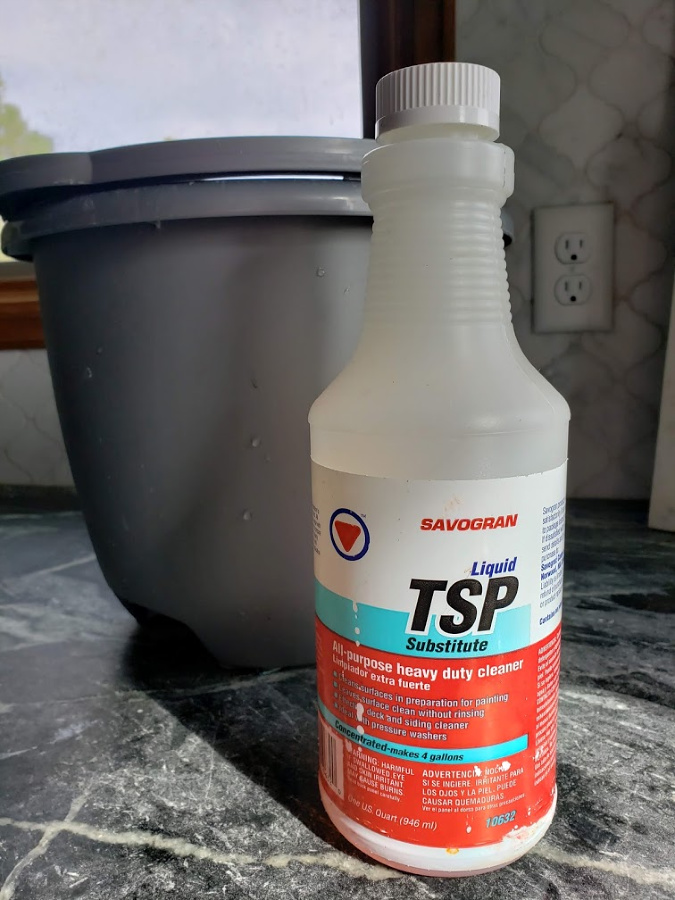
It’s amazing how dirty your cabinets get, I won’t even get into it because it’s embarrassing. But we laid down a heavy sheet of plastic over the marble and scrubbed them down, both sides thoroughly. If you don’t get everything it can show/bleed through your paint!

TSP mixed with water and scrub scrub
Step 2: Lay Out Doors! We bought super cheap-o particle board (I think $7.99 a sheet) to use as table tops and pointed cabinet raiser thing-ys and laid all of the doors out face down first. I began face down so I could get a handle on the sprayer again, work on adjusting the spray for even coverage, etc and not mess up the fronts.

16 doors
We used this Antoinette from Annie Sloan paint and Clear Gloss laquer. And yep I sprayed both products! I highly recommend it, keep reading for how!

We used 8 1/2 tins of the Antoinette to complete the pantry and kitchen.
Here’s the sprayer I used for the entire project. Worth it’s weight in gold my friends.

Step 3: Mix paint with water to get the right consistency to spray. You have the right formula to spray when the paint mix runs through the funnel that comes with the sprayer in 30 seconds.
This is CRUCIAL. If it’s too thick, even by a little it will not come through the sprayer evenly and if it’s too runny it will just get runny and make a mess.
**Also make sure to clean the nozzle of your sprayer regularly with the brush as buildup occurs from the paint and can cause splotches.
**I did 3 coats on the door fronts, drawers and cabinet boxes. This color is light and my cabinets are DARK charcoal so it took 3 coats to get a good even coverage.

Here’s a door after 2 light coats, not quite fully coated on the edges and a few spots in the middle. Hence needing 3 coats!
I let the doors dry overnight then flipped to do the other side and then dry overnight again. I wanted to make sure that the paint was thoroughly dried before flipping on those points, we don’t want ugly point holes or dents in our perfect paint finish!
Step 4: Paint upper cabinet boxes. I broke it up into the upper and lower sections, easier to manage and I had to get the doors out of the garage before I could spray anything else so while the doors were drying I worked on the upper boxes so they would be ready when the doors were ready to re-install.
To do this I used a sponge roller, specifically for cabinets (local hardware store), watered down the first coat as stated in instructions and went to town. Here’s the first coat, don’t panic it’s always ugly! Spraying looks roughly like this too. See why I needed 3 coats?!

Think of the first coat as a primer.
After 2 subsequent coats (1 full and the third more of a touching up) I was left with this…

A beautiful soft pink finish.
Step 5: Apply clear gloss laquer to doors and boxes. I first tried rolling the laquer on the doors, forgetting to water it down 10% first and it came out super splotchy. Devastated I realized I forgot the water. Then I got desperate and decided to try spraying it.
Definitely SPRAY it! I mixed the laquer with water and did the same funnel test. At the right consistency I hooked up my sprayer, said a prayer or 10 and began. It worked like a charm!
Spraying it evened out the finish and was 10 million times faster. I sprayed on a total of 3 coats of laquer, one more than recommended. I did this as I was using a watered down version of the laquer so I wanted to be sure there would be adequate sealing of the paint.
Once I got the laquer sprayed on both sides of doors (with drying time overnight in between) I applied it with the roller, first coat 10% water added then second coat full strength, to the upper boxes. After drying we reapplied the doors!
Step 6: Remove, Number, and wash/scrub drawers and bottom boxes using same method as above. We did this outside to prevent spilling the TSP mixture.

I numbered correspondingly all the doors and drawers so we knew where they went after painting.
Step 7: Wrap drawers to protect them from spraying paint and laquer. I had the idea of using garbage bags taped to cover the inside of the drawers. It worked amazingly well and only took maybe 20 minutes to do all of the drawers.

Wrap the bag up from the bottom, use tape to seal at the top edge.
Step 8: Set/stand drawers face up when painting. This allows the paint to get evenly across the fronts and if you have any dripping it goes down the sides versus the entire fronts.
Step 9: After painting the fronts and letting those dry set them up on the tables overhanging the edges so you can paint the inner part of the front panel.

You can see here how the backs are still dark grey, after letting the fronts dry we moved them up to give me a good access point to spray the backs.
Step 10: Attack the lower boxes while waiting in between coats for drawers. Same application of 10% water mixed with paint for first coat and then full strength paint coats after that.
In the shot below you can see the slight color difference between the top and bottom cabinets. This is because the bottom is just the coats of paint with no laquer. The laquer slightly darkens the paint color as you can see in the uppers.

Make sure to do LOTS of taping off of everything, this makes painting go so much faster!
Step 11: Apply watered down laquer using sprayer to all sides of drawers (3 coats) and apply 2 coats (1 watered down and then 1 full strength) to lower boxes.
Step 12: INSTALL! After letting the laquer dry overnight we re-installed our drawers. I couldn’t live with everything all over the counters haha. But the product says it takes 14 days to fully cure so we will be extra careful with everything for the next 2 weeks to let it really set.

Holy moly am I LOVING this color! It makes the kitchen feel 10 times bigger.
This shot is to show you the sheen and finish I was able to get using the sprayer.

Ooo la la
You are going to have to wait to see the whole thing cause I’m terrible like that. Totally kidding, I just haven’t shot the entire space yet. In 2 weeks I’ll be sharing the reveal with the Antoinette in all of it’s stunning glory!
This project was one I have thought about for years but I couldn’t find the perfect color to go with my reclaimed copper hood and blue/copper stove. I found it in this color!
It took me a week from start to finish, working almost constantly. But it was so completely worth it and I must say, given my first ever experience using Annie Sloan’s Chalk Paint (first in the pantry) and now in the kitchen I am a HUGE fan.
This paint is beautiful, gives an incredible finish and was really easy to work with. I will absolutely be using this again for other projects. Our pantry has had no issues with wear and durability over the last 3 months and it gets major use. So I have absolute confidence in this being a long lasting application.
What do you think of these pink kitchen cabinets? Have you ever used Annie Sloan’s chalk paint for a project? What was your experience? How about painting your kitchen pink?!
I always love to hear from you so hit me up in the comments!
And don’t forget to subscribe to keep up on the latest with this project.
P.S, There are SO many amazing spaces being transformed this round so make sure to pop back over to check out their projects here!





Suzi Q
October 23, 2019Tina, I simply adore this pink!!! The kitchen is really stunning ! Matches well with your other things and colors! Fantastic!!!!
Never take this project on myself, HOWEVER, this. Poor and this paint I will def. use- on something!!
I wonder if I can use it on furniture?
I’ve really wanted a soft pink wall too in my bedroom….what do you think???
Thanks for sharing! You blow my mind in the best way!!!
Tina Bousu
October 24, 2019Hi! Thank you so much!! You can most definitely use it on furniture and floors and just about any surface. This stuff is amazing, I am already thinking about other projects to use it on. You should totally go for it in your bedroom, this color is SO pretty! It’s not too pink, not baby-ish, it’s almost a neutral with a pink tint. xoxo
Anna
July 7, 2020Absolutely lovely!
Was this the first time you used a sprayer? I want to refinish our kitchen cabinets but a little nervous. Seems the sprayer works better than hand painting.
Thank you!
Tina Bousu
July 7, 2020Hi Anna, nope we also used it to paint our Ikea Applaro sectional. I really like the finish the sprayer gives, no brush marks and perfectly even. You could use a different paint too just make sure it’s thin enough to come up through the sprayer. And do a couple of test runs on a sheet of cardboard or plywood. This will let you test your paint thickness, finish and help you get a feel for the sprayer without going after your cabinets right away. Good luck and you can do it! xo
Alisa
October 23, 2019Holy moly! I love your kitchen!! That color is soooooo so good.
Tina Bousu
October 24, 2019Hi Alisa! Thank you SO much!!
JAMALA WALLACE
October 24, 2019Ooolala is correct!! That soft pink is looking wonderful especially with the ceiling pattern..I truly love how boldly you work in your design style! It’s always exciting to watch
Tina Bousu
October 24, 2019Thank you Jamala! I always like to push myself and keep my mind coming up with bold and fresh ideas. Thank you for constant support lady, I so appreciate it! xoxo
Miranda Wulfekoetter
October 23, 2019I adore that color! You guys are killing it over there– high fives all around!
Tina Bousu
October 24, 2019Miranda, thank you sweets! I am SO obsessed with this color, I can’t stop staring at it. That’s totally not weird right?!
Susie | Chelsea Project
October 23, 2019Beautiful color and coverage, Tina. You’ve sold me on using a sprayer. Lookin so good!
Tina Bousu
October 24, 2019Thank you Susie! Honestly the sprayer saved my life lol. It would have taken me forever using a roller as I had so much to do. Using the sprayer was not only much faster but it gave me that awesome perfectly smooth and factory like finish. I highly recommend picking one up. I can see myself using it for tons of other projects!
Kate Pearce
October 24, 2019Tina this is looking so killer! My daughter and I are obsessed. She keeps asking to check out the updates on the “green kitchen”!
Tina Bousu
October 24, 2019OMG Kate that is so awesome! haha I love that she keeps asking about it! It’s definitely an imagination run wild kind of space so it makes my day that she wants to see how it’s changing! We’re almost there xoxo
Nancy McKee
October 29, 2019Thank you so much for sharing this information! It is inspiring AND informative. I have owned the Home Right sprayer for a couple of years and it is indeed amazing!
Tina Bousu
October 30, 2019Hi Nancy, it’s such an awesome sprayer and it can be used for so many projects! Thank you so much for stopping by!
Yev
November 8, 2020Hi Tina,
It is very beautiful ❤️
I would also like to paint my kitchen cabintes, but they are chipboard with kind of laminated finish.
One handyman told me I can’t paint those, but I have been reading upon it and it seems that Annie Sloan might work.
I used it to refurbish my kitchen table, it worked brilliantly, but it was real wood.
Many thanks for your advice ❤️
Tina Bousu
November 10, 2020Hi there! Thank you so much! I haven’t tried it on anything laminated, I would suggest trying the chalk paint on just one of the doors to see how it goes. If it takes then you can do the whole kitchen, if not at least you didn’t waste a bunch of time. Good luck!
Dache
August 27, 2022This is so cute, but the show stopper for me is that mirror above the stove, really cute, I’m curious where it came from?
Tina Bousu
August 30, 2022Thank you! It’s vintage find from a local flea market