Copper Hood Stripping Experiment #4327
Following on the heels of the updated white paint in the kitchen I promised I would talk about what we did with the copper hood! (see that here)
A recap in case you didn’t see that one, the hood is old. It’s reclaimed and it has who knows how many years of gunk and patina on it.
This is what it looked like way back when it was delivered…look at how dark it is from those years of use.

Don’t judge the pics, this was way before I had any kind of semi decent camera (le cringe)
I hemmed and hawed for a long time on whether to strip it. I decided to give it a go and have since done 2 rounds of a treatment prior to last week.
Copper Hood Stripping
So here’s what we did the first 2 rounds. We made a paste of vinegar, salt, and enough flour to create a runny paste. Watermelon is for the margarita/s you’re going to need doing this.

No set amounts, just pour vinegar dump some salt, mix and add flour.
We brushed it all over the hood and let it sit. You can see the greenish color as it absorbs the patina. Then wipe off with wet rag.

It definitely got brighter after this treatment. But once it fully dried it was much darker.
We did that twice over the course of a couple of years but never went far enough to really strip it. Here is from fall of 2019 we had done a paste treatment and got it to this point.

Lighter but still lots of patina.
Fast forward to today, I am so over the dark patina. I want this baby to be bright and maybe not fully shiny like a brand spankin new penny but dang it I want to get somewhere in the realm of similar to the copper finish on the range.
First thing was the same paste treatment. It didn’t do much so we decided to get crazy.
We ordered 800-3000 grit sandpaper to do a wet sanding treatment on it. You could feel grime just stuck on there and we wanted to sand it off and essentially buff it.
Here is after we did the wet sanding and wiping it down to dry it.
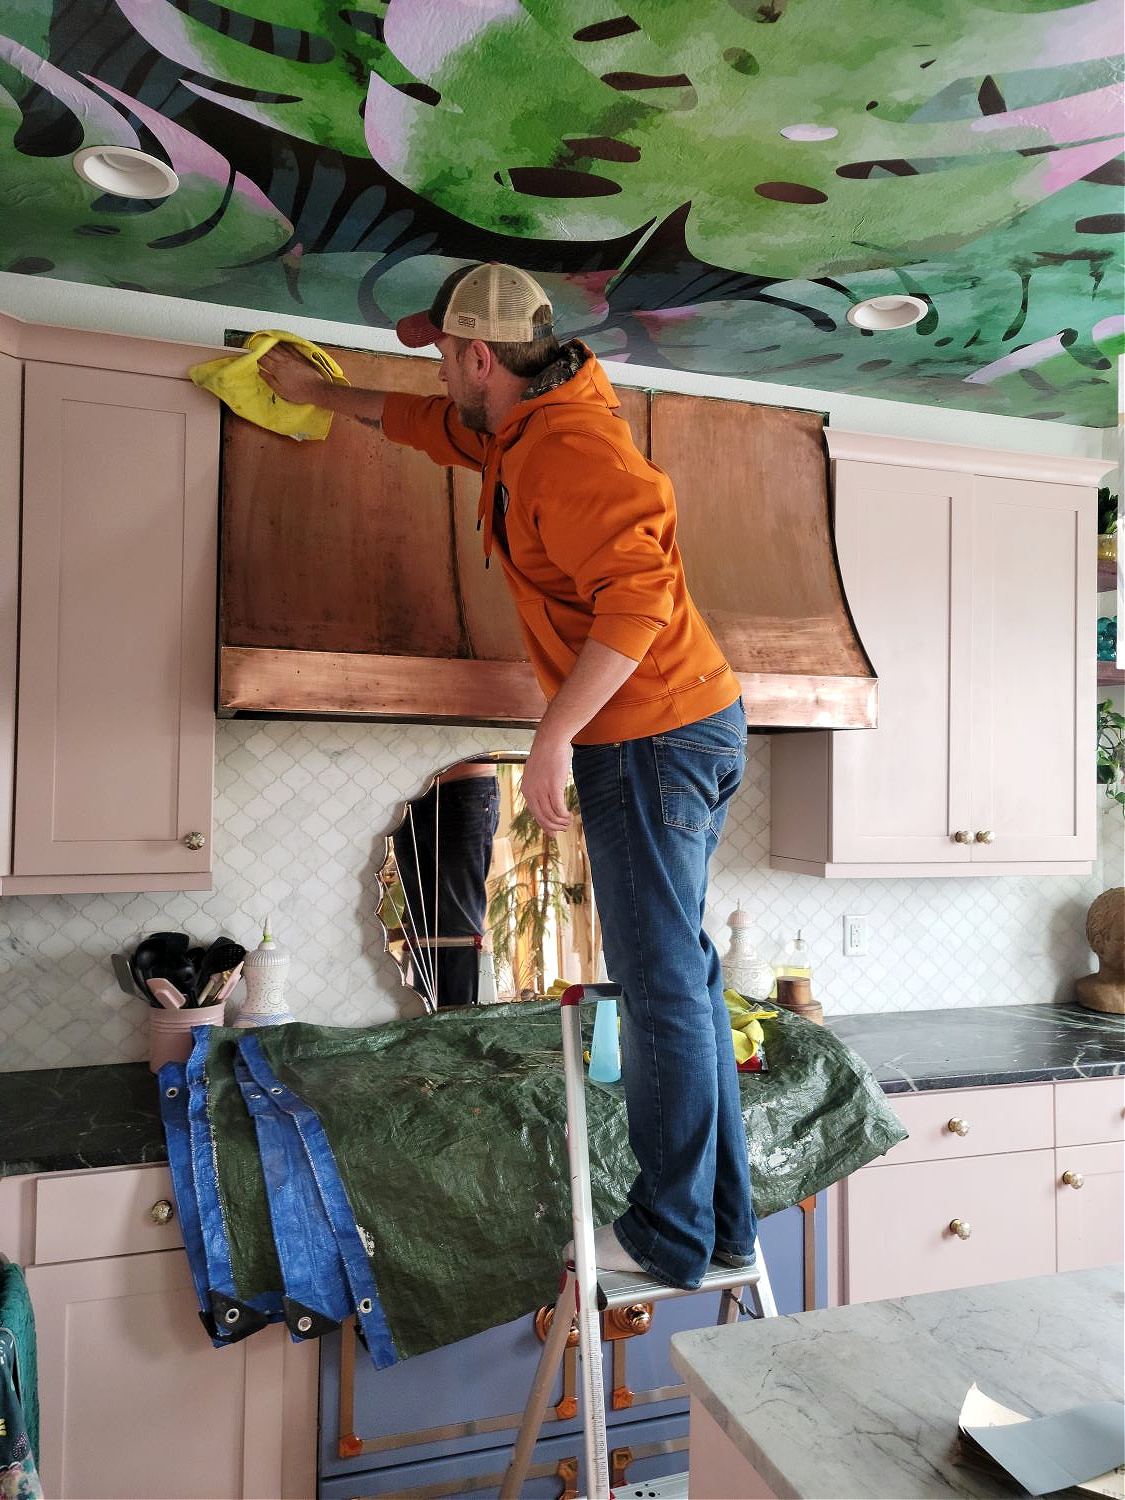
To do the wet sanding we sprayed it with water and sanded in small sections, focusing more heavily on the really dark areas with the most buildup at the lower grits of 800. After that we came back with the higher grits up to 3k to buff.
Once it dried I was still not happy with how dark it looked. Although it was much better and almost silky smooth. We mixed up a mixture of lemon juice, vinegar and salt and put it in a spray bottle.
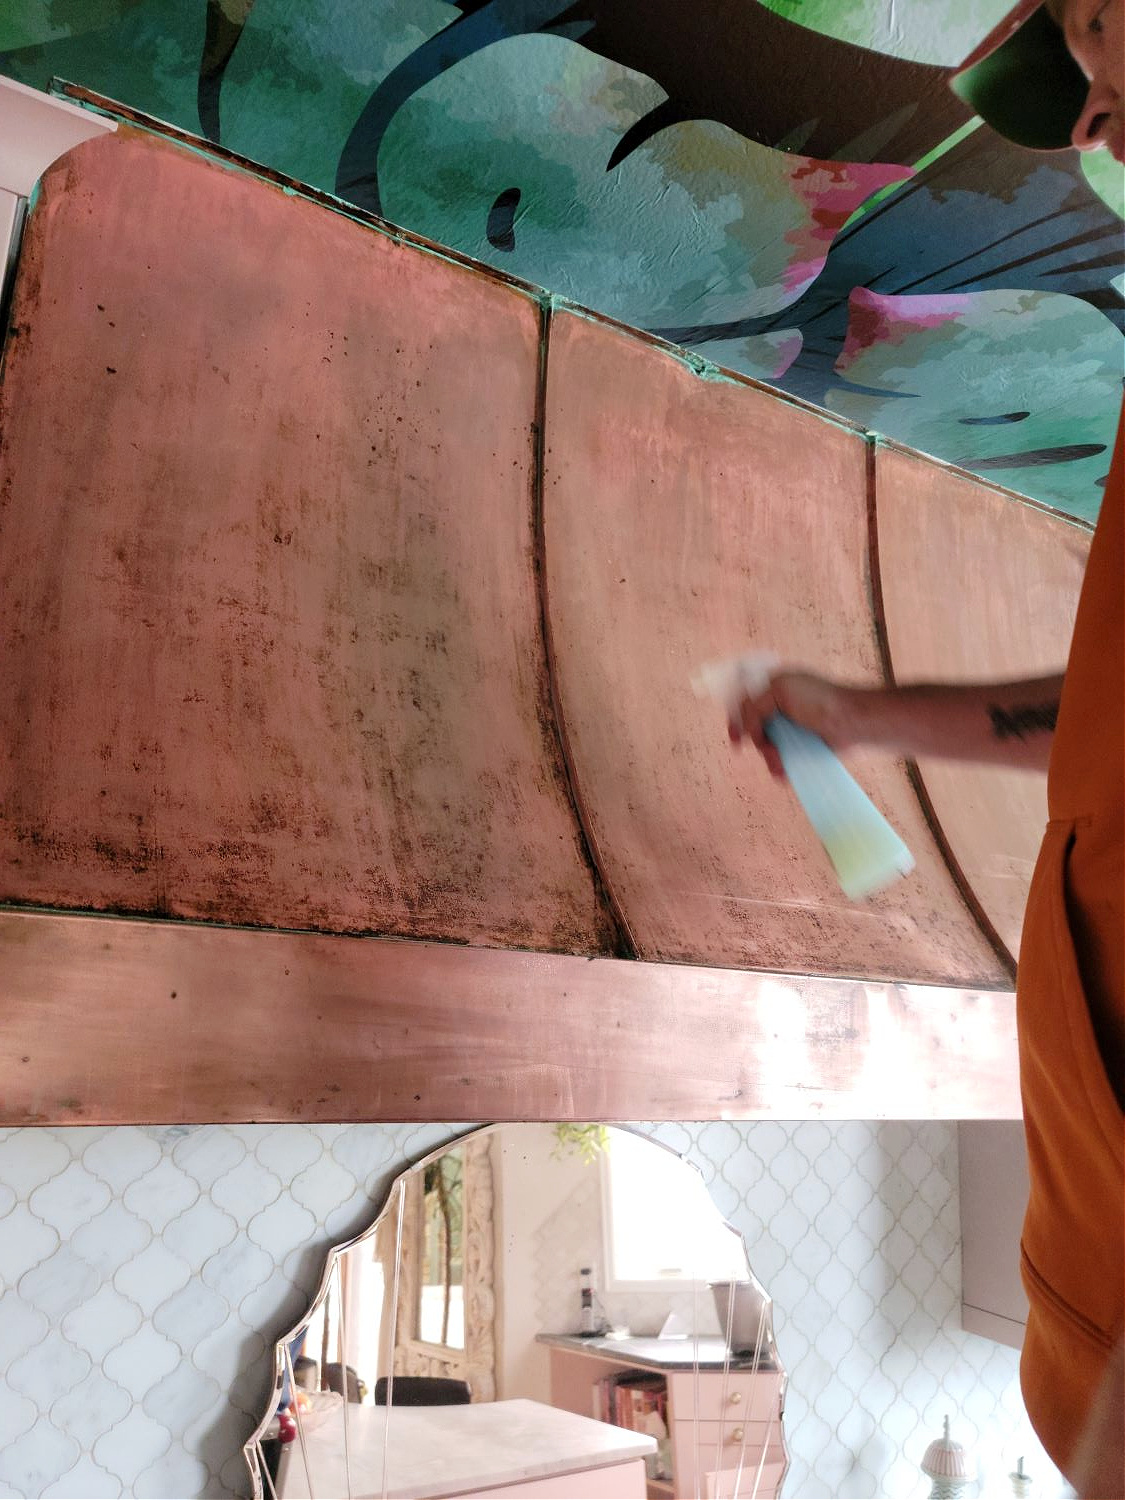
Spray all over, wipe with wet rag, repeat.
Here you can see the difference it made, the 2 left sections have been sprayed and cleaned the right section has not.
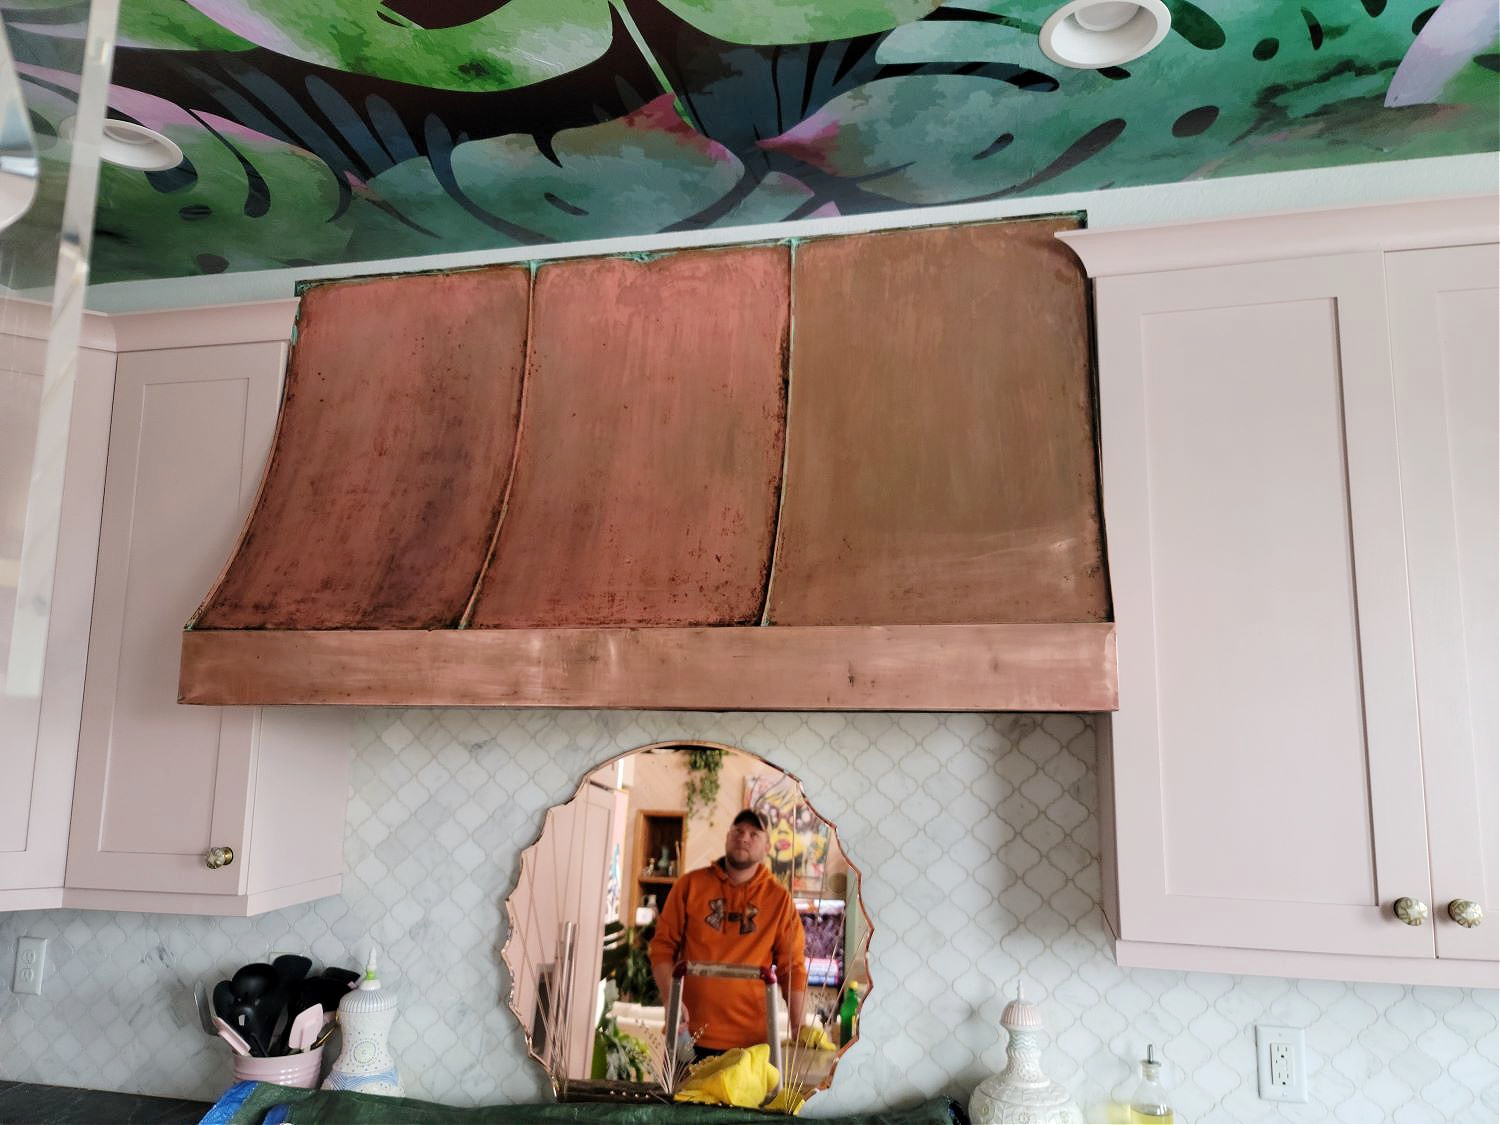
I wasn’t sure if this is where I wanted to leave it. So we just did the same treatment on the right section and left it to dry.
Here’s what it looks like a week later, I snapped this shot this morning.

Ugh it went back to that dark color again. It’s much better than it was BUT it’s not as bright as I would like it to be.
There are glimpses of shiny copper in there but we definitely need to keep messing with it. Even after the paste, the wet sanding and the lemon/vinegar/salt spray it’s still got a darker finish.

I am definitely not stopping now, I’m too invested.
Here’s a good close up. You can see there are bumps on the trim/face of the hood. They probably occurred when it was removed from it’s original location and shipping. Just another way it shares its life which is awesome.

Glimpses of shiny copper mixed with dark areas and a little bit of grime we still need to tackle.
After 3 different techniques we still aren’t there yet but we sure are learning a lot haha. And every time we try something we get a little closer to what I want it look like so that’s a win too.
Next up I have ordered some Bar Keepers Friend, a hot tip I got from a couple of peeps over on the ‘gram. We’ll see what happens, and you know I’ll definitely keep you posted on how successful we are.
Have you ever tackled stripping brass or copper? What technique did you use? Always love to hear from you so any tips to try or tips to stay away from are welcomed!
I’ll be sharing the stool saga next, I feel like we need a good round up of cute stools in varying price points (within the realm of reason obvs) so I will include a few cutsies I found too…
Be sure to hit up the subscribe box for that one, especially if you are in the market for counter/bar stools!
XOXOXOXO
Do you have a copper hood in your kitchen? Let me know in a comment below!



Diane
February 18, 2021On my tombstone it will say a friend of “bar keeper’s friend”. Wear gloves. It can dry ur hands tremendously. Little bit hard to rinse but keep wiping. U will be amazed and sorry u didn’t use in the first place. It likes to ‘eat’ sponges. It degrades them if u use the same sponge often.
Tina Bousu
February 23, 2021Haha, ok that is a fantastic testimonial! Thank you so much for the gloves and sponges tip. I just got some BKF and am prepping to tackle the hood with it, I’ll keep you posted how it goes!
Hoodsly
May 18, 2023Huge difference after cleaning one side! BTW, it is changing the overall look of the kitchen beautifully!
Tina Bousu
June 22, 2023than you so much