How to Paint Ceramic Thrifted Lamps
I have been obsessed with inexpensive, quick and easy DIY projects lately and this one totally hit the mark on every note. I spotted these 2 ceramic lamps at a local thrift store for $15 each.
While super cute as they are, I saw them really popping with a bold color on the base contrasting with the white flower. Think Anthropologie level aesthetic and quality on a thrifter budget.

The base, flower and finial are all ceramic, I was really surprised by the quality when I spotted them.
First thing I did was tape them up really well. I covered the flower completely with tape even carrying it around to the back of the petals. Then I popped a ziploc bag over the tops and the cords and finished those areas with tape to make sure I got a nice clean finish with no overspray.

When I set them up to paint I elevated them so I could spray under the rounded edges of the base, this worked really well.
I opted to use a paint and primer spray paint in a beautiful bold crisp green called “Spring Green” by Rustoleum. This color coordinated beautifully with the shades I wanted to use (more on the shades below) and would give that pop I was going for.

I ended up only using 1 can for both lamps!
Here they are after the first coat and still wet. They look really bright but they did darken up just a bit after they fully dried. I also sprayed the finials to match.
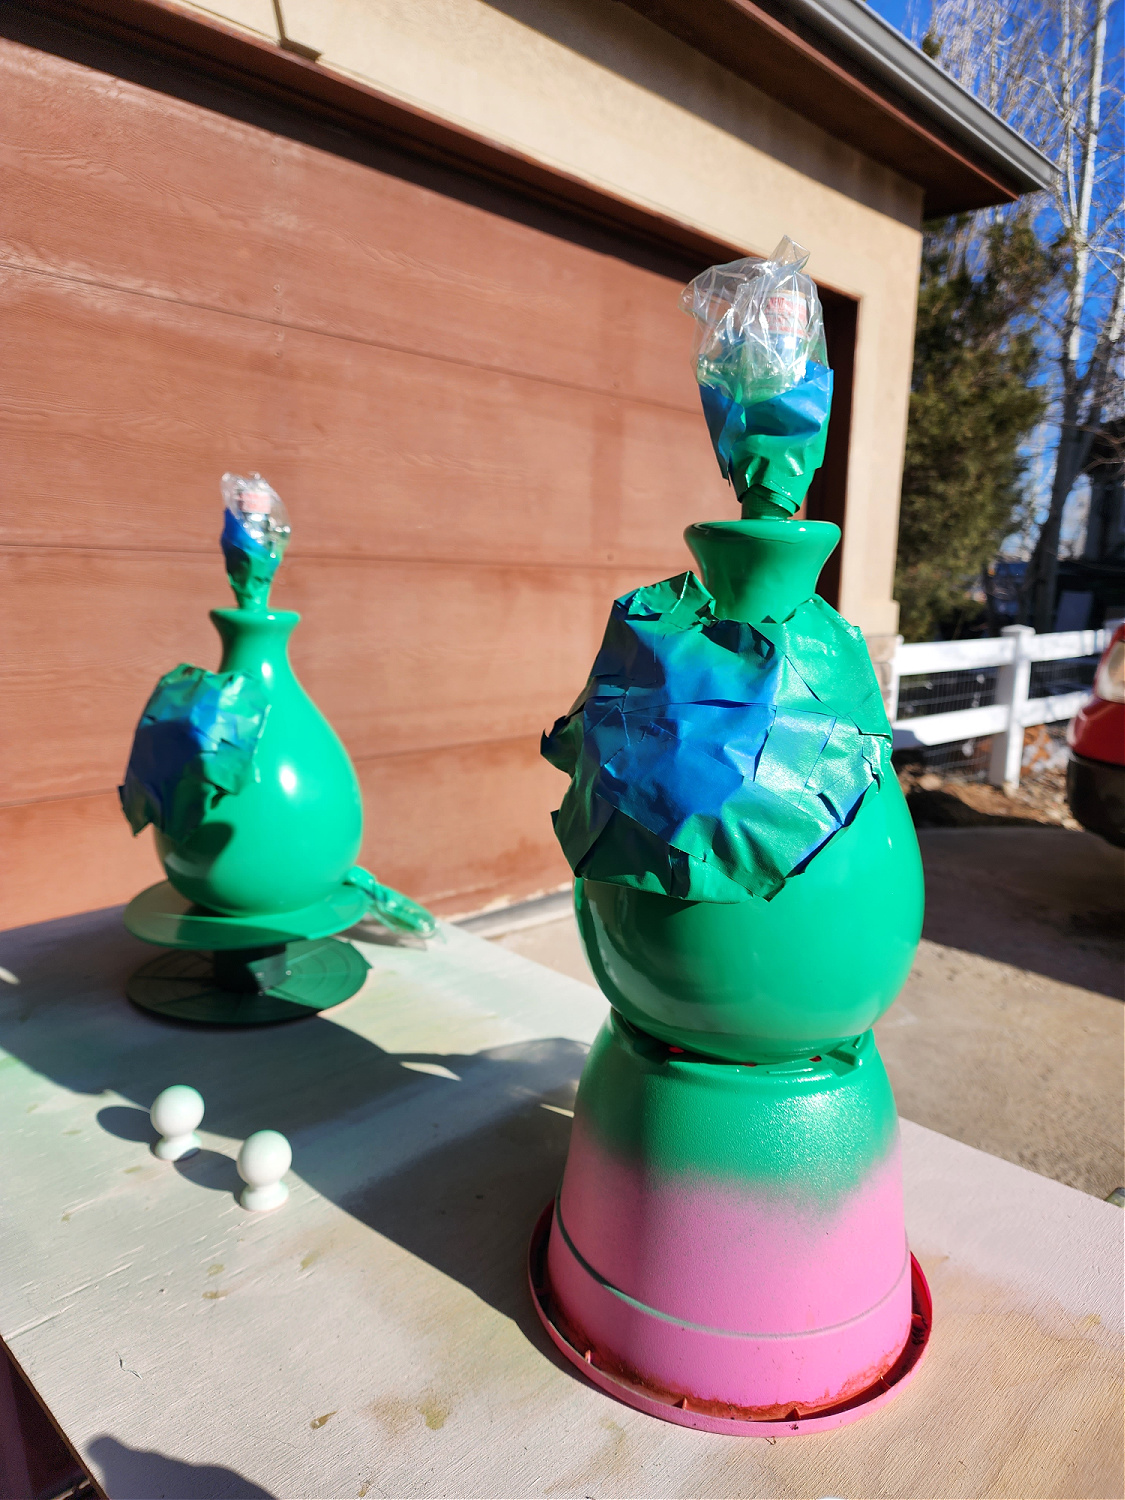
I did 2 light coats but did end up with one drip spot above the flower. I was able to fix it by letting the paint completely dry and using a high grit sanding block lightly sanded the drip area smooth and respraying.
After fully drying I topped them with the embellished lampshades I had in storage that I envisioned for them. They were THE perfect element to finish the lamps.

I purchased the shades years ago from Home Goods.
Hello spring vibes! Note: I would not recommend spray painting a ceramic lamp that has a sheen. The shine means it has a finish that would need to be lightly sanded to allow for the paint to stick.
As the base of these was a matte ceramic I felt pretty confident I wouldn’t have any adhesion issues and it worked really well. After painting/drying I attempted to scratch them and there was no problem.
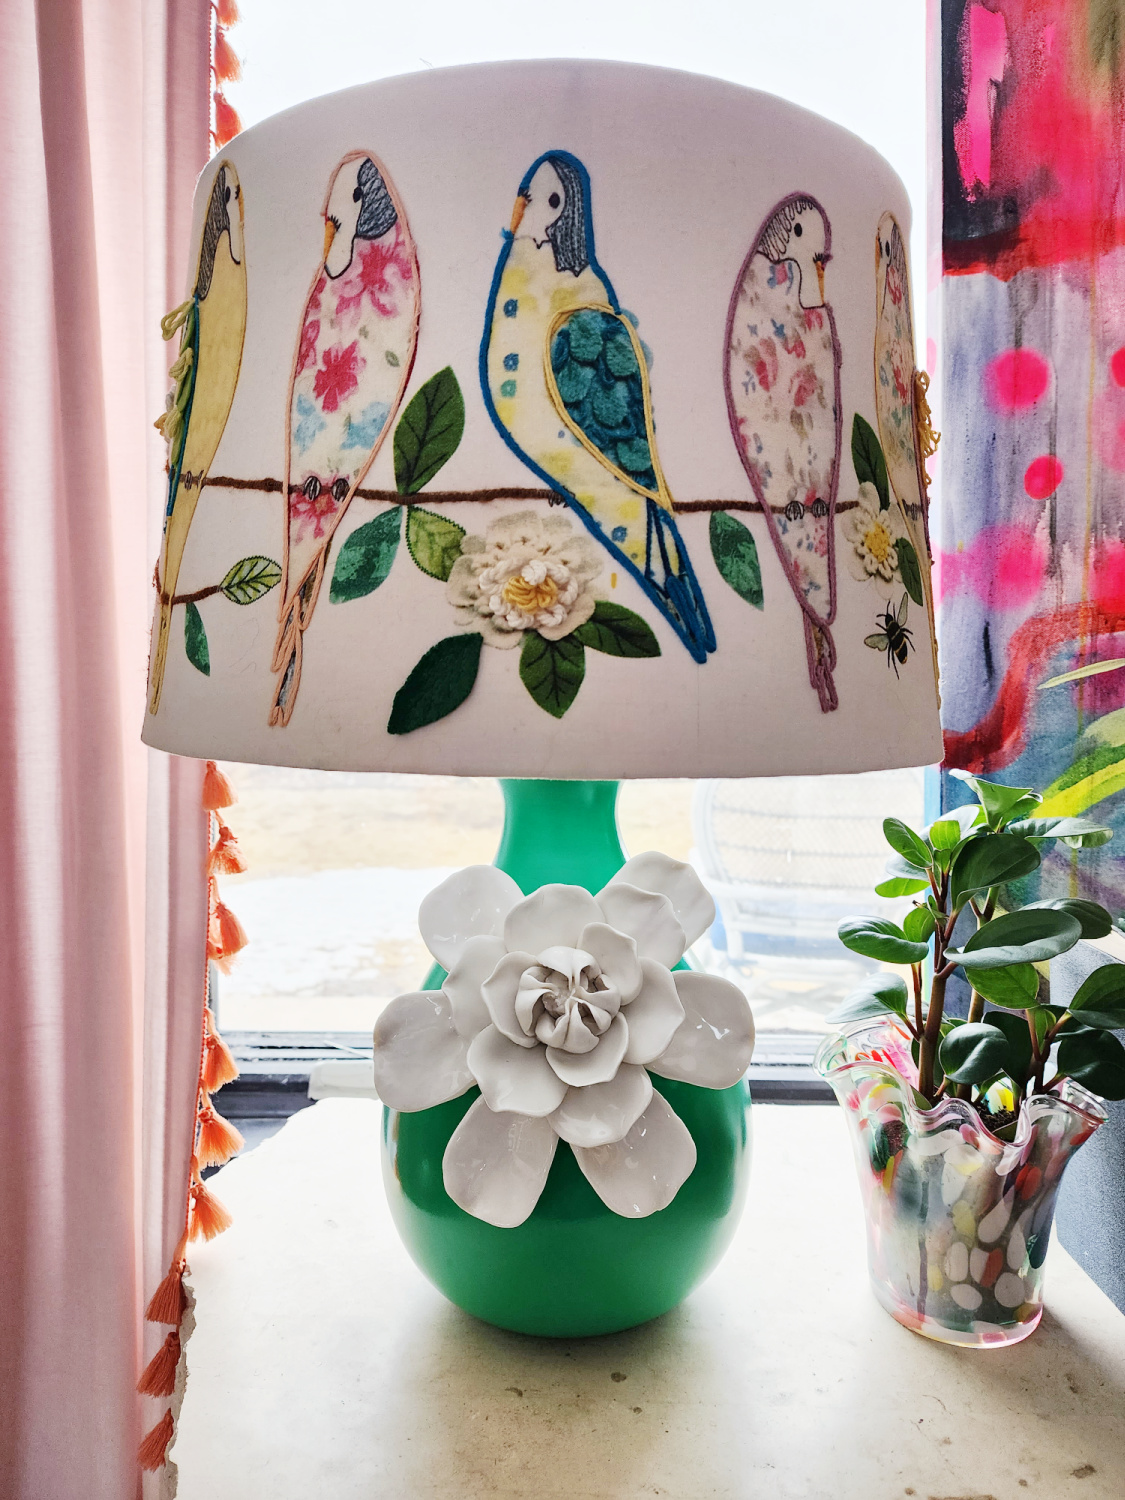
The shades seem like they were made to pair with the lamps and boy do you see that flower detail now!
Color, color and more color. This whole area is such a vibe and I am loving it. They pick up on the colors of this piece by my friend Daniel Freaker so beautifully.

The tessellated cabinet, planters, books and white textured coral piece are all thrifted too.
The other one has a different shade but similar texture. I chose to go with a gloss spray paint for some added sparkle and it really bounces the light adding an extra highlight to the flower.

All the oranges, pinks, greens and yellows please.
In all the whole process from taping off and painting took me maybe 20-30 minutes. The longest part was taping off the flower petals because of all the nooks and crannies.

In total this project cost me $30 for the lamps and only 1 can of spray paint at $6, for a total $36 for 2 custom ceramic lamps. I’m so happy with how much life they bring to the space and how the green is such a beautiful backdrop for the flowers.

What do you think? Would you ever buy lamps at the thrift store and give them a little glow up? How about spray paint, have you painted lamps before? I always love to hear your thoughts so be sure to hit me up in the comments!
And don’t forget to pop your email in the subscribe box, you’ll be the first to know when a new project is live!
XOXOXO





Diana Parker
March 8, 2023WOW! Those Lampshades though. 💚
Tina Bousu
March 29, 2023Thanks so much Diana, they were the perfect shades for these lamps!