DIY Abstract Wall Mural
Have you ever seen really cool hand painted murals and thought “I would LOVE something cool like that in my house”? Me too. And with so many amazing murals out there inspiration runs wild.
I have been itching for a large statement that wasn’t too over the top for my 2 story entryway for quite some time. A little over 6 months ago it occurred to me to try and paint something. Now you should know that this idea scared the bejeepers out of me. Why? Because I was so afraid of trying it and hating it since creating my own mural felt very personal. Thus if it sucked, it would hurt deeply like a giant creative failure.
I know weird right?! Me, the woman that painted her laundry room cabinets coral and diy’d a gold leafed concrete countertop to go with it. The woman with a pink kitchen and an office with a faux greenery wall. Fear isn’t something I know very well in design terms because I’ve always just run with it. But this one was scary, like really scary.
Alas, last week we decided to rent scaffolding to paint the window trim on the large window wall (opposite of the entry) and it became a “I better just do it” moment. No more putting it off and going back and forth. Worst case scenario I could just repaint it, I mean I had the scaffolding on hand anyway.
The walls were already painted a crisp white (Chantilly Lace by BM).
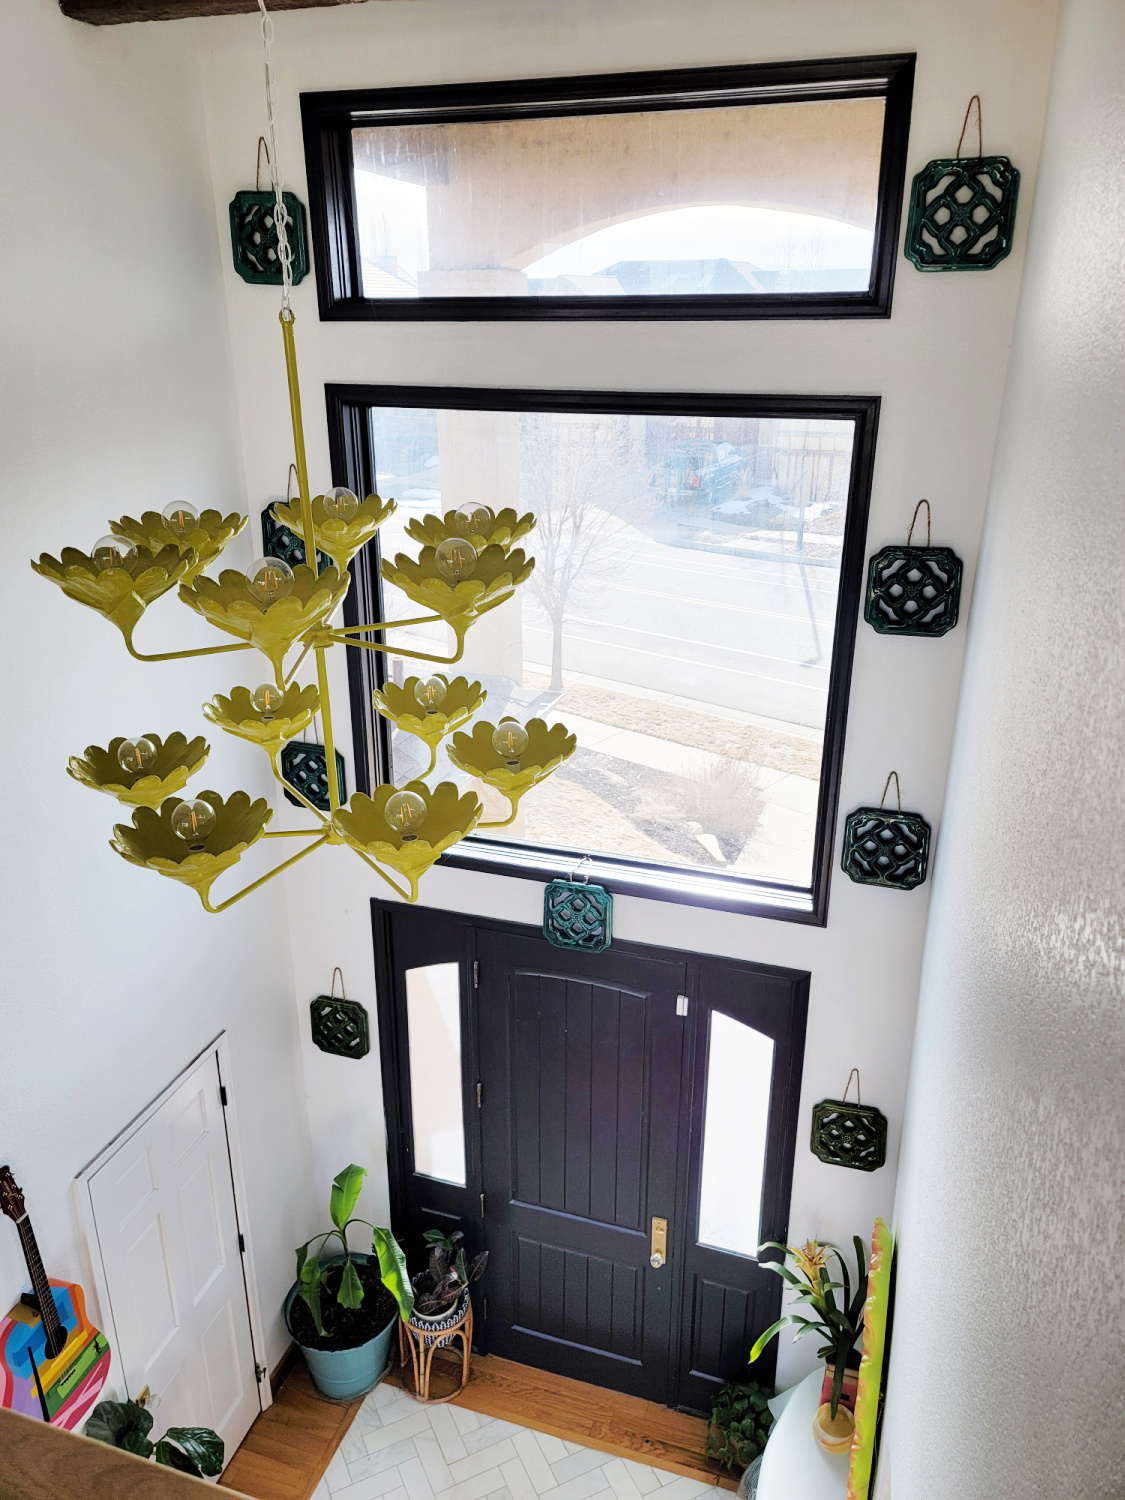
This was pre-scaffolding. I found these vintage ceramic tiles and wanted to try them out here. I ended up hating it so they were up like a week.
If you need scaffolding check into local rental equipment businesses. We were able to rent the set of 3 sections for a full week for $240. It is much cheaper to rent than to purchase unless you plan to use it quite a bit.
We have used scaffolding many times already and let me tell you, it’s not scary to use! It is really straightforward to put together.

Here we’re getting it all set up after covering the marble tile.
I went in with no real plan. I knew I wanted to paint squiggles with the occasional enclosed circles so there was no projection or traced out design. Armed with a small roller, paintbrush and black paint (the same color black on all the trim, Caviar by SW color matched to Behrs Ultra in eggshell. This paint worked amazingly well and coverage was fantastic) I climbed to the top tier of the scaffolding.
Using the small roller, I made my husband do it as I was so nervous my hand was shaking, we just started a squiggle. From there I would analyze and decide which way to do the next and so on.
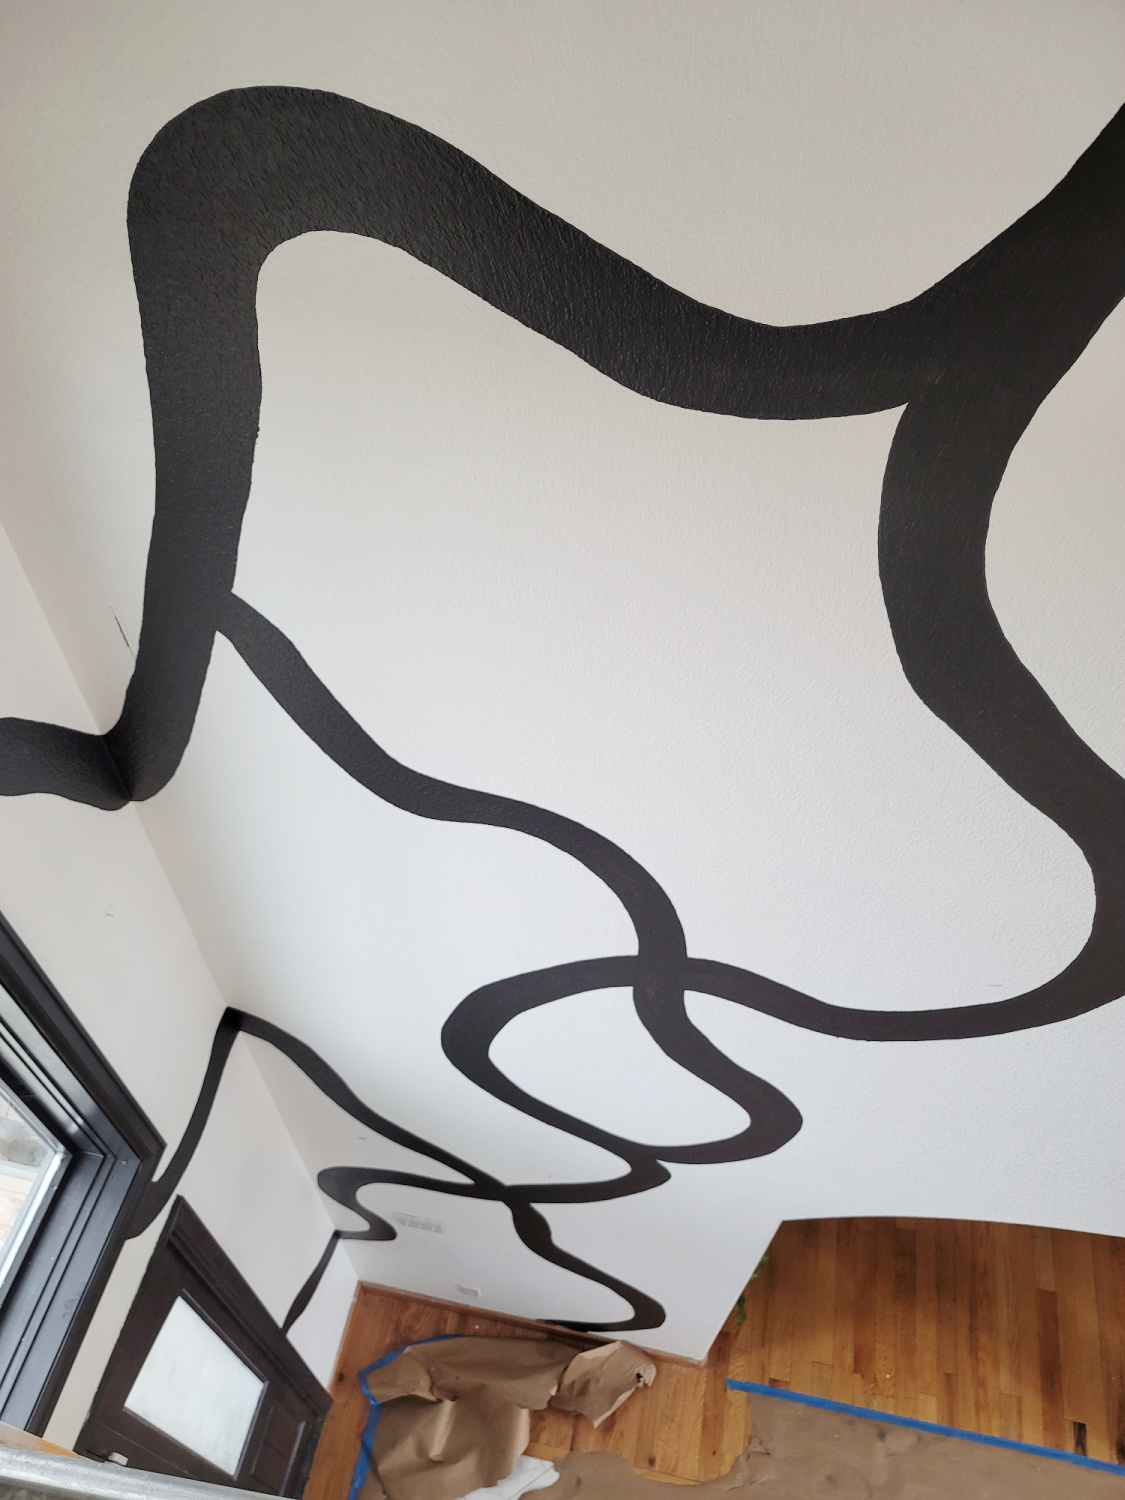
In this pic you can see some clean edges and some messy edges.
After rollering the main squiggles I would come back with an angled brush and cut in along both sides of each squiggle. This allowed me to get a much cleaner line/look, especially as we have heavily textured walls which are a pain in the butt for something crisp like this.
I tried a few different brushes for the cutting in that we picked up at HD, the best one was the Wooster 2 inch Pro.
It worked really well for filling in the nooks and crannies of the texture and held the perfect amount of paint to get a nice clean line at the same time.
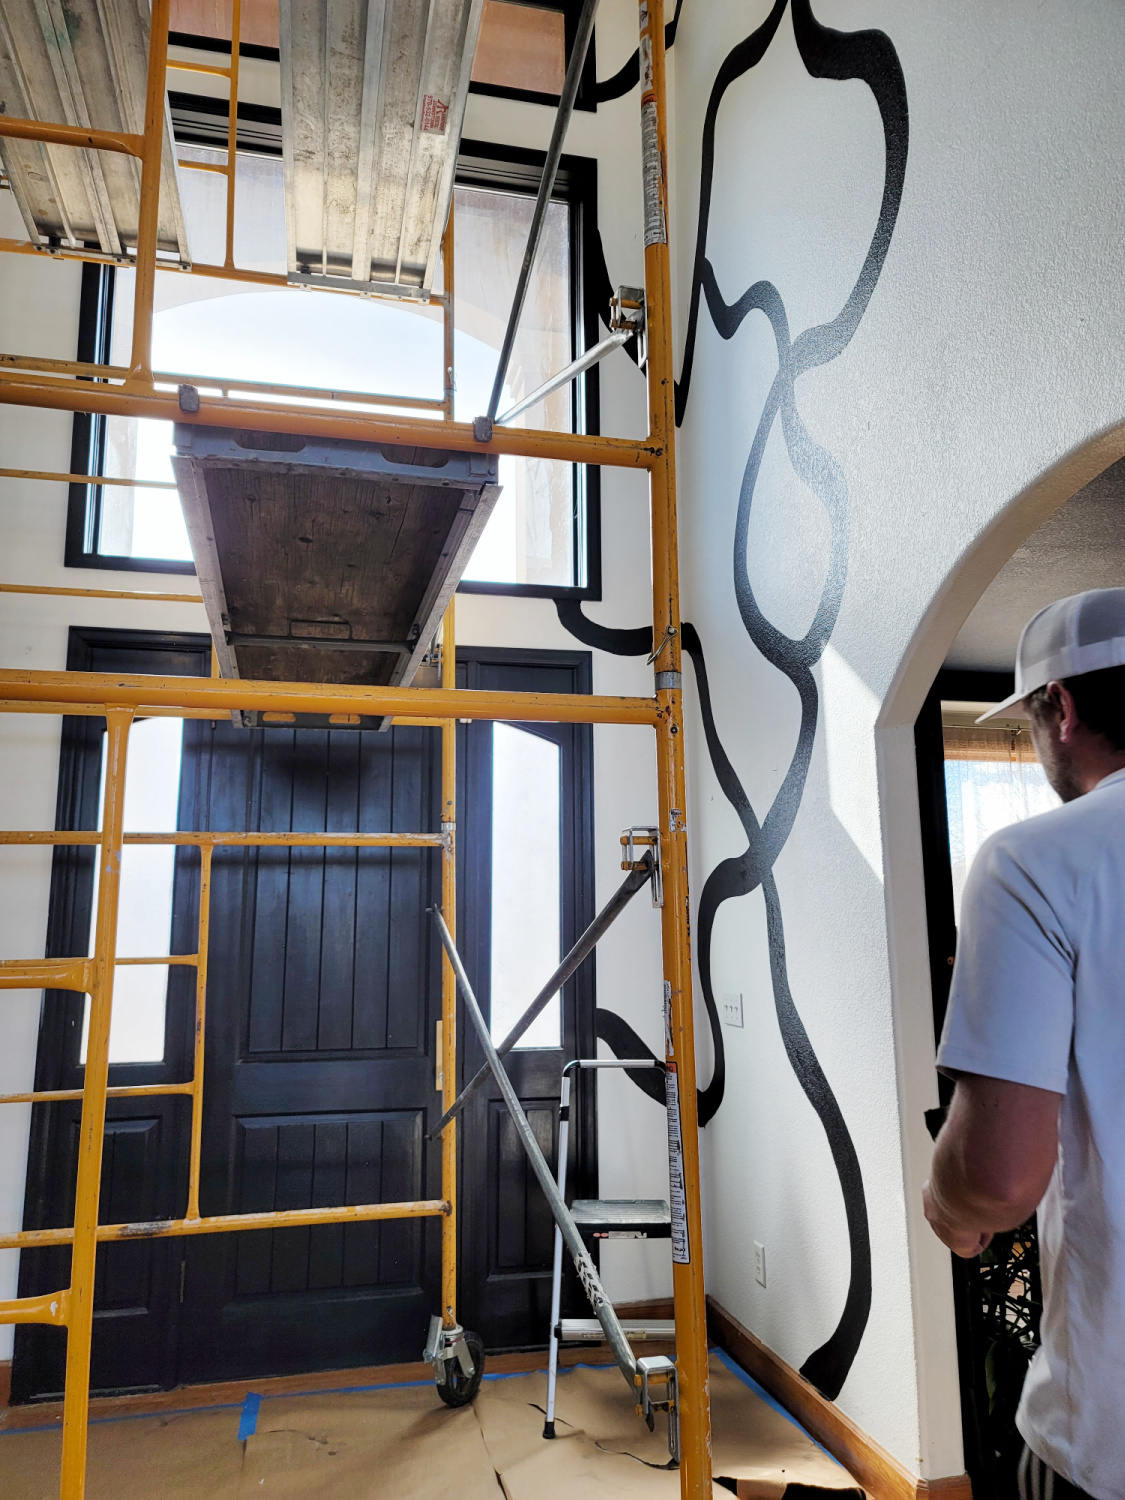
Looking up from getting most of the edges cut in on the first side.
I just kept building from there taking care so that it felt intentional without becoming too much.
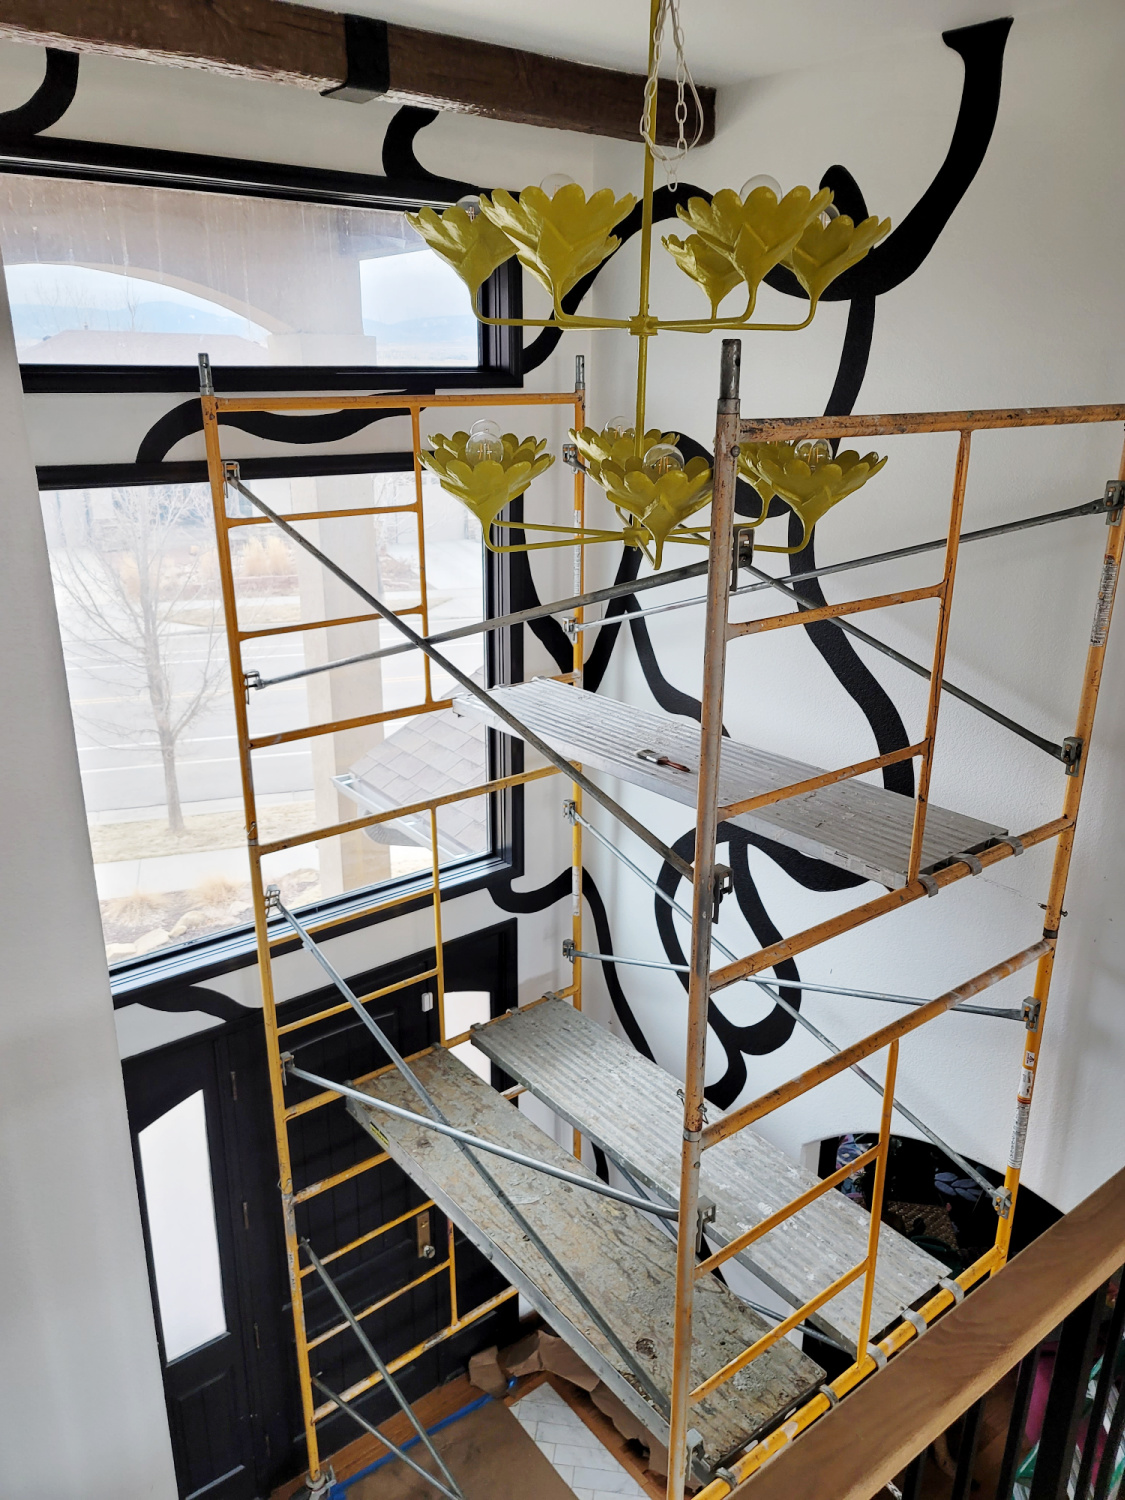
Adding little squiggles and elements to create that abstract graphic look.
Day 2 I tackled the other wall. Note the closet door is the same color as the wall instead of the front door and trim. If it was black it would be a visual disruption, so by painting it the same as the walls and incorporating it into the mural it disappears allowing the mural to be the star.

It was fun to figure out a way to wrap one through the door!
After cutting everything in I did have a few smears and drips of black paint so I just came back with the white and touched up those spots.
And the finished mural, oh yeah!! I am SO glad I just went for it. It did everything I was hoping it would, giving some texture and interest to the space. It also enhances the height by drawing the eye up from below.
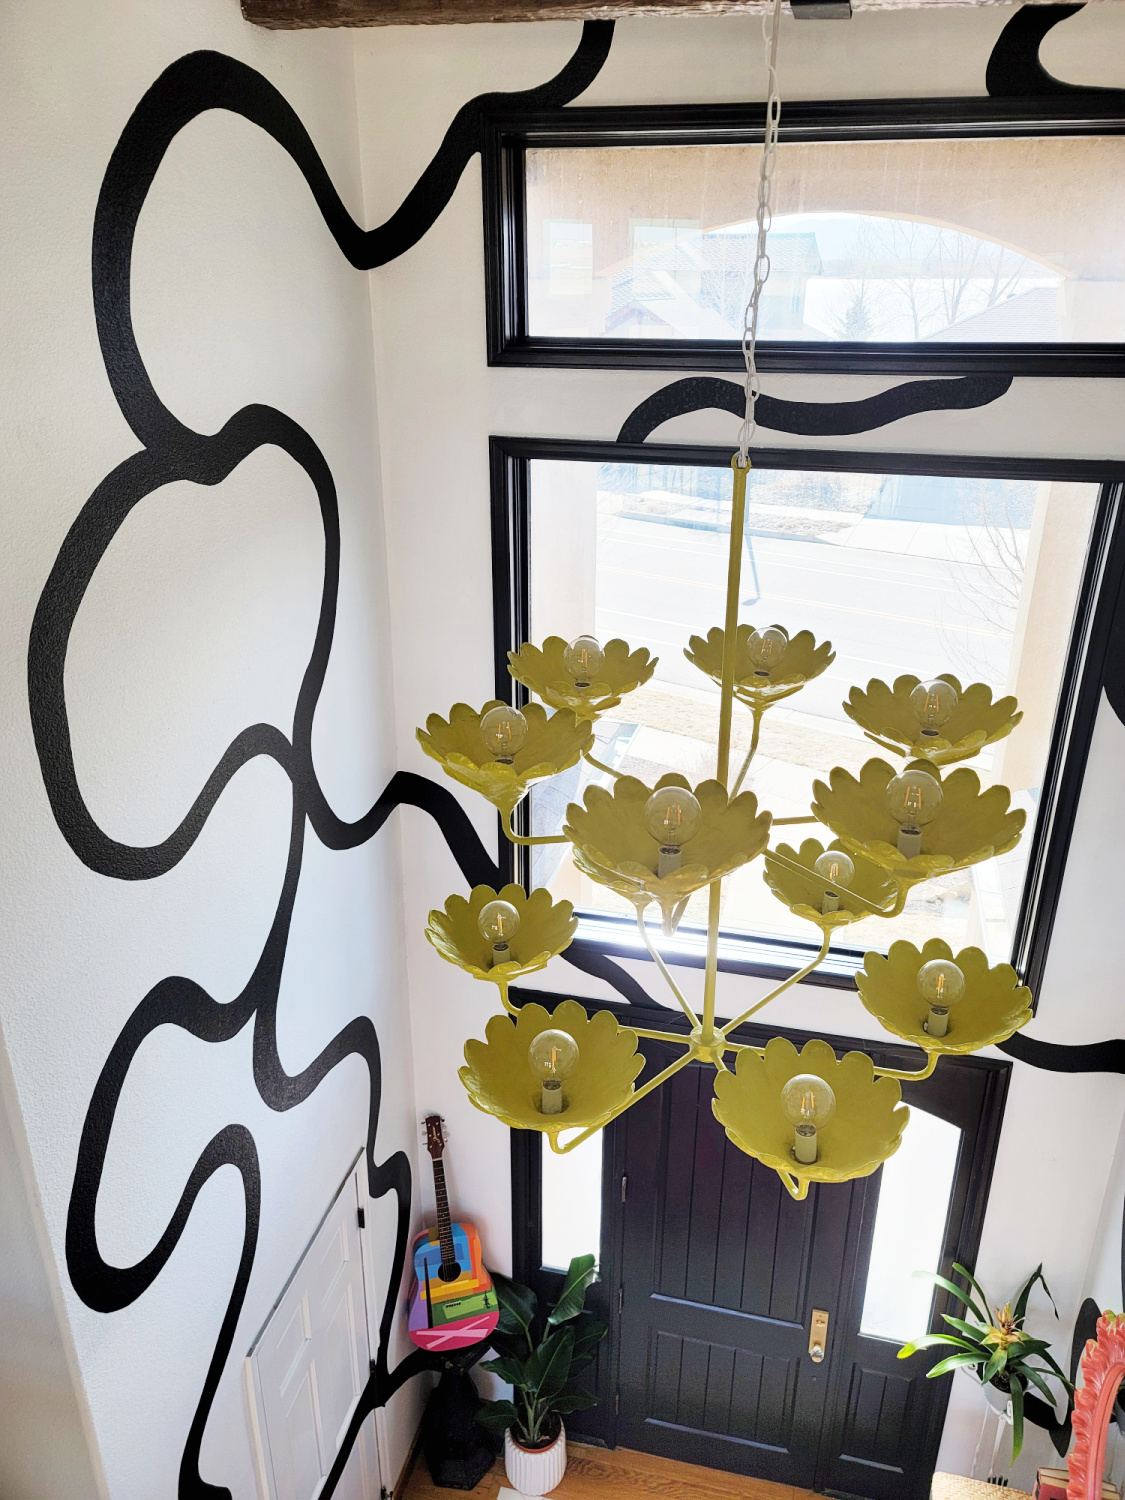
This is looking down from our open walkway on the left.
I had someone message me that it’s like living in a Picasso painting, I will totally take that.
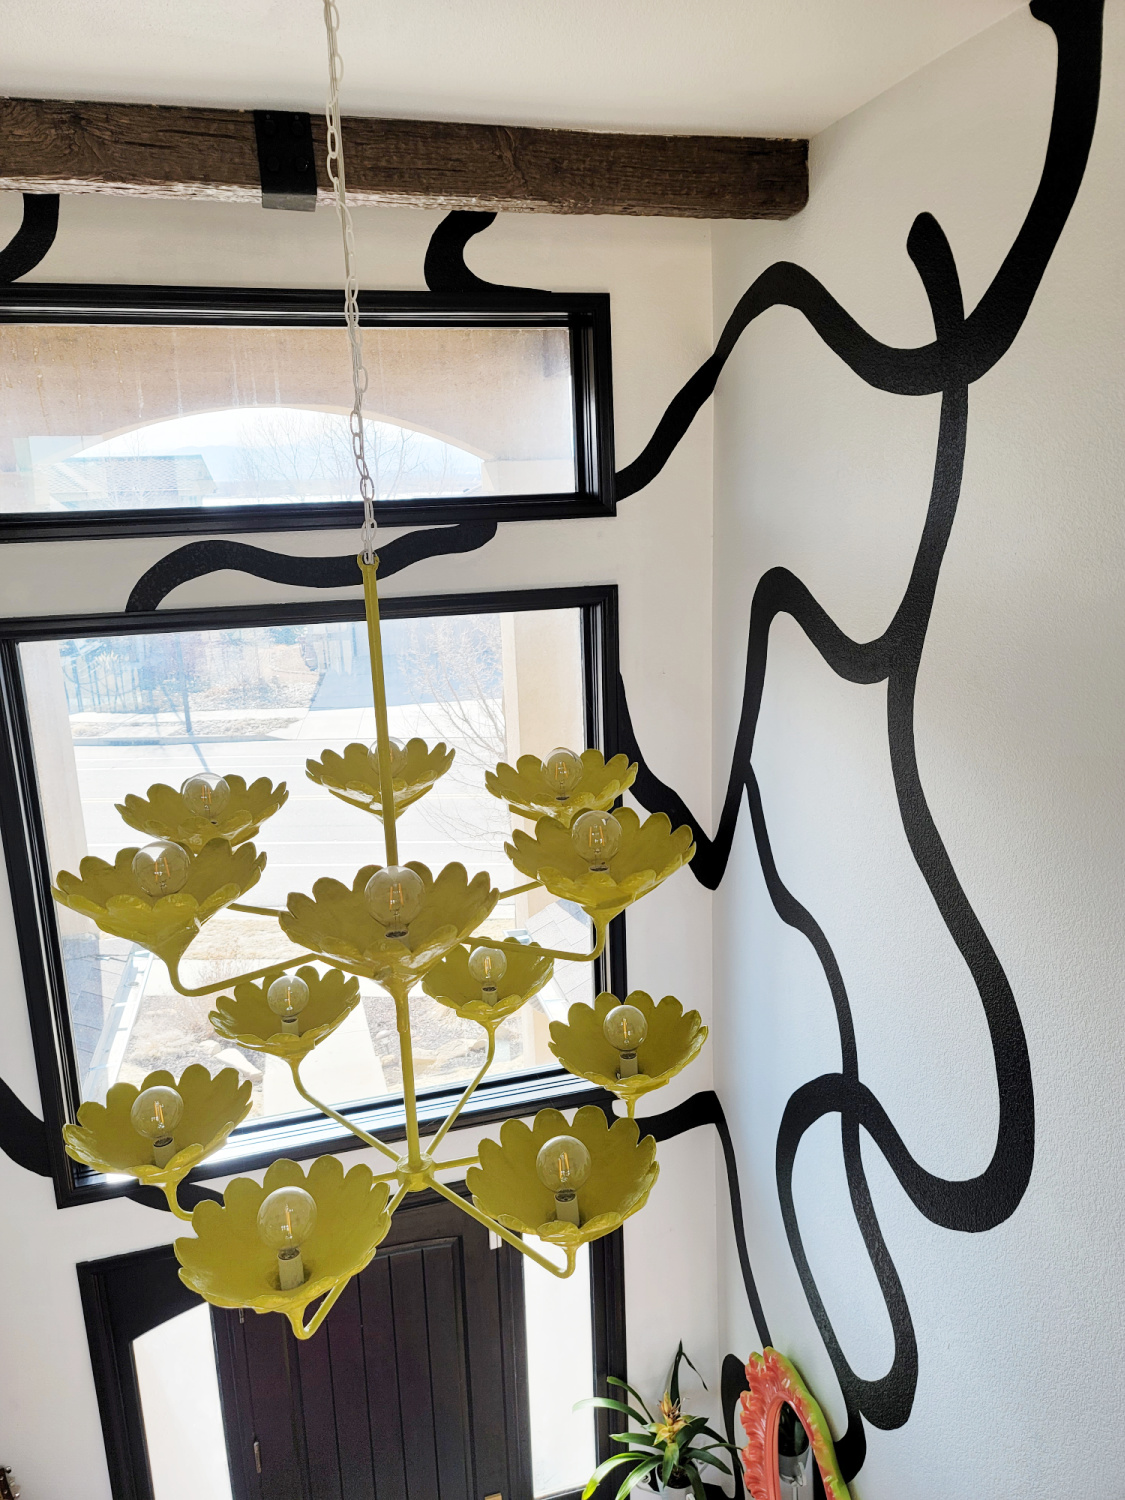
Here we’re looking toward the right side.
Our DIY Abstract Wall Mural provides a sense of drama without being overbearing and is a perfect backdrop for some more colorful pieces while simultaneously defining the entryway from the rest of the wide open wall space.

Dang am I so glad I finally did this.
And I had to give you a shot of Wallace (aka Wally) rocking his spot in the entryway in front of the mural with my DIY painted mirror reflecting more mural action.
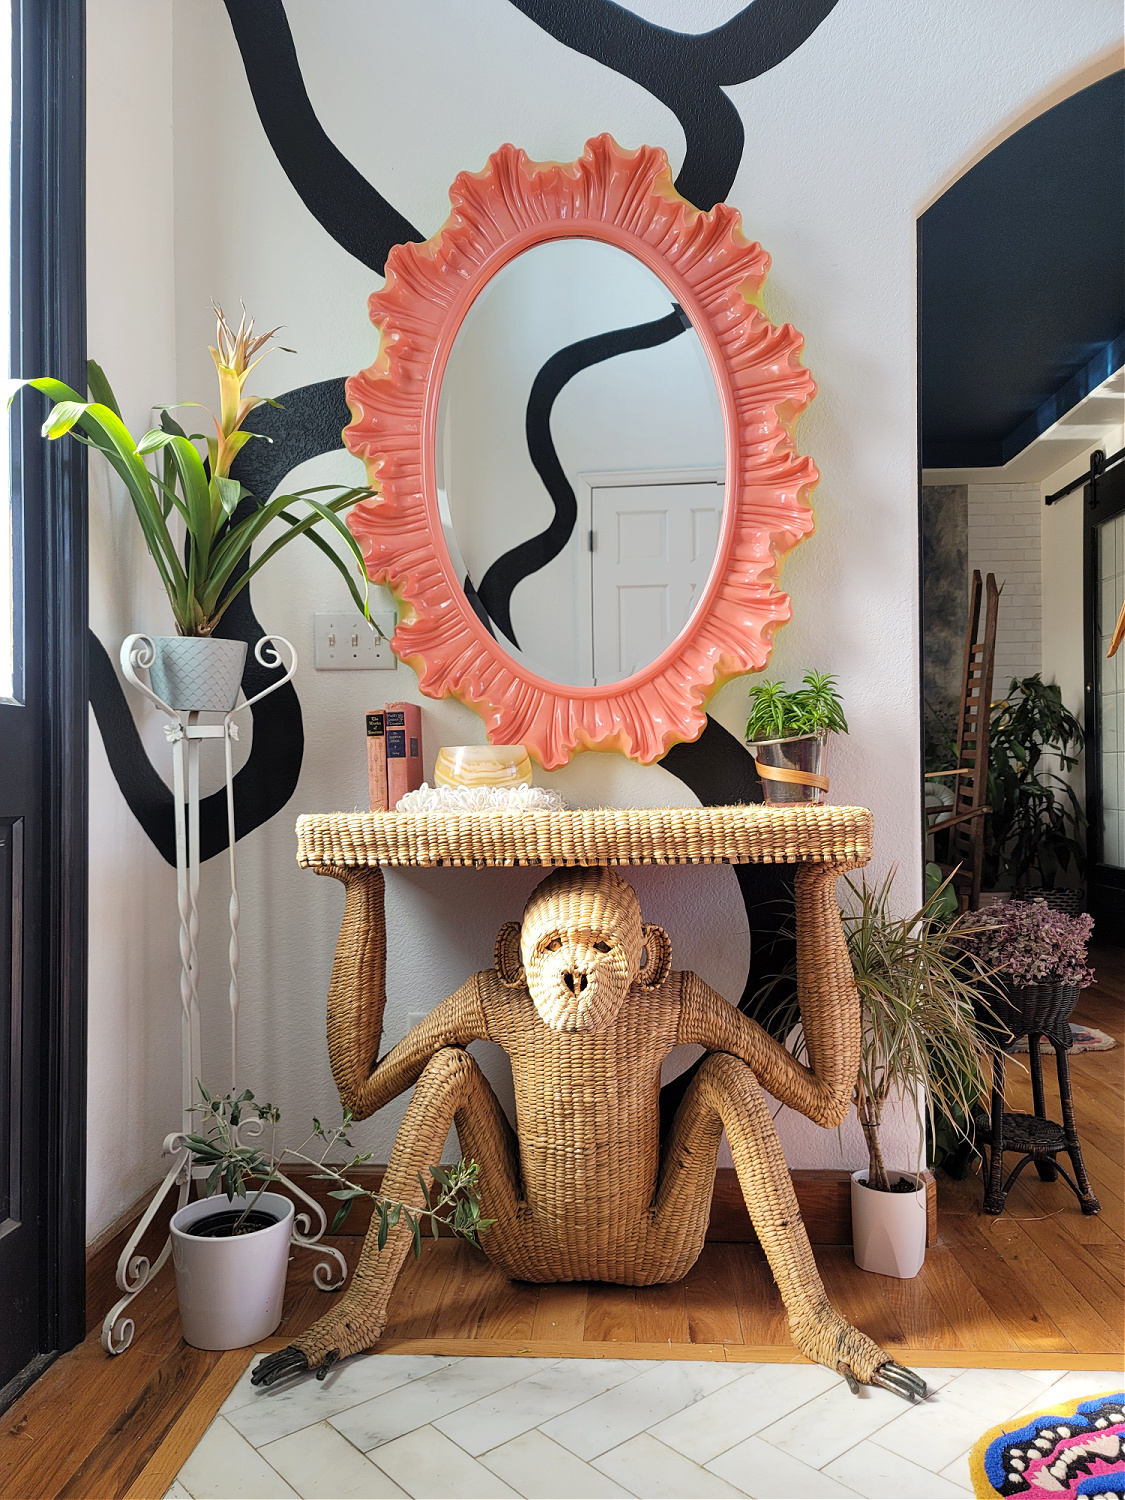
Wally is my most recent FB marketplace find and he perfectly softens up the black and white.
What do you think of our DIY Abstract Wall Mural? Do you feel more confident to take on your own mural project? Don’t be like me and wait forever, I feel silly now about how nervous the whole thing made me. It is just paint after all!
I love to hear from ya so hit me up in the comments!
And don’t forget to pop over to the subscribe box so you’re the first in the know when new projects go live. I’ve got an inexpensive kitchen cabinet hardware update coming up next!
XOXOXO





PJ NEWMAN
March 23, 2022LOVE, LOVE, LOVE THE MURAL!! AND WALLY AND THE FUNKY MIRROR! YOU ROCK. Not crazy about the wrought iron plant stand. It’s kinda weak. I know you’ll probably upgrade it in the future.
Tina Bousu
April 8, 2022Hi PJ, thank you so much! That’s an outdoor stand I usually use on the patio for big baskets, I needed something for height and that worked perfectly until I find something better.
Tina
March 23, 2022Absolutely love it!💕💕💕
Tina Bousu
April 8, 2022Thank you so much Tina!